
So my newest sewing obsession is making tiny super-fancy dresses for my more detailed Bratz repaints. They can be quite a bit of work, but it’s worth it! If you like tiny super-fancy dresses, that is.
This is not a sewing tutorial, so if you’re not familiar with basic clothing construction or sewing principles, you might want to brush up before attempting this!
A few notes before we begin:
- I don’t use a pattern. Or a ruler. I don’t do math. So if you don’t do any of those things either, you’re in good hands. *Later in the process I realized that I do use a pattern, but for the bodice only. And it’s a very loose pattern.
- Choice of fabric will either make your life for the next hour or so very easy or very difficult.
- For the skirt you’ll want something that’s very flowing and drape-y.
- For the bodice you’ll at least want your lining to be a bit stiffer (like a cotton quilting fabric).
- If you want an overlay over the skirt you can use anything from tulle to lace to … anything lightweight and fancy.
- This doesn’t have to be perfect. It’s a doll. Not a night on the red carpet.
You’ll need:
- Sewing stuff. Thread, fabric (see note above), pins, a sewing machine…
- Fray check (seriously, you 100% need this)
- A doll
- The shoes the doll will be wearing (or an idea of how tall they are).
- Some patience.
- Some more patience.
- And just in case … a seam ripper.
READY, SET, GO!
The Skirt
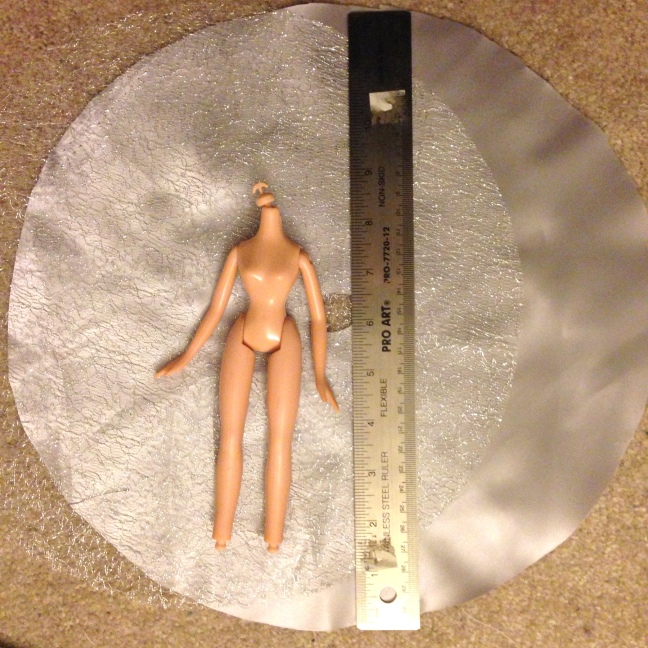
Lay your fabric out on a flat surface and cut out a skirt. I eyeball this, but I base my measurement off of the doll’s legs, with her shoes attached. Because this skirt will be a circle skirt, I just put the doll’s waist in the ‘center’ of the circle, mark it, mark where her feet end plus a centimeter (seam allowance), then draw a sort-of symmetrical circle.
If you want the dress to have a slight train effect (be longer in the back than the front) add three or so inches to one side of the circle. It makes an egg-like shape.
To make the waist opening, fold the circle or egg-like shape in quarters, and cut a small hole in the top where the folds intersect.
Err on the small side here! You can always cut more away later if you need to make the opening larger, but it’s hard to make it smaller if you cut the opening too big early on.

Then cut up the back of the skirt from the edge of the fabric to the waist opening. Yay. A skirt.
Overlay
If you want an overlay on top of your skirt, lay the overlay fabric out, put the cut-out skirt over it, and trace the pattern. Repeat all the cuts that you did with the skirt.
I find it easiest to cut the overlay and the skirt fabric out separately, because I tend to use fabrics that are slippery and I don’t like pinning them more than necessary. It is possible, of course, to cut them out at the same time, if you prefer.
Bodice

Crap, I totally lied about the pattern. I use a pattern for all my bodices, but this one is one I created myself by taking apart a Bratz top and copying the shirt pieces onto a piece of paper, leaving room for a 1/4″ seam allowance (you might give yourself more allowance than that, 1/4″ is not enough, as it turns out).
Cut out your bodice according to whatever bodice pattern you have on hand, or whatever pattern you make yourself. There are plenty of patterns on Etsy for little Blythe dresses that fit Bratz and have simple bodices.
My bodice is going to be strapless.

Cut out one set of whatever fabric you cut your skirt from, and one from a lining fabric that’s cotton or anything easy to work with and sturdy. Mine is a cotton broadcloth.
Fray check


This is probably the most important step. If you used a fabric that frays easily (satins, organza, whatever) I would fray check EVERY raw edge of the fray-y fabric at this point. You will thank me later.
When fray-checking, make sure to go with the weave of the fabric. You can tell if you’re going with the weave because if you’re going against it, you’ll actually start pulling the fabric apart. Because the skirt is a circle, the weave will change ever few inches, just to keep you on your toes.

Sew the skirt
This part is a pain. First you want to ‘hem’ the slit you cut up the back of the skirt. I just press each edge to the side with my iron from Target that cost $10 (and is the worst iron you can imagine).
Then move on to the the circular edge. I have no tricks for this, except to say that it is hard and you might want to reserve time to drink a glass of wine or meditate after you’ve finished this.

I press the hem in about 1/4″ with my worst-iron-ever, then sew it and the slit up the back of the dress very carefully. Pintrest probably has better tips for you on this subject than I do.
Once you’re done with all that, drink wine/meditate/cheer, and then press the skirt. I always stretch the fabric a bit too much when hemming circle skirts so pressing it helps remind the skirt it’s supposed to be a circle, not a wavy mess.

Next, line up the waist opening of the skirt with the waist opening of the overlay and baste them together. This can sometimes stretch the waist opening too much, so basting by hand here is probably the better option. I won’t be basting this with a sewing machine anymore.
Sew the bodice


Sew all the bodice pieces together, trim the edges, turn right-side out, and press. Bam. Done.
Connect the dots (sew the bodice to the skirt)
This is another tricky part, mostly because I don’t have a pattern and so it’s always trial-and-error to get the size of the waist opening match the lower edge of the bodice.
I just start pinning the bodice to the skirt and adjust, cut, or gather as necessary to make it work. This is the part that is normally not perfect.
If your waist opening is too small: good! Easy fix. Just cut the waist opening a bit lower on the skirt until it fits. Or, you can just pin the bodice a little lower on the skirt. Because it’s a circle skirt, the waist opening will get larger if you cut away more fabric.
If your waist opening is too big: less good! But not horrible. You’ll just need to sew some basting stitches to the top of the waist opening and gather the opening until it’s small enough to fit the bodice.
Then sew all that together. When you trim all the seams and all that, you should have the bodice connected to the overlay and the skirt.

I usually sew a couple reinforced stitches just in case this dress is going to get into the hands of a five-year-old. Also make sure to look at the seam you just sewed from the front of the dress to check that you caught all the edges of fabric in the seam. Otherwise you’ll end up with a big hole in the front of the dress (definitely speaking from experience).
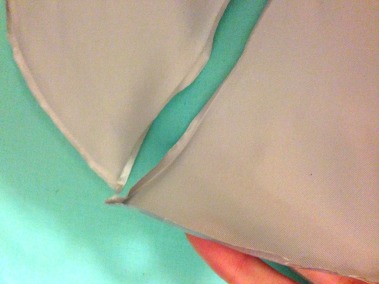
Sew up the back of the skirt


I always screw this up. You need one side of the bodice and skirt to overlay over the other for your snaps or velcro or whatever you use. I normally play around with the skirt (get the overlay out of the way for a sec) opening by folding the edges right sides together until I figure it out.
I think this is actually a lot simpler in real life than it is in my mind. So that’s good for you, I suppose.
I ended up messing mine up, but it’s hardly noticeable so whatever. Like I said, it doesn’t have to be perfect.

Stitch up the back of the overlay, too!
Add a fastener

I use adhesive velcro, and iron it in there to make sure the adhesive is really super stuck. You can use whatever you want.
Decorate
Well, the hard part is done. I have a huge box of beads and ribbon and buttons and glitter that gets pulled out at this point. I ended up sewing a strip of ribbon onto the bodice before sewing it onto the skirt, and then I sewed another strip of ribbon to the bottom of the overlay fabric on the skirt.


Sky’s the limit.
Here’s the end result! To adopt this little doll and her silver dress, head over to I Am Loved Doll’s Etsy!


wonderful, thanks, and you are so funny. love long hair on dolls, covers mistakes!
LikeLike
So pretty!
LikeLike
Thanks for this tutorial! I’m going to try to make one tonight.
Since you have a handy-dandy bodice pattern, would you be able to scan it and add it as a pattern for people who don’t have an existing one to copy? I’m going to try and see what I can come up with (after a bit of searching first to see if someone else has posted one!) but I’m lazy so if yours was here, I’d be done now 🙂
LikeLike
You’re welcome! I’m happy to scan in my pattern – it’s not perfect; could probably use some tweaking – but I’m away from home over Christmas and won’t be able to scan it in until the 1st! I’ll let you know when I do add it to the blog.
LikeLike