Doll Repainting 101: Essential (Bare Minimum) Materials

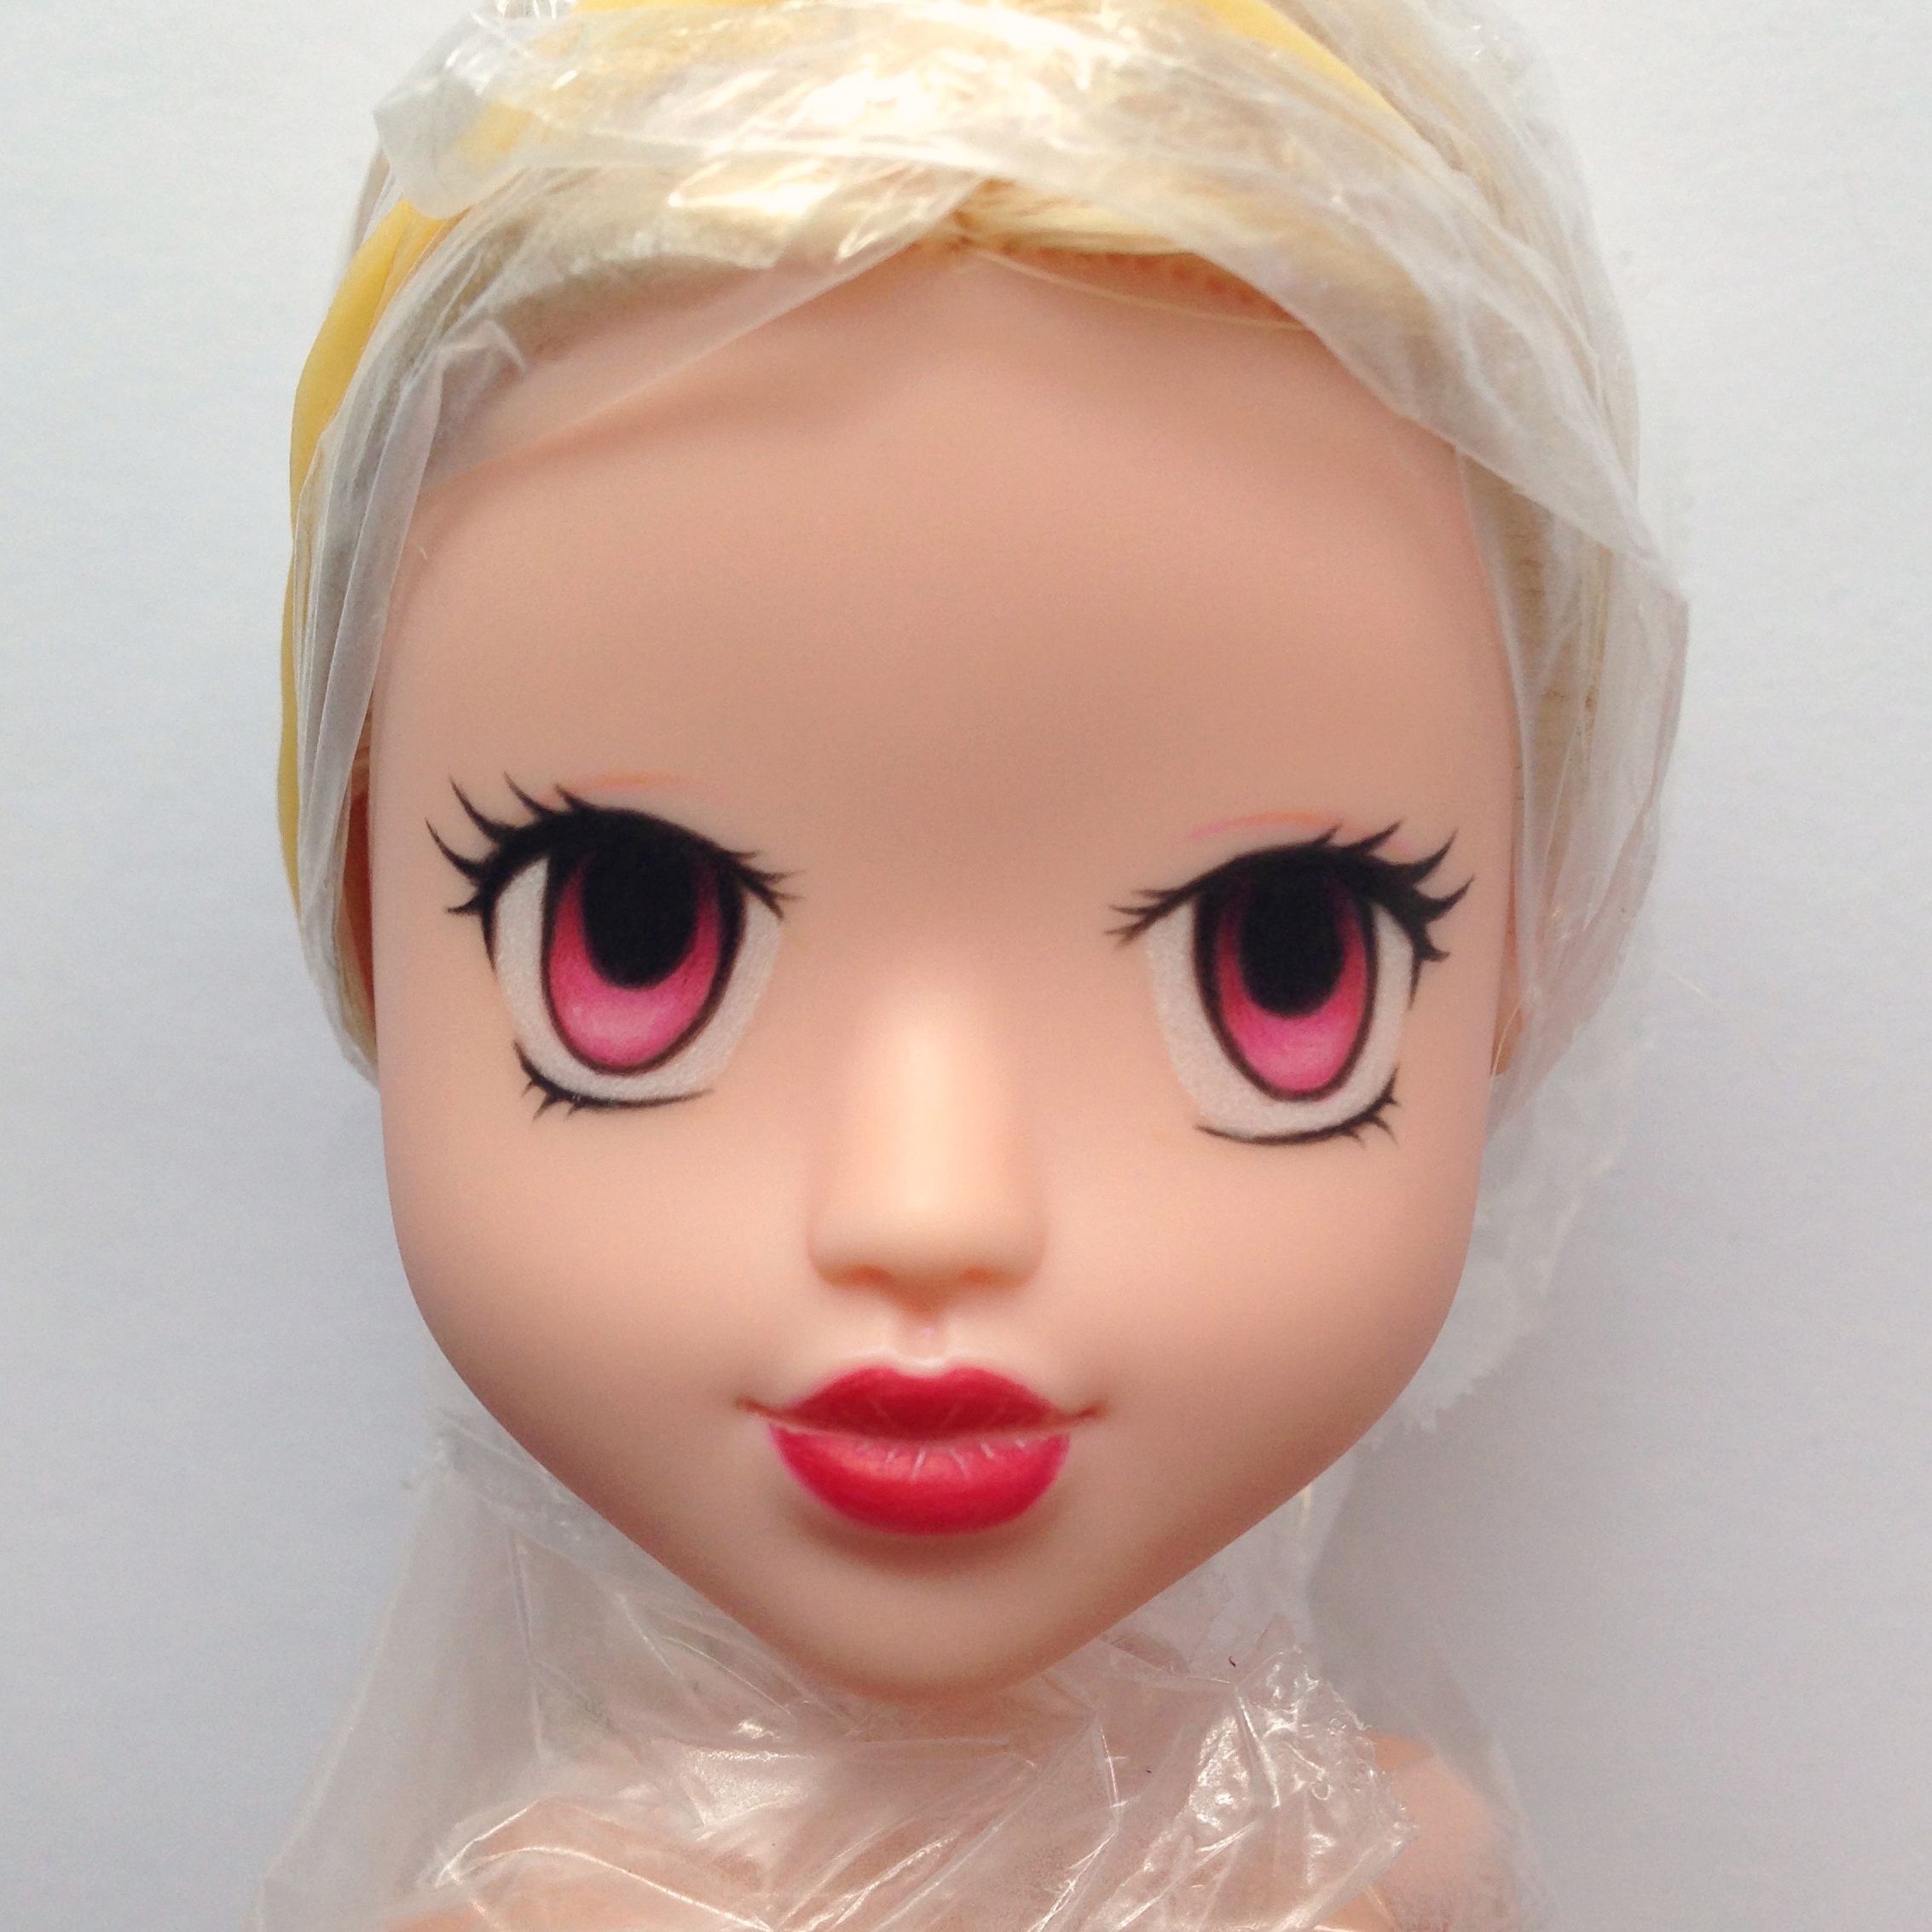
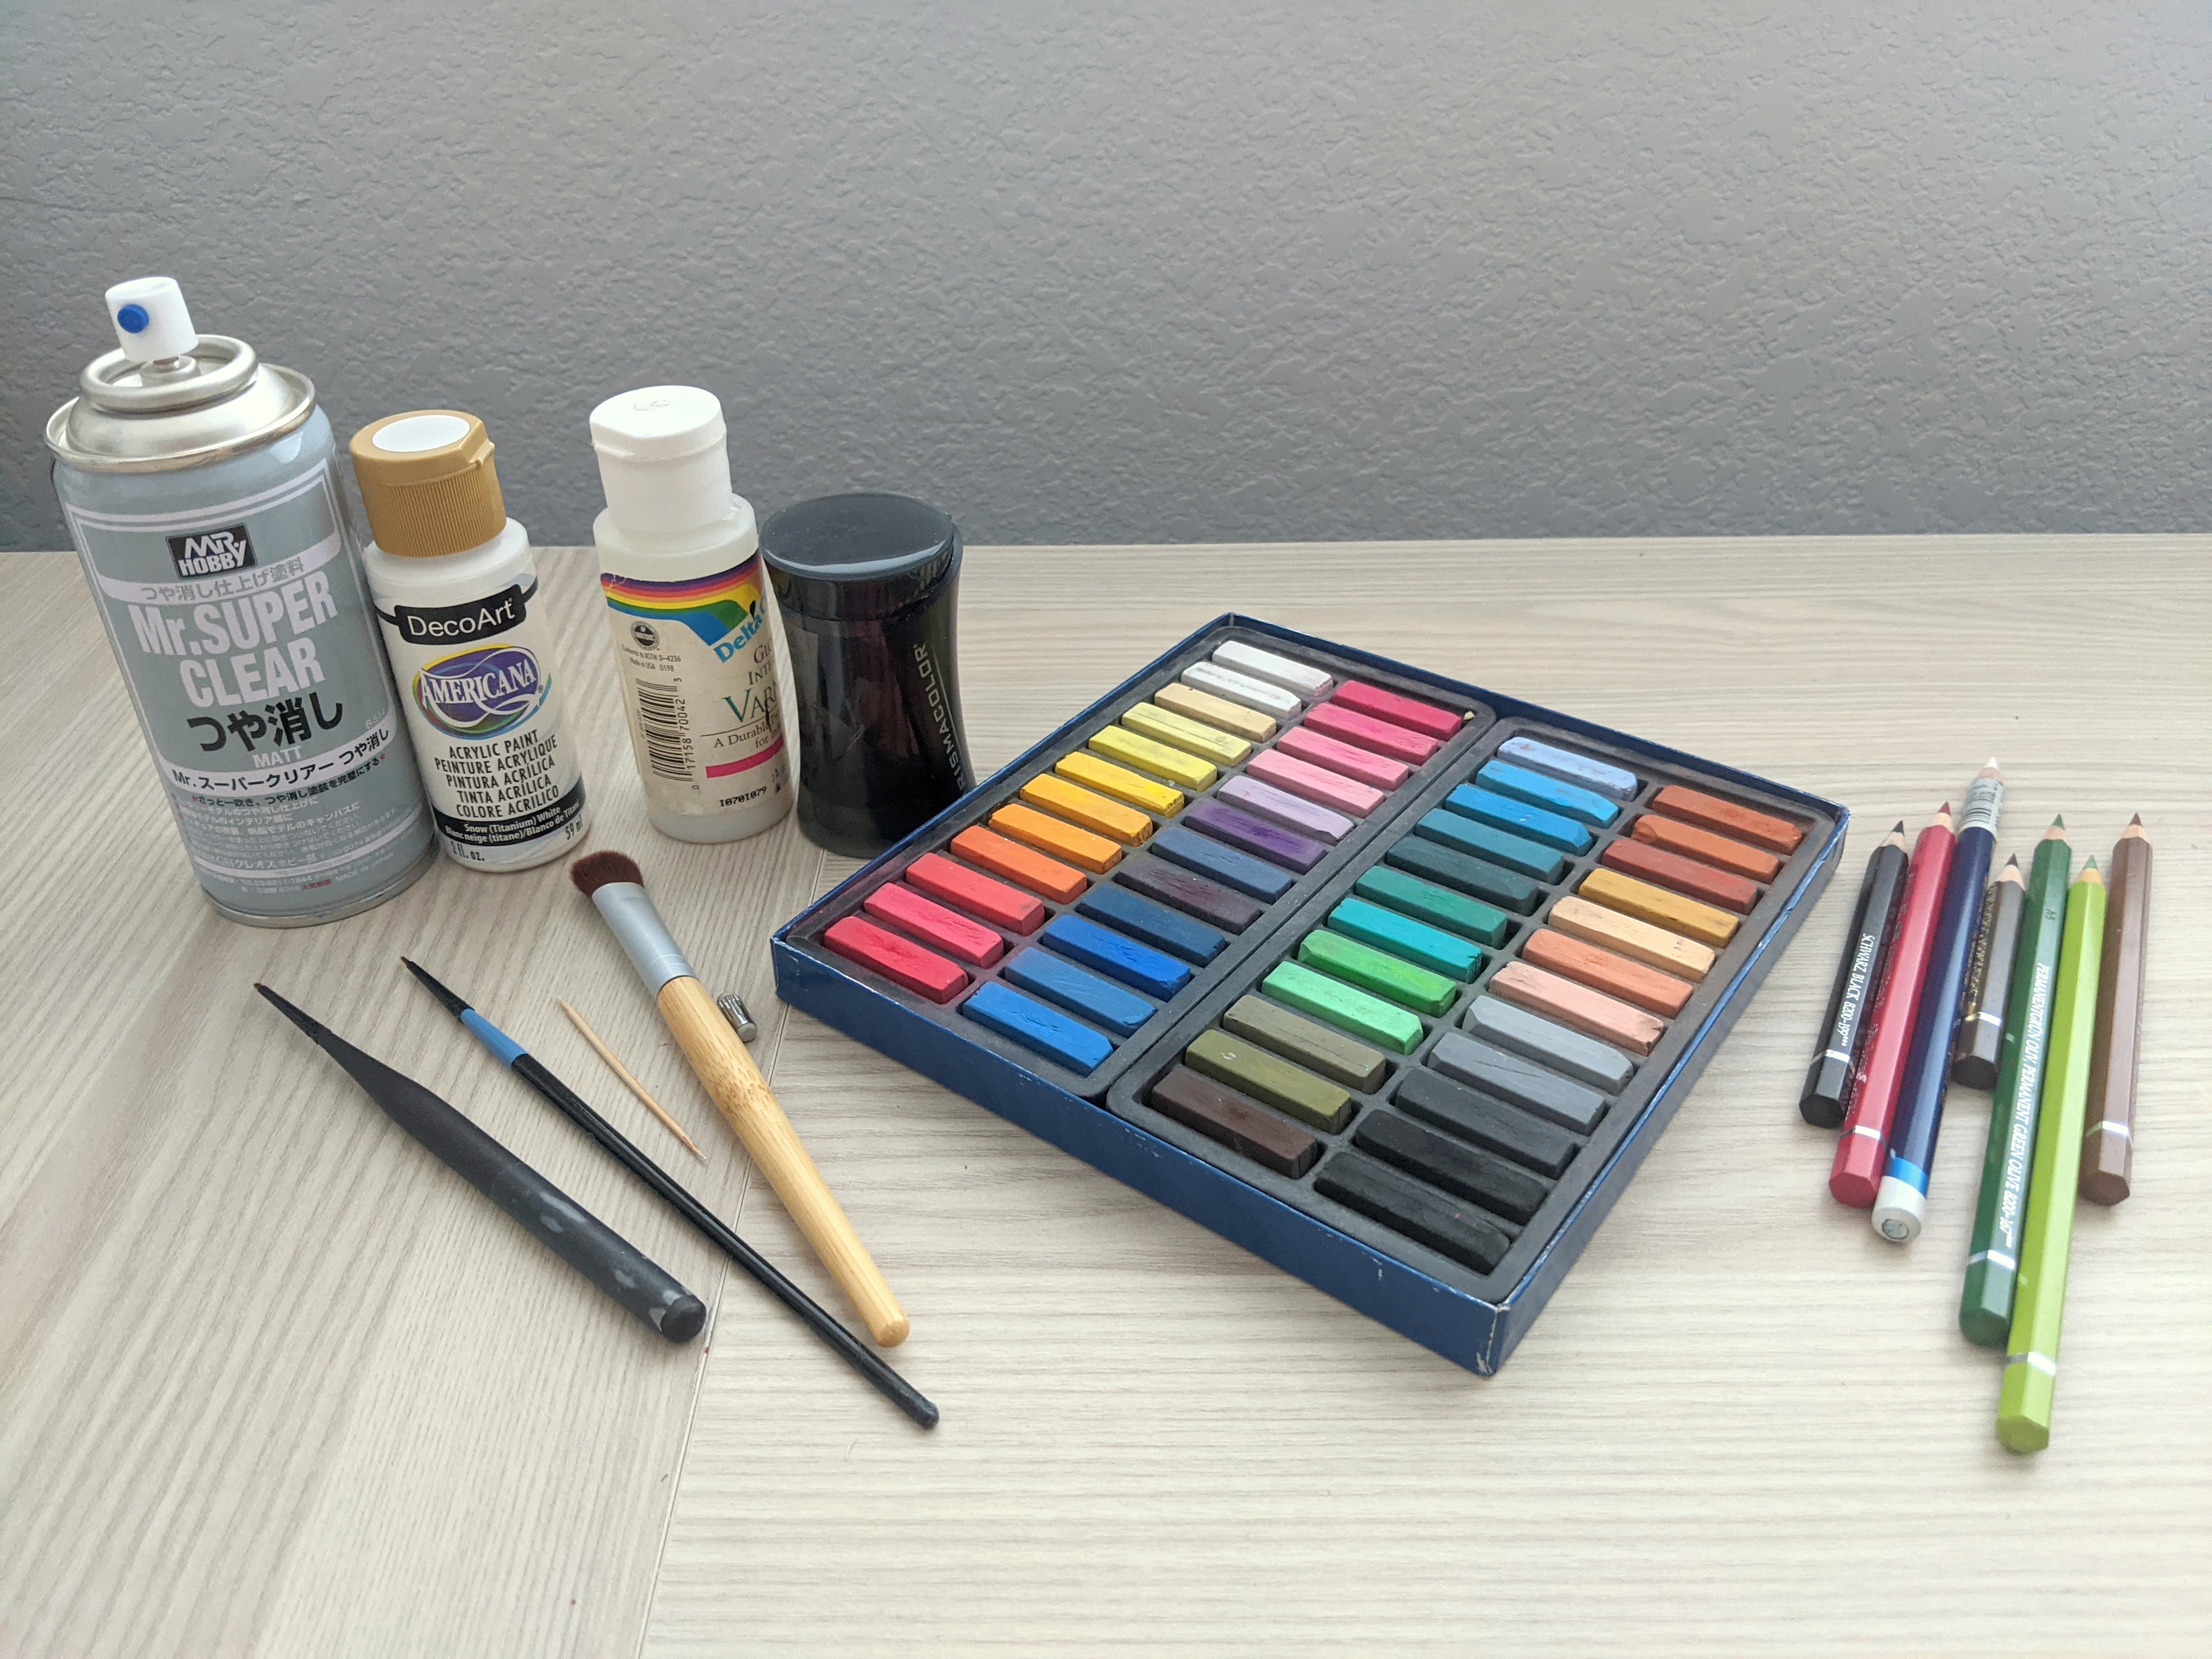
Are you interested in repainting or customizing dolls, but aren’t sure what materials are the absolute essential ones to start with? I recently had a friend ask me about how to get into repainting dolls, but she saw my art desk (a picture) and balked at all the sh*t stuff strewn across it. I’ve been customizing for years, so I’ve accrued quite the collection of materials, but if you’re just getting started and are on a budget, here is my list of absolute, bare-minimum, must-have, super-essential stuff.

(Also, yes I know it’s been three years since I’ve posted anything on here. I’m still alive).

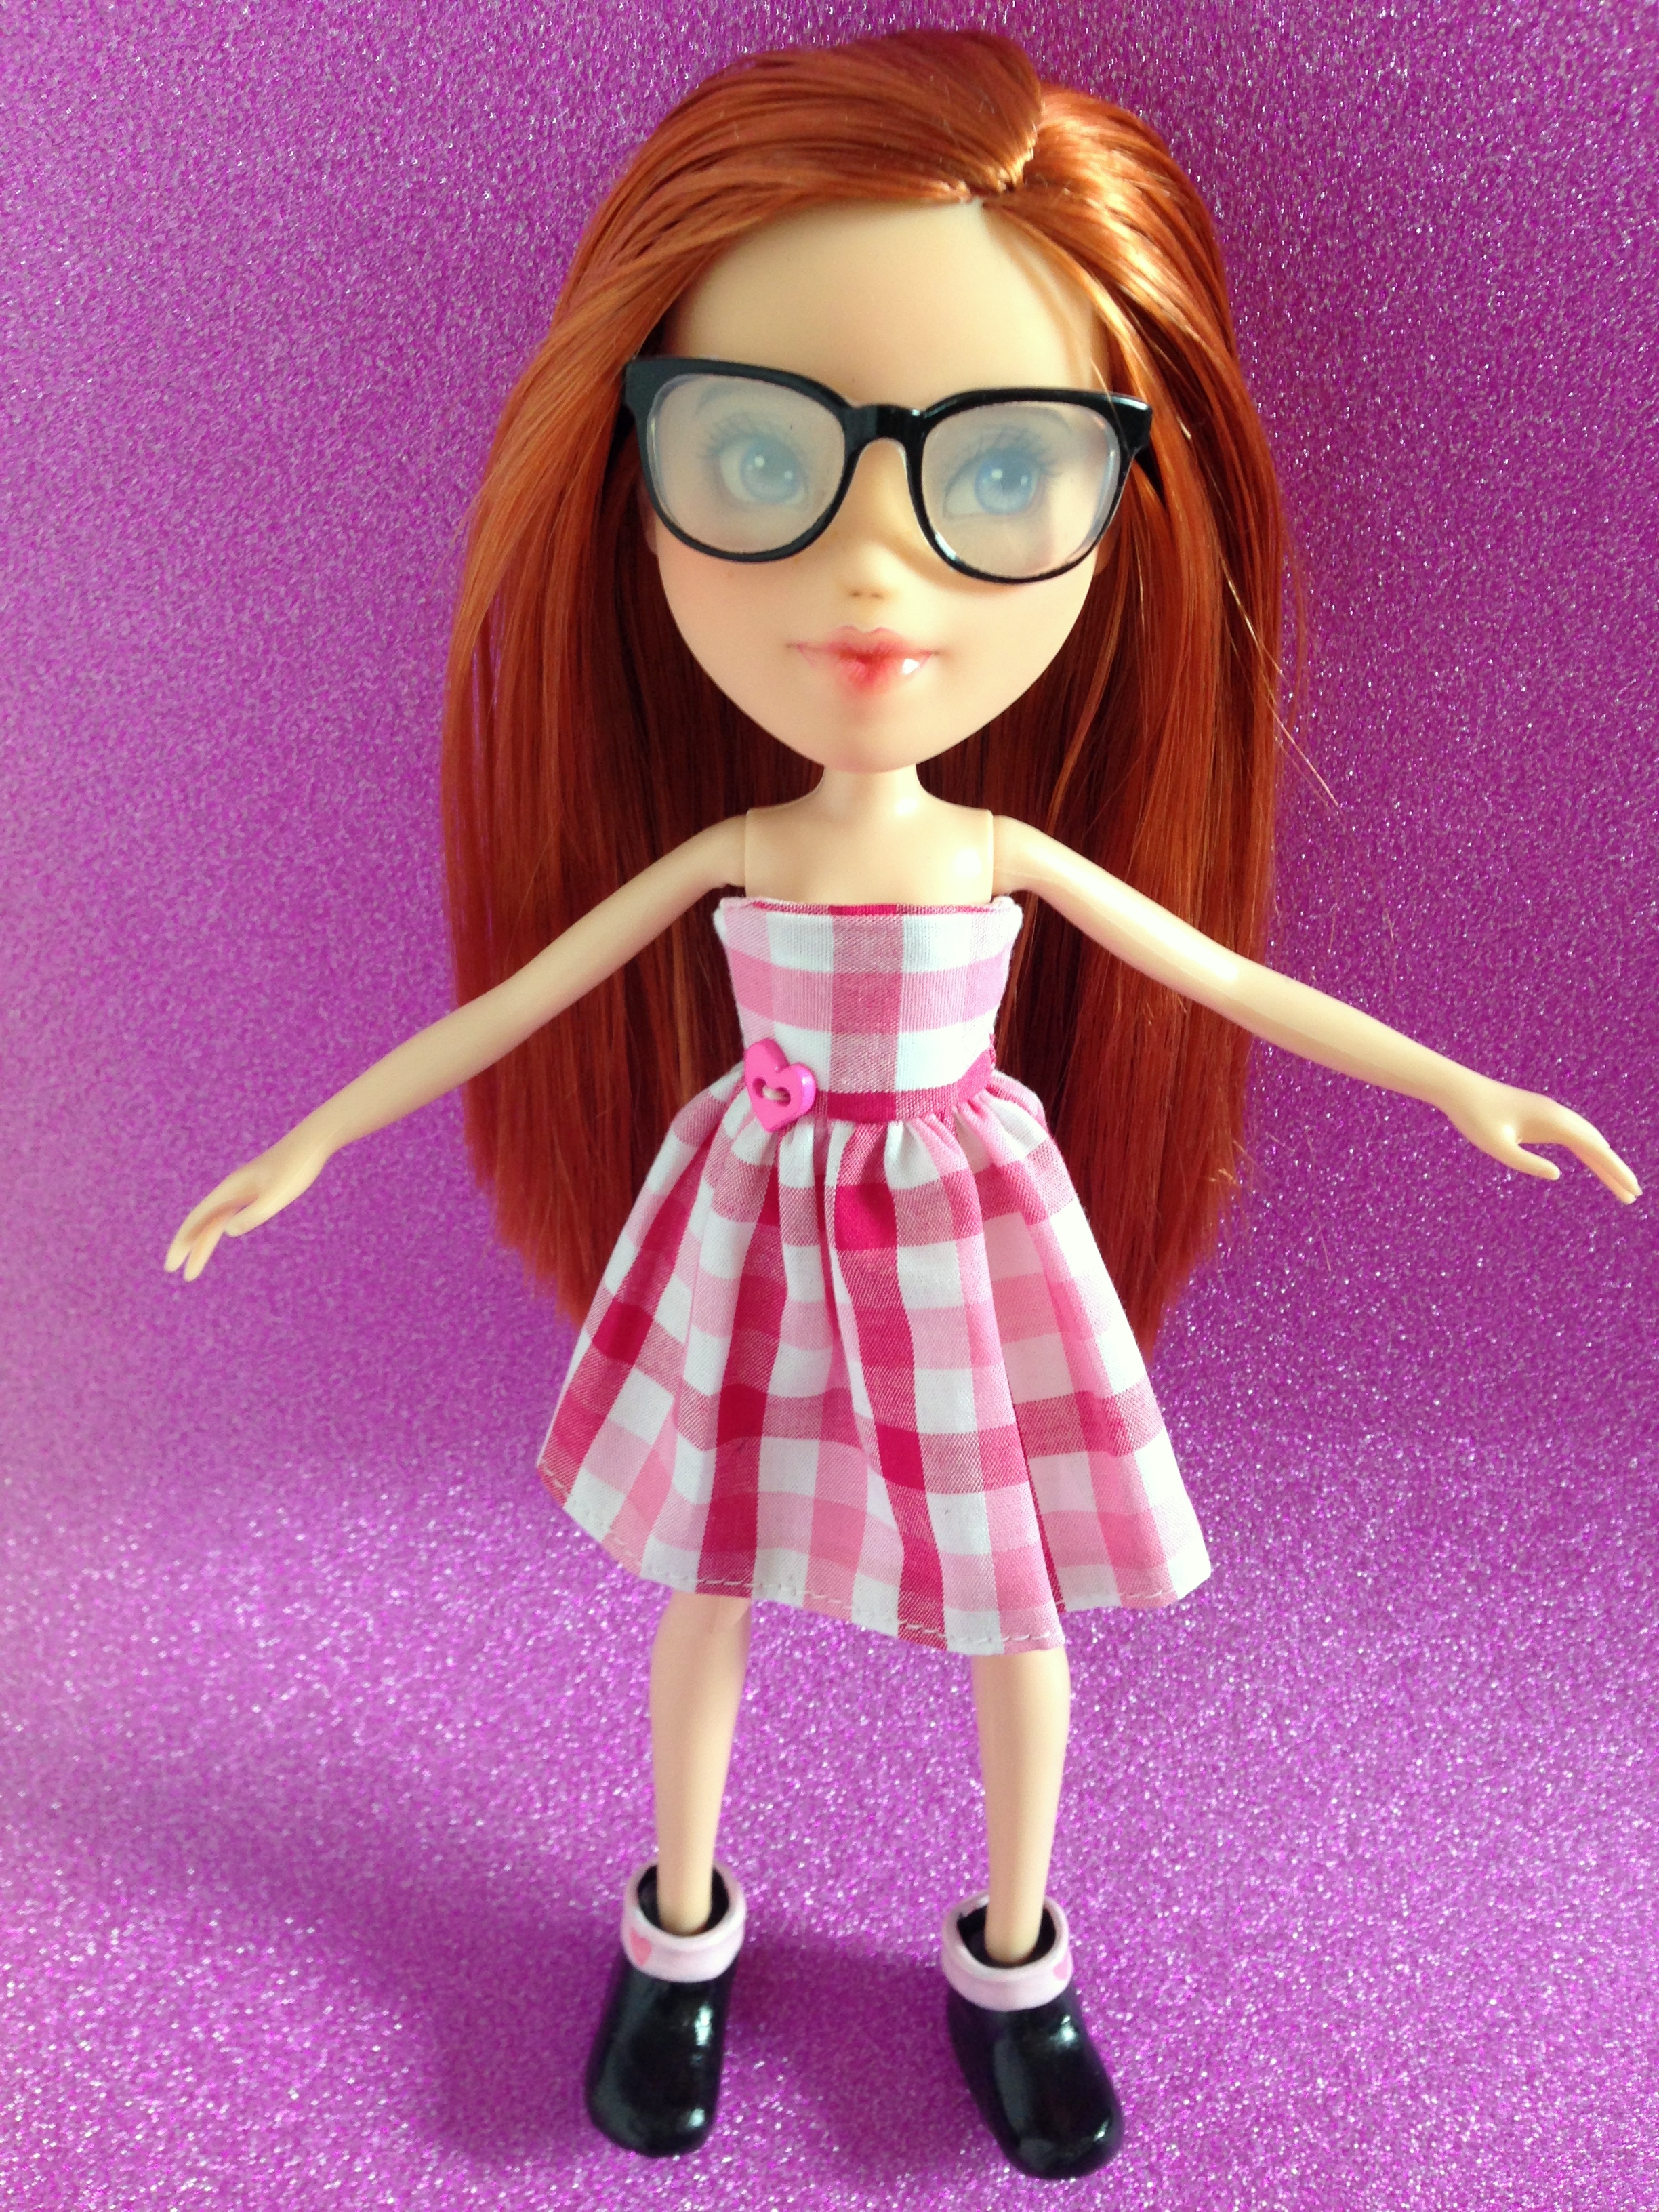
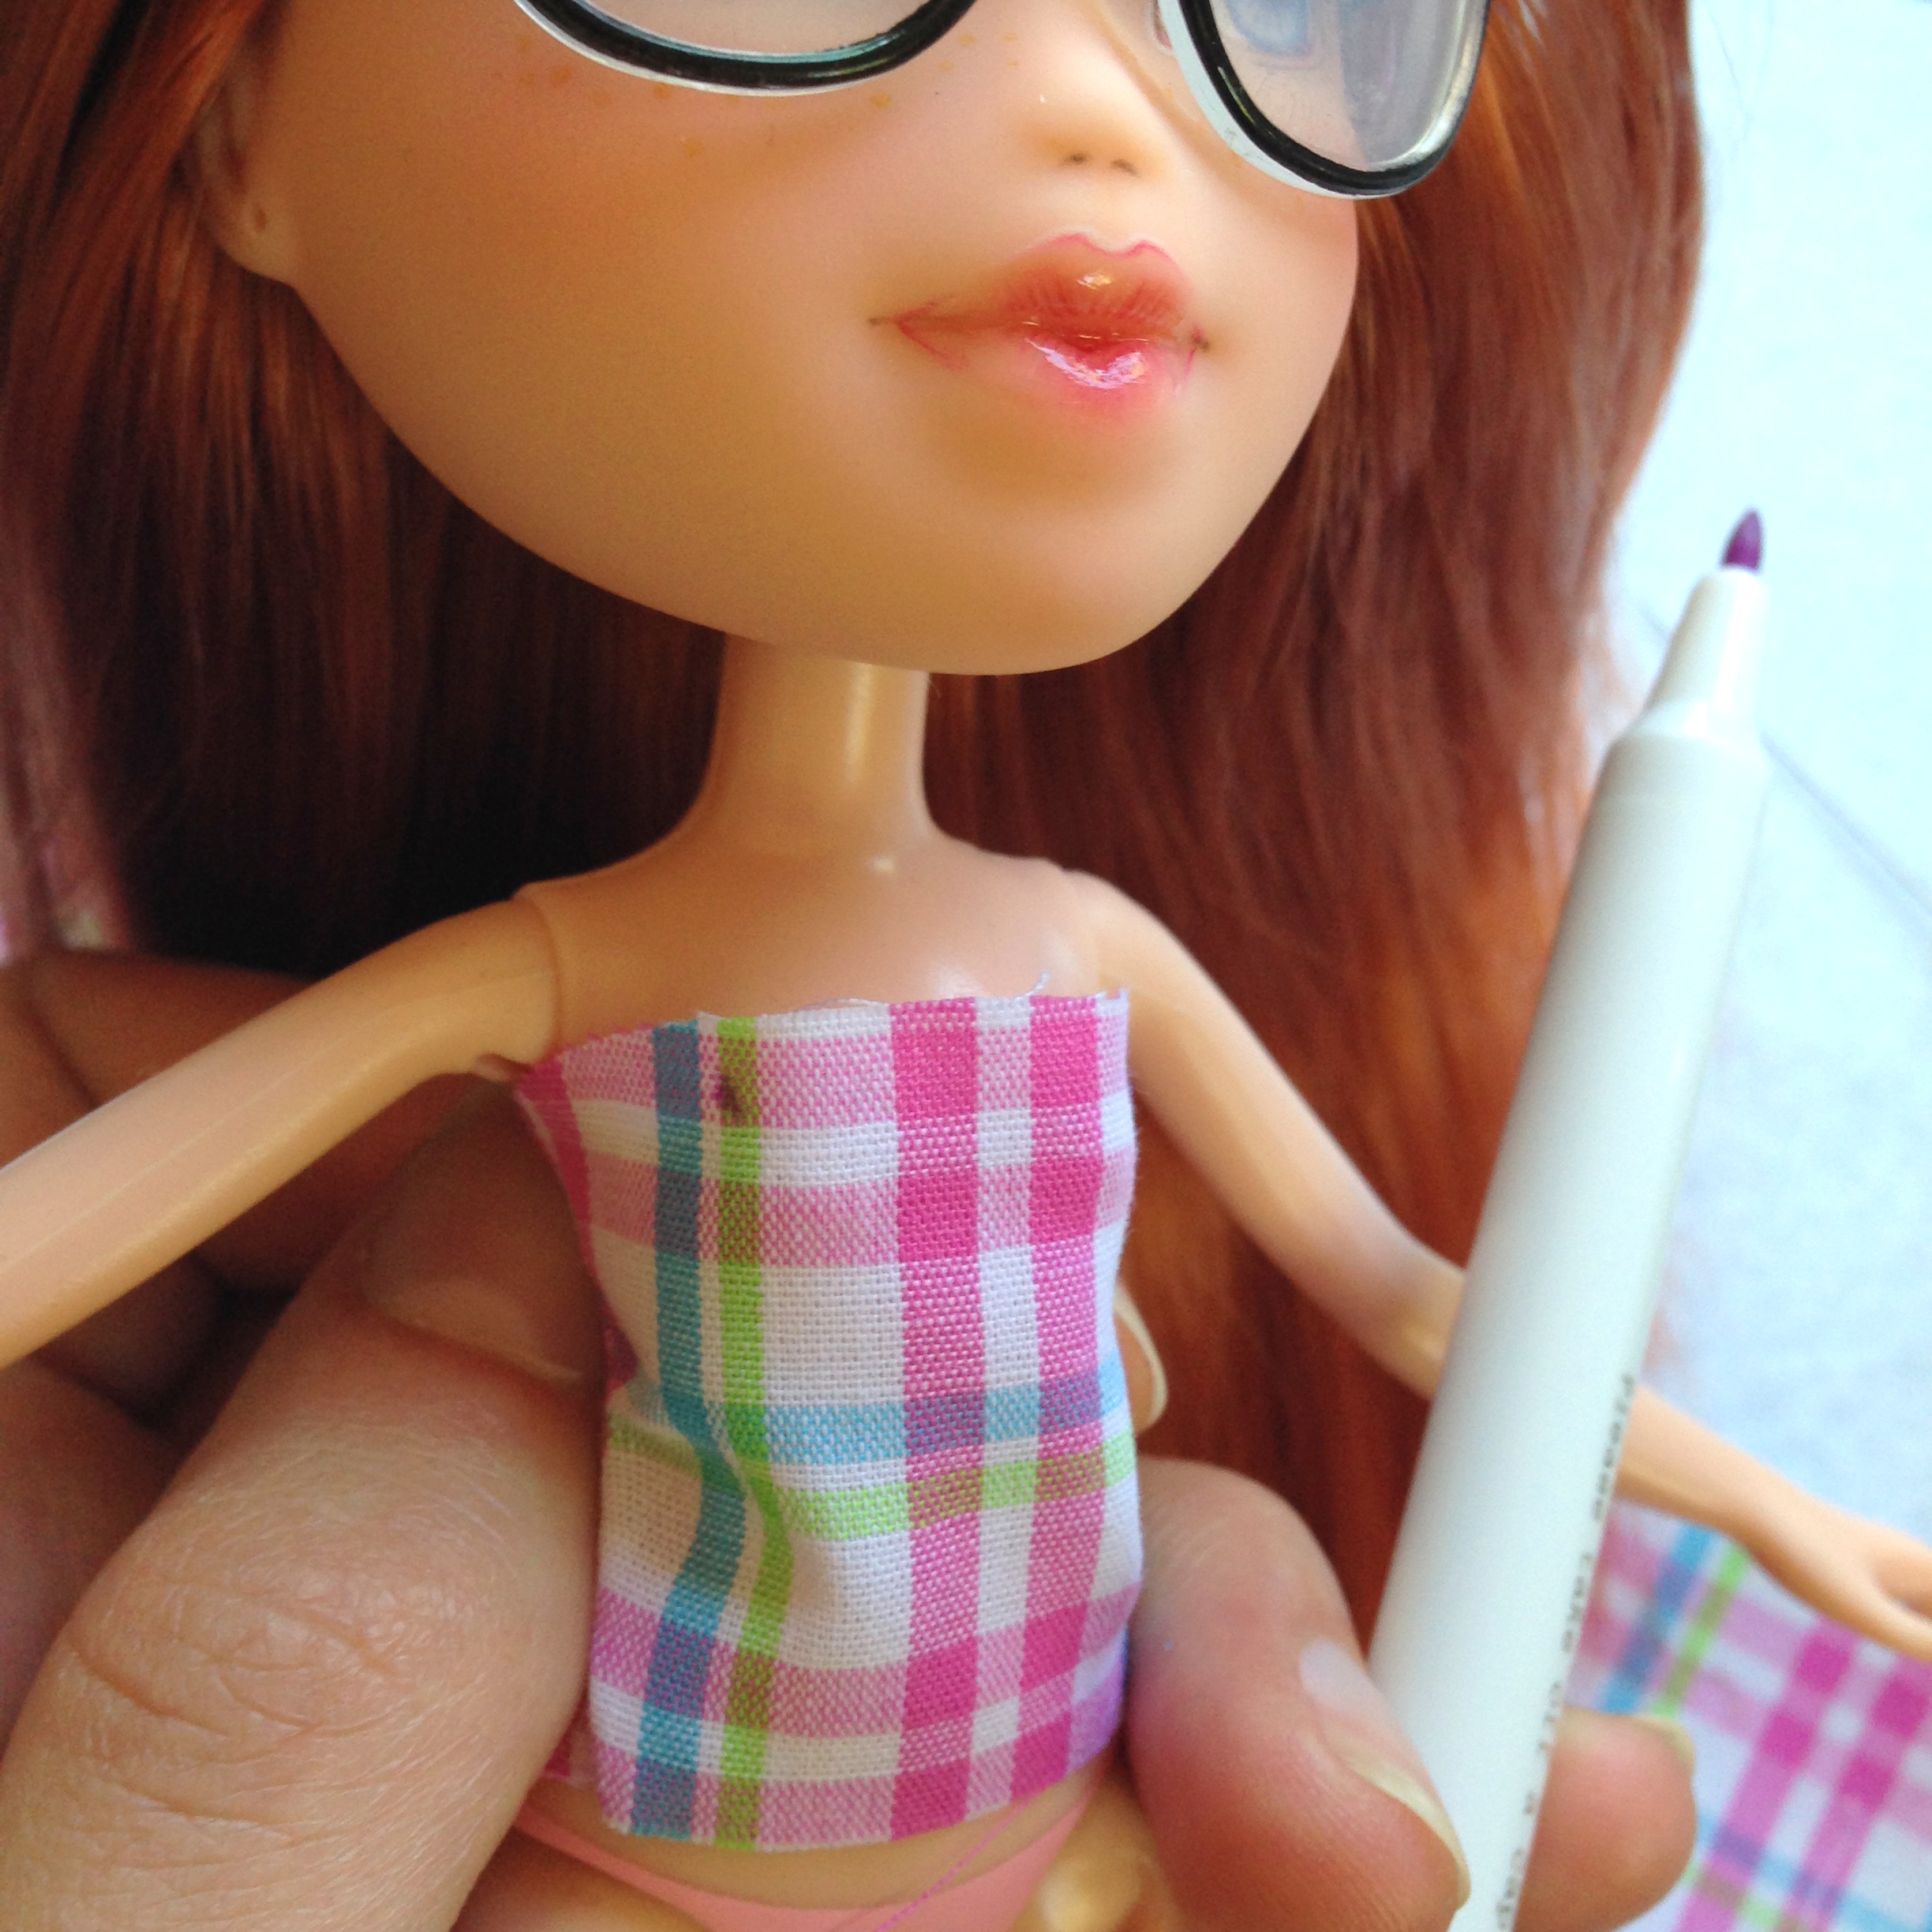
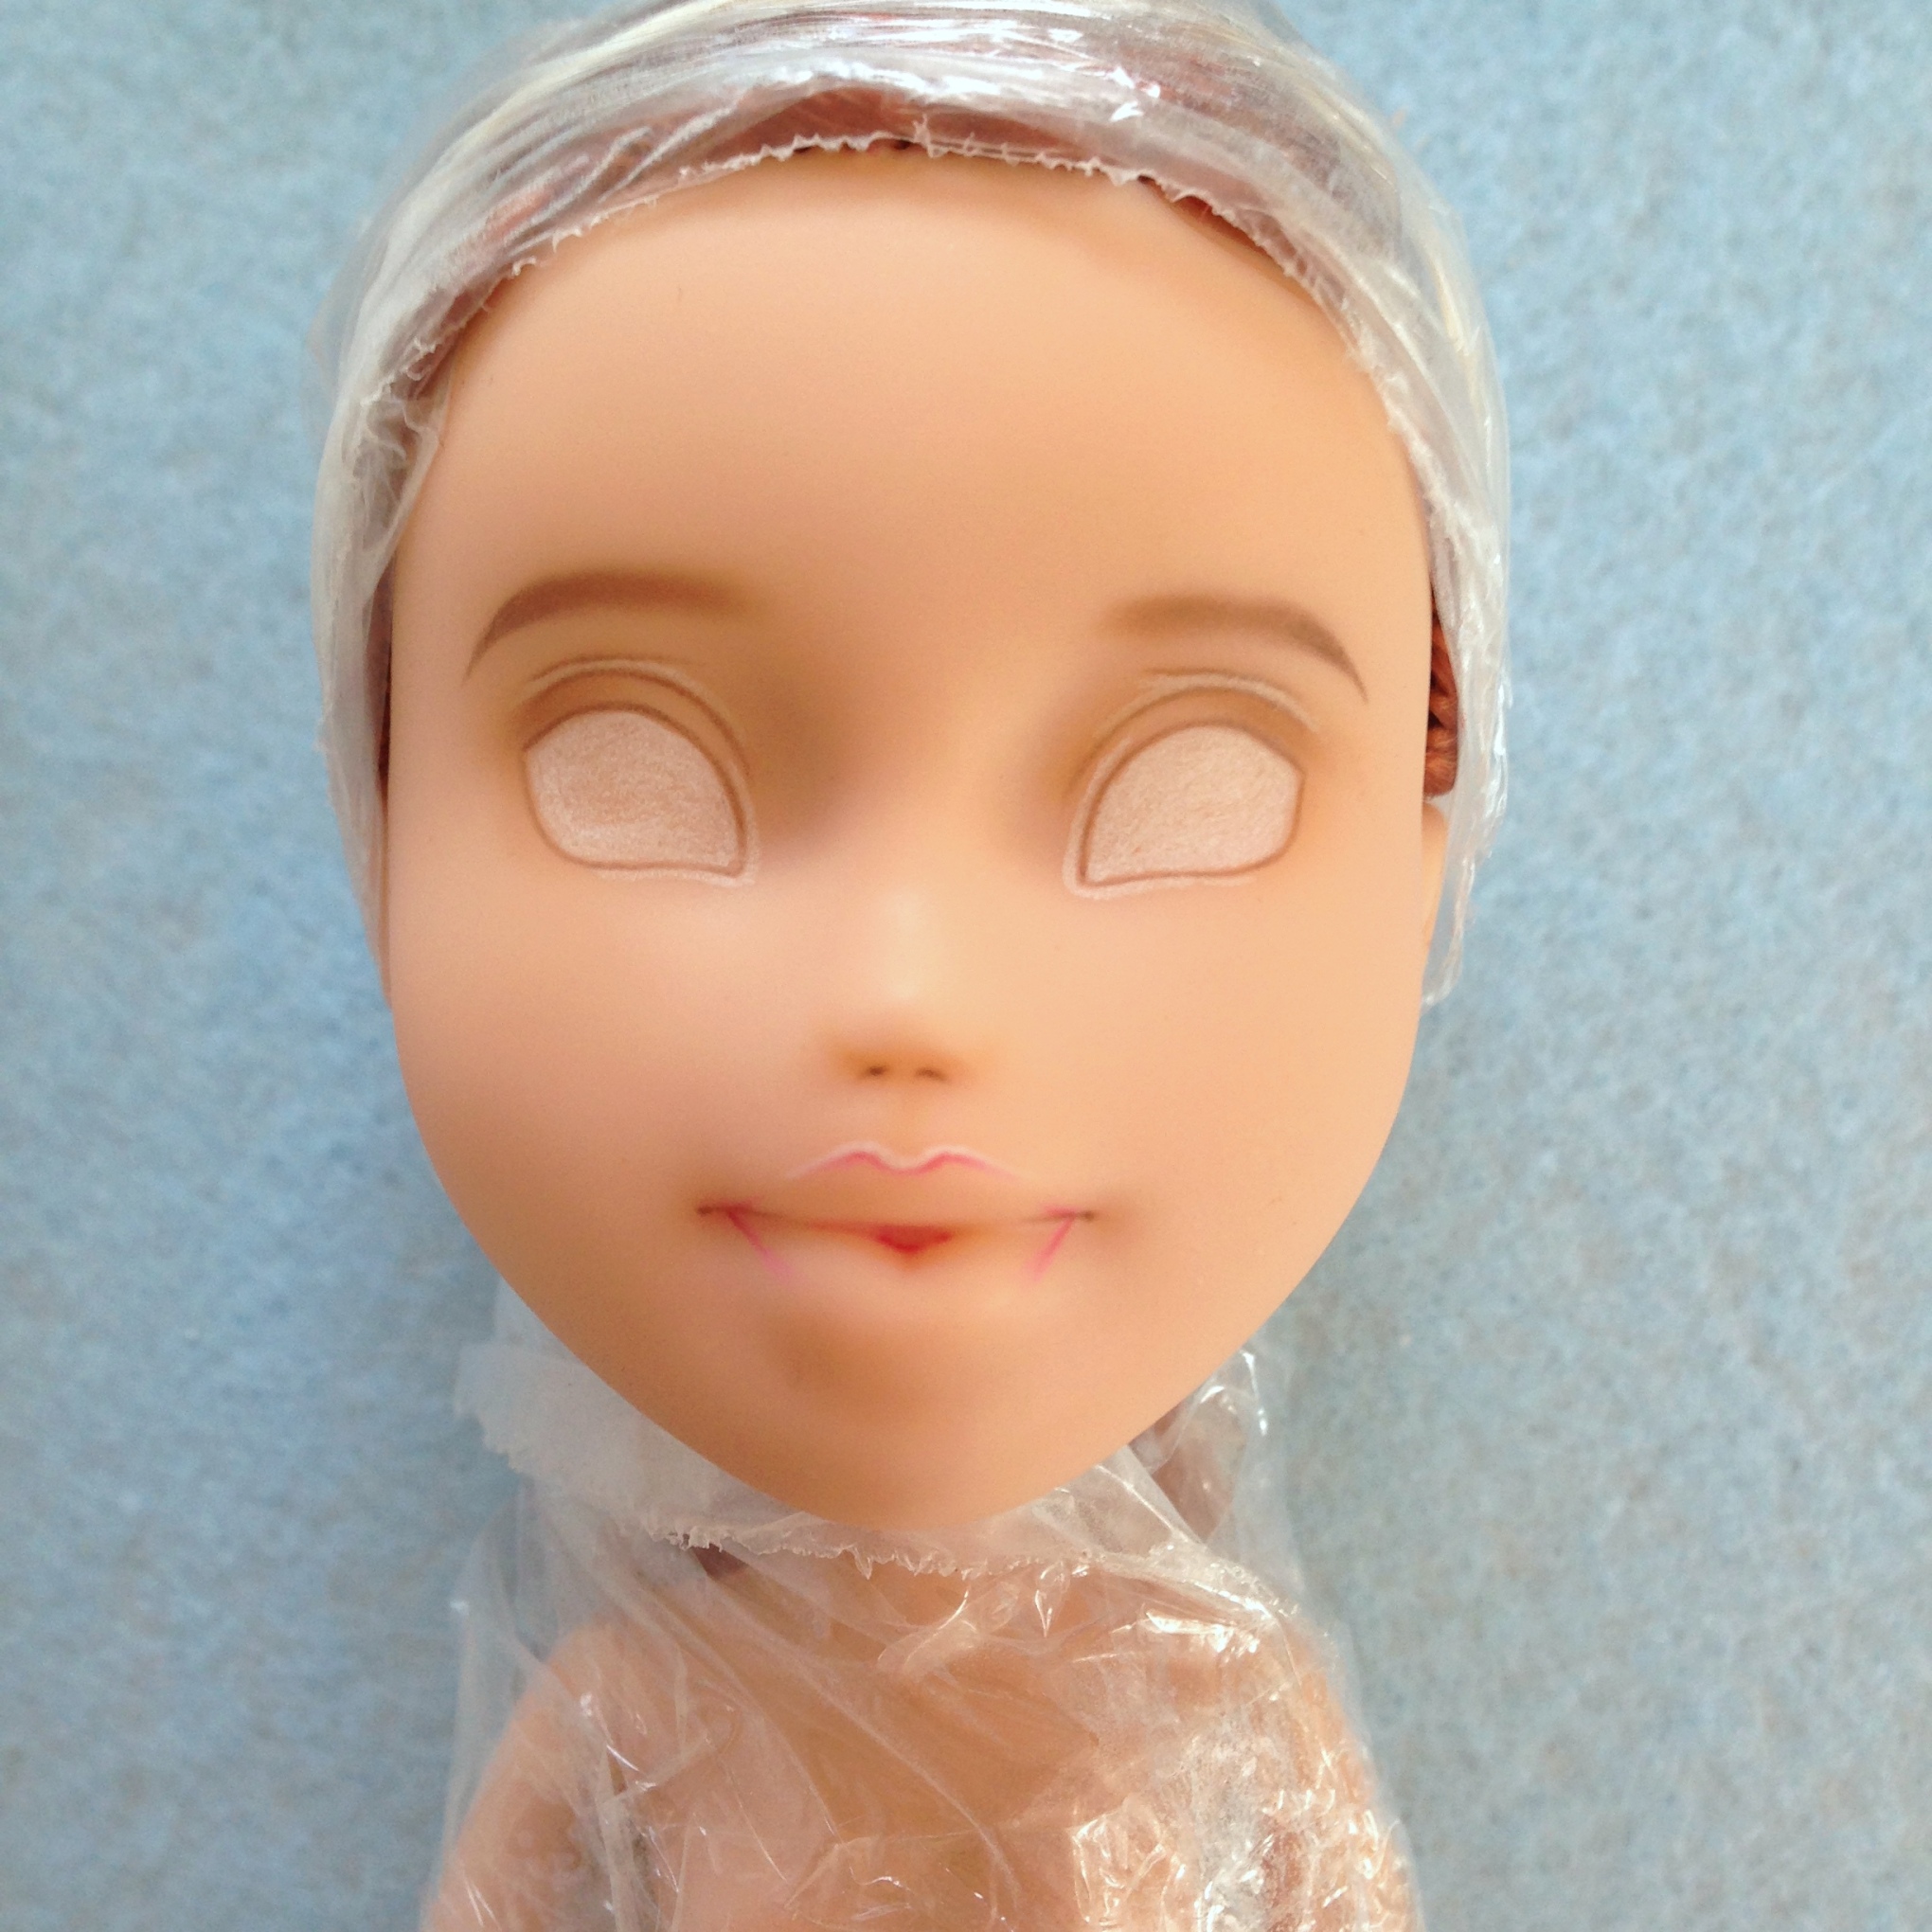
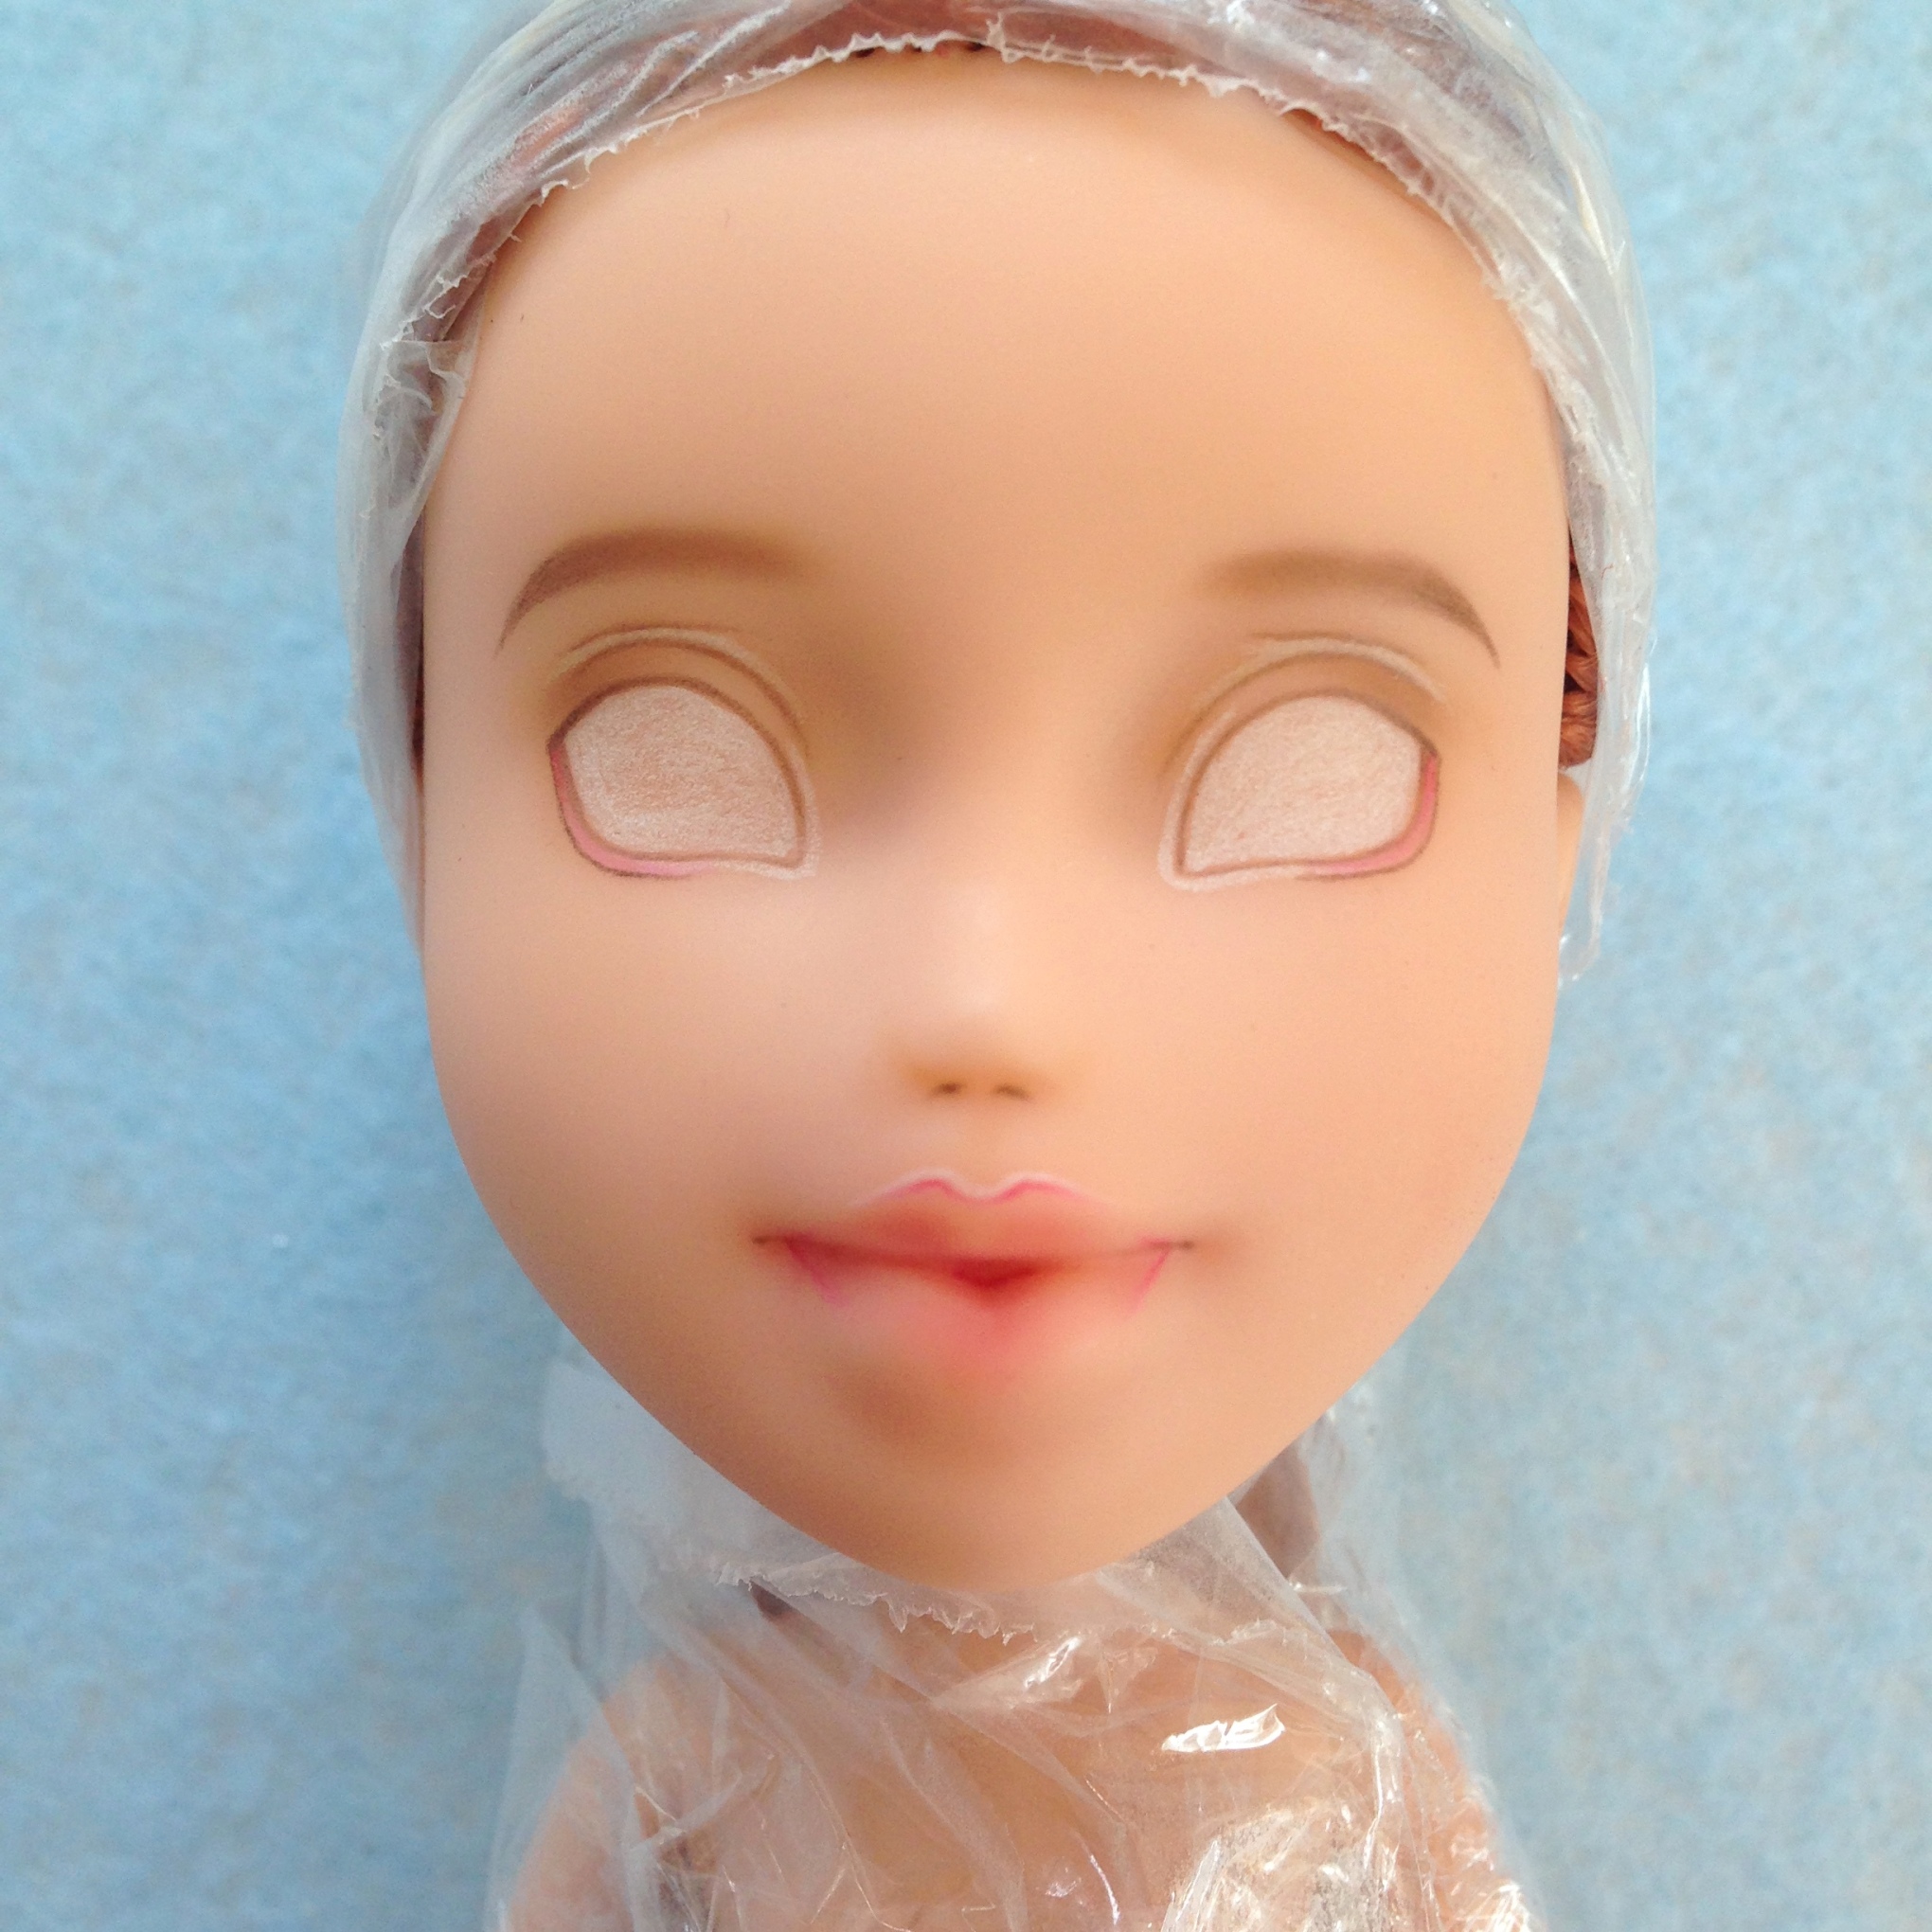
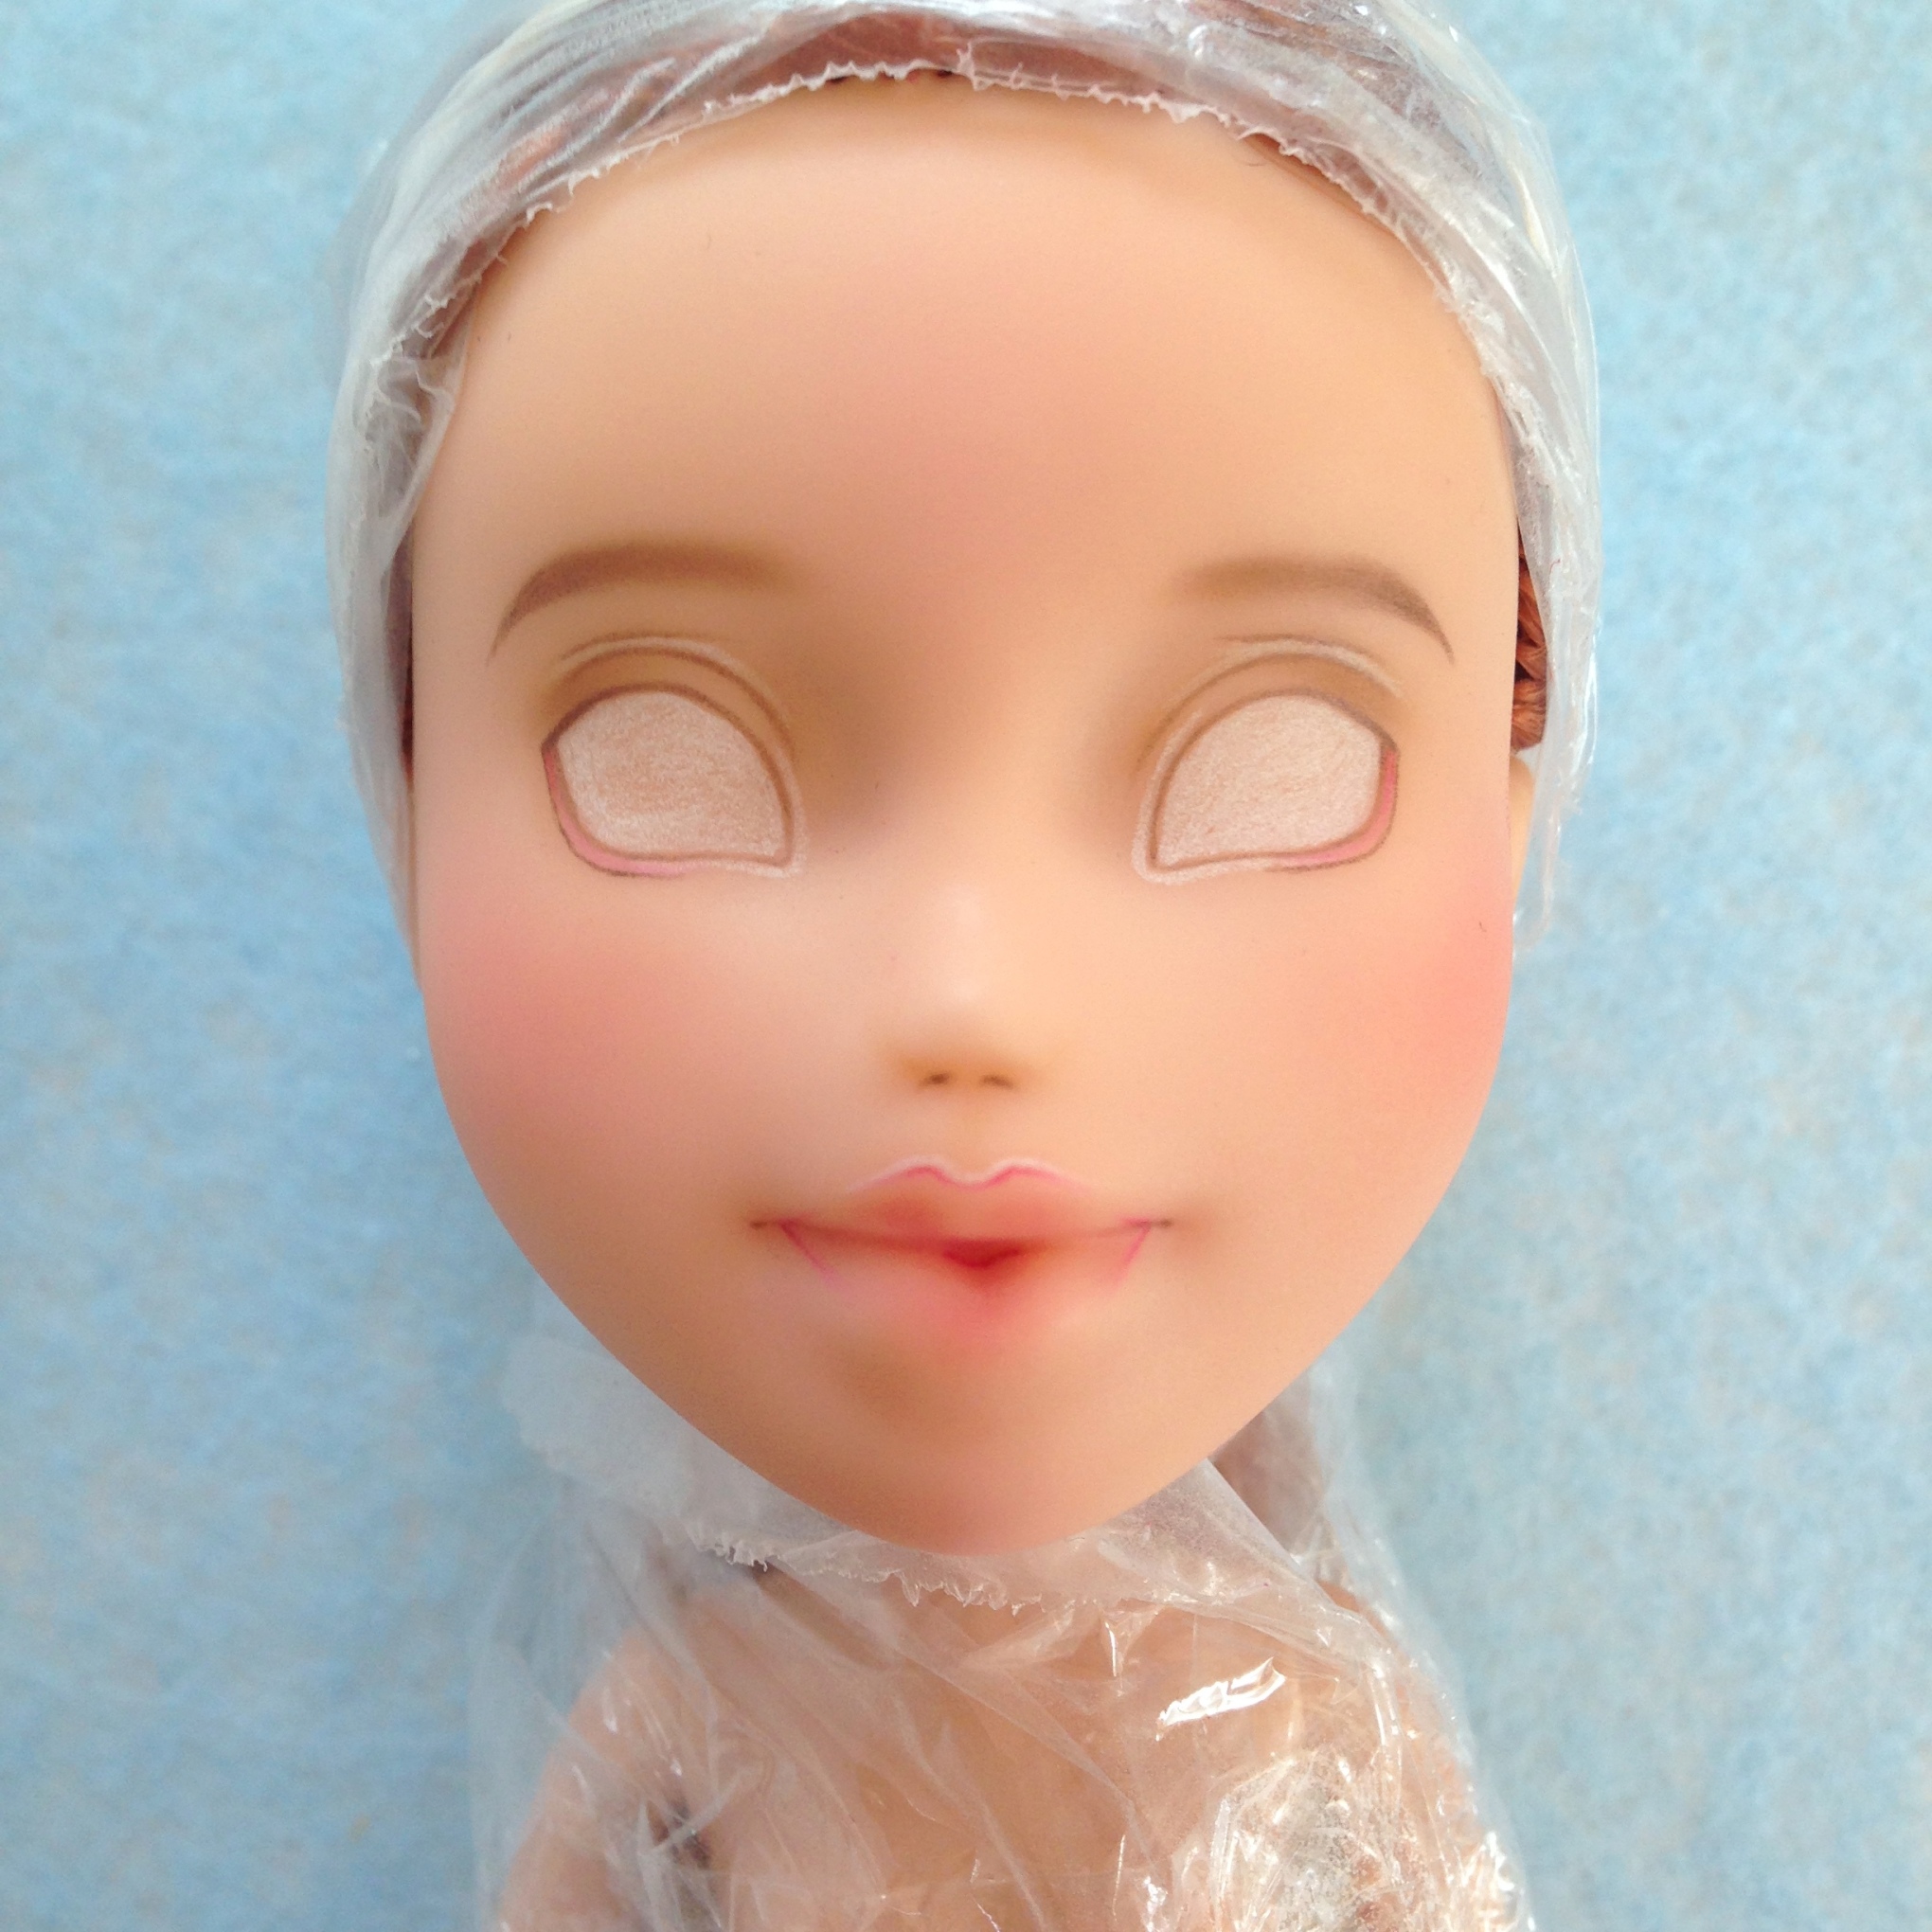
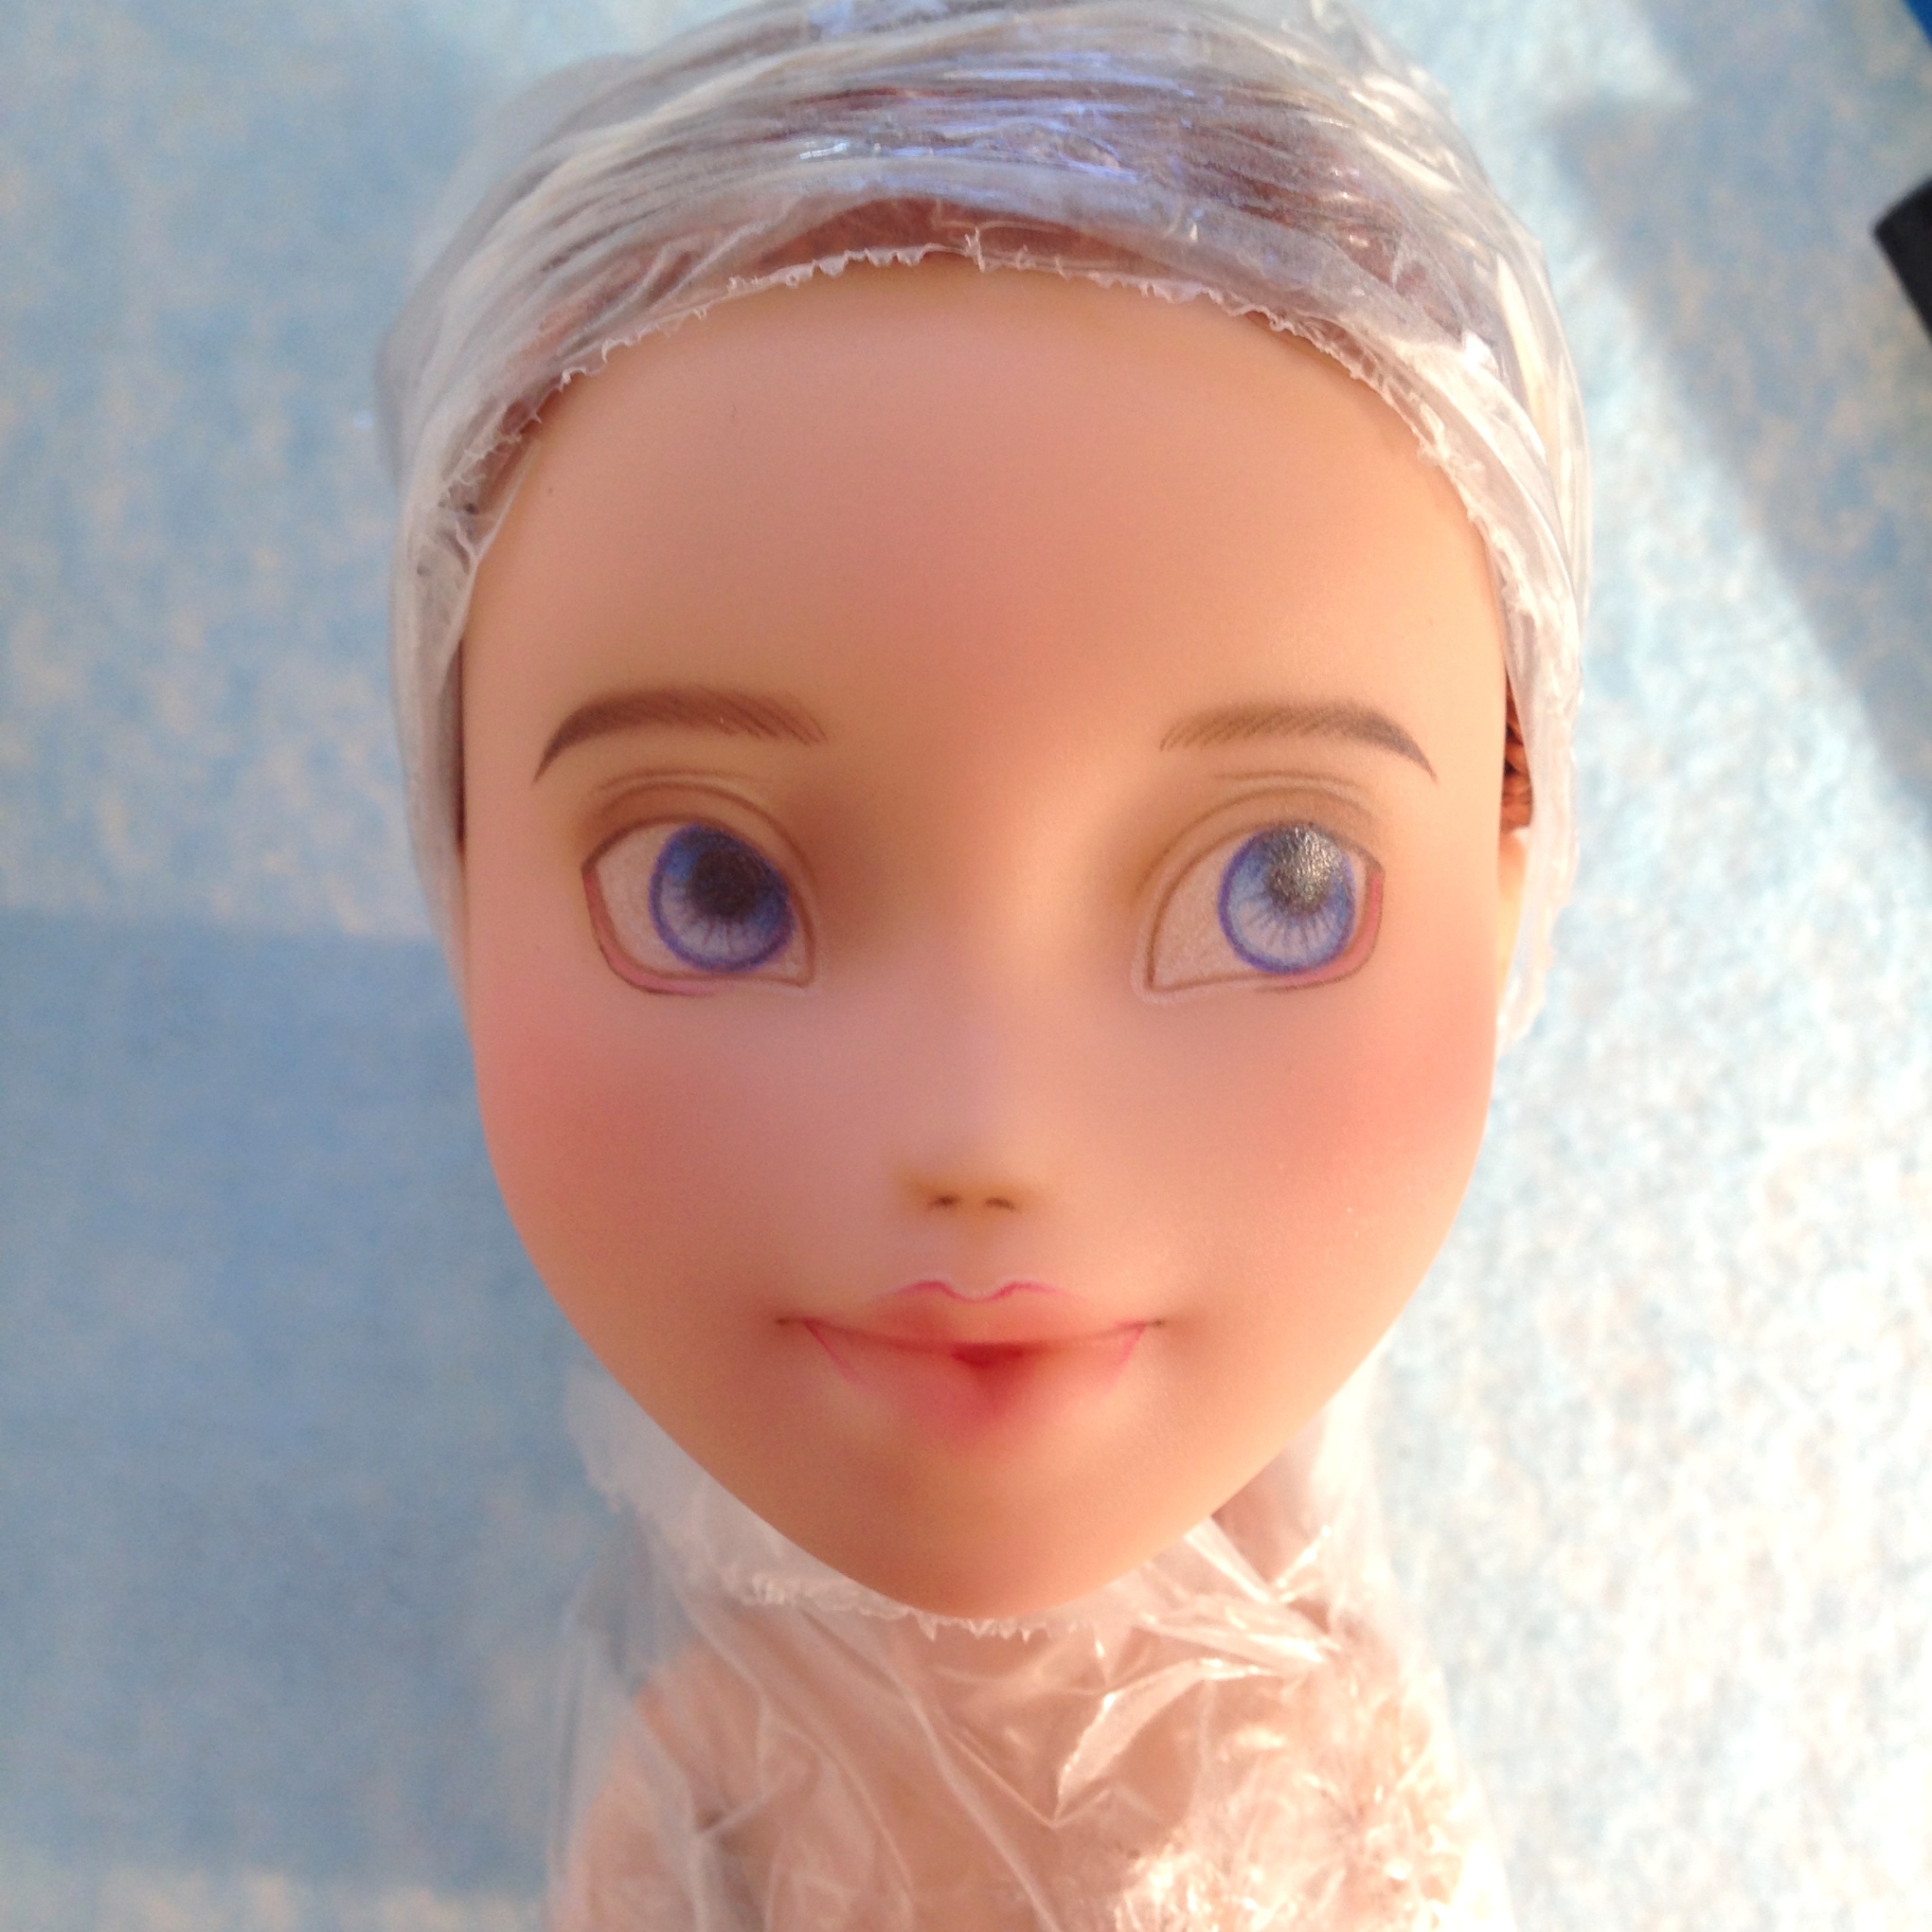
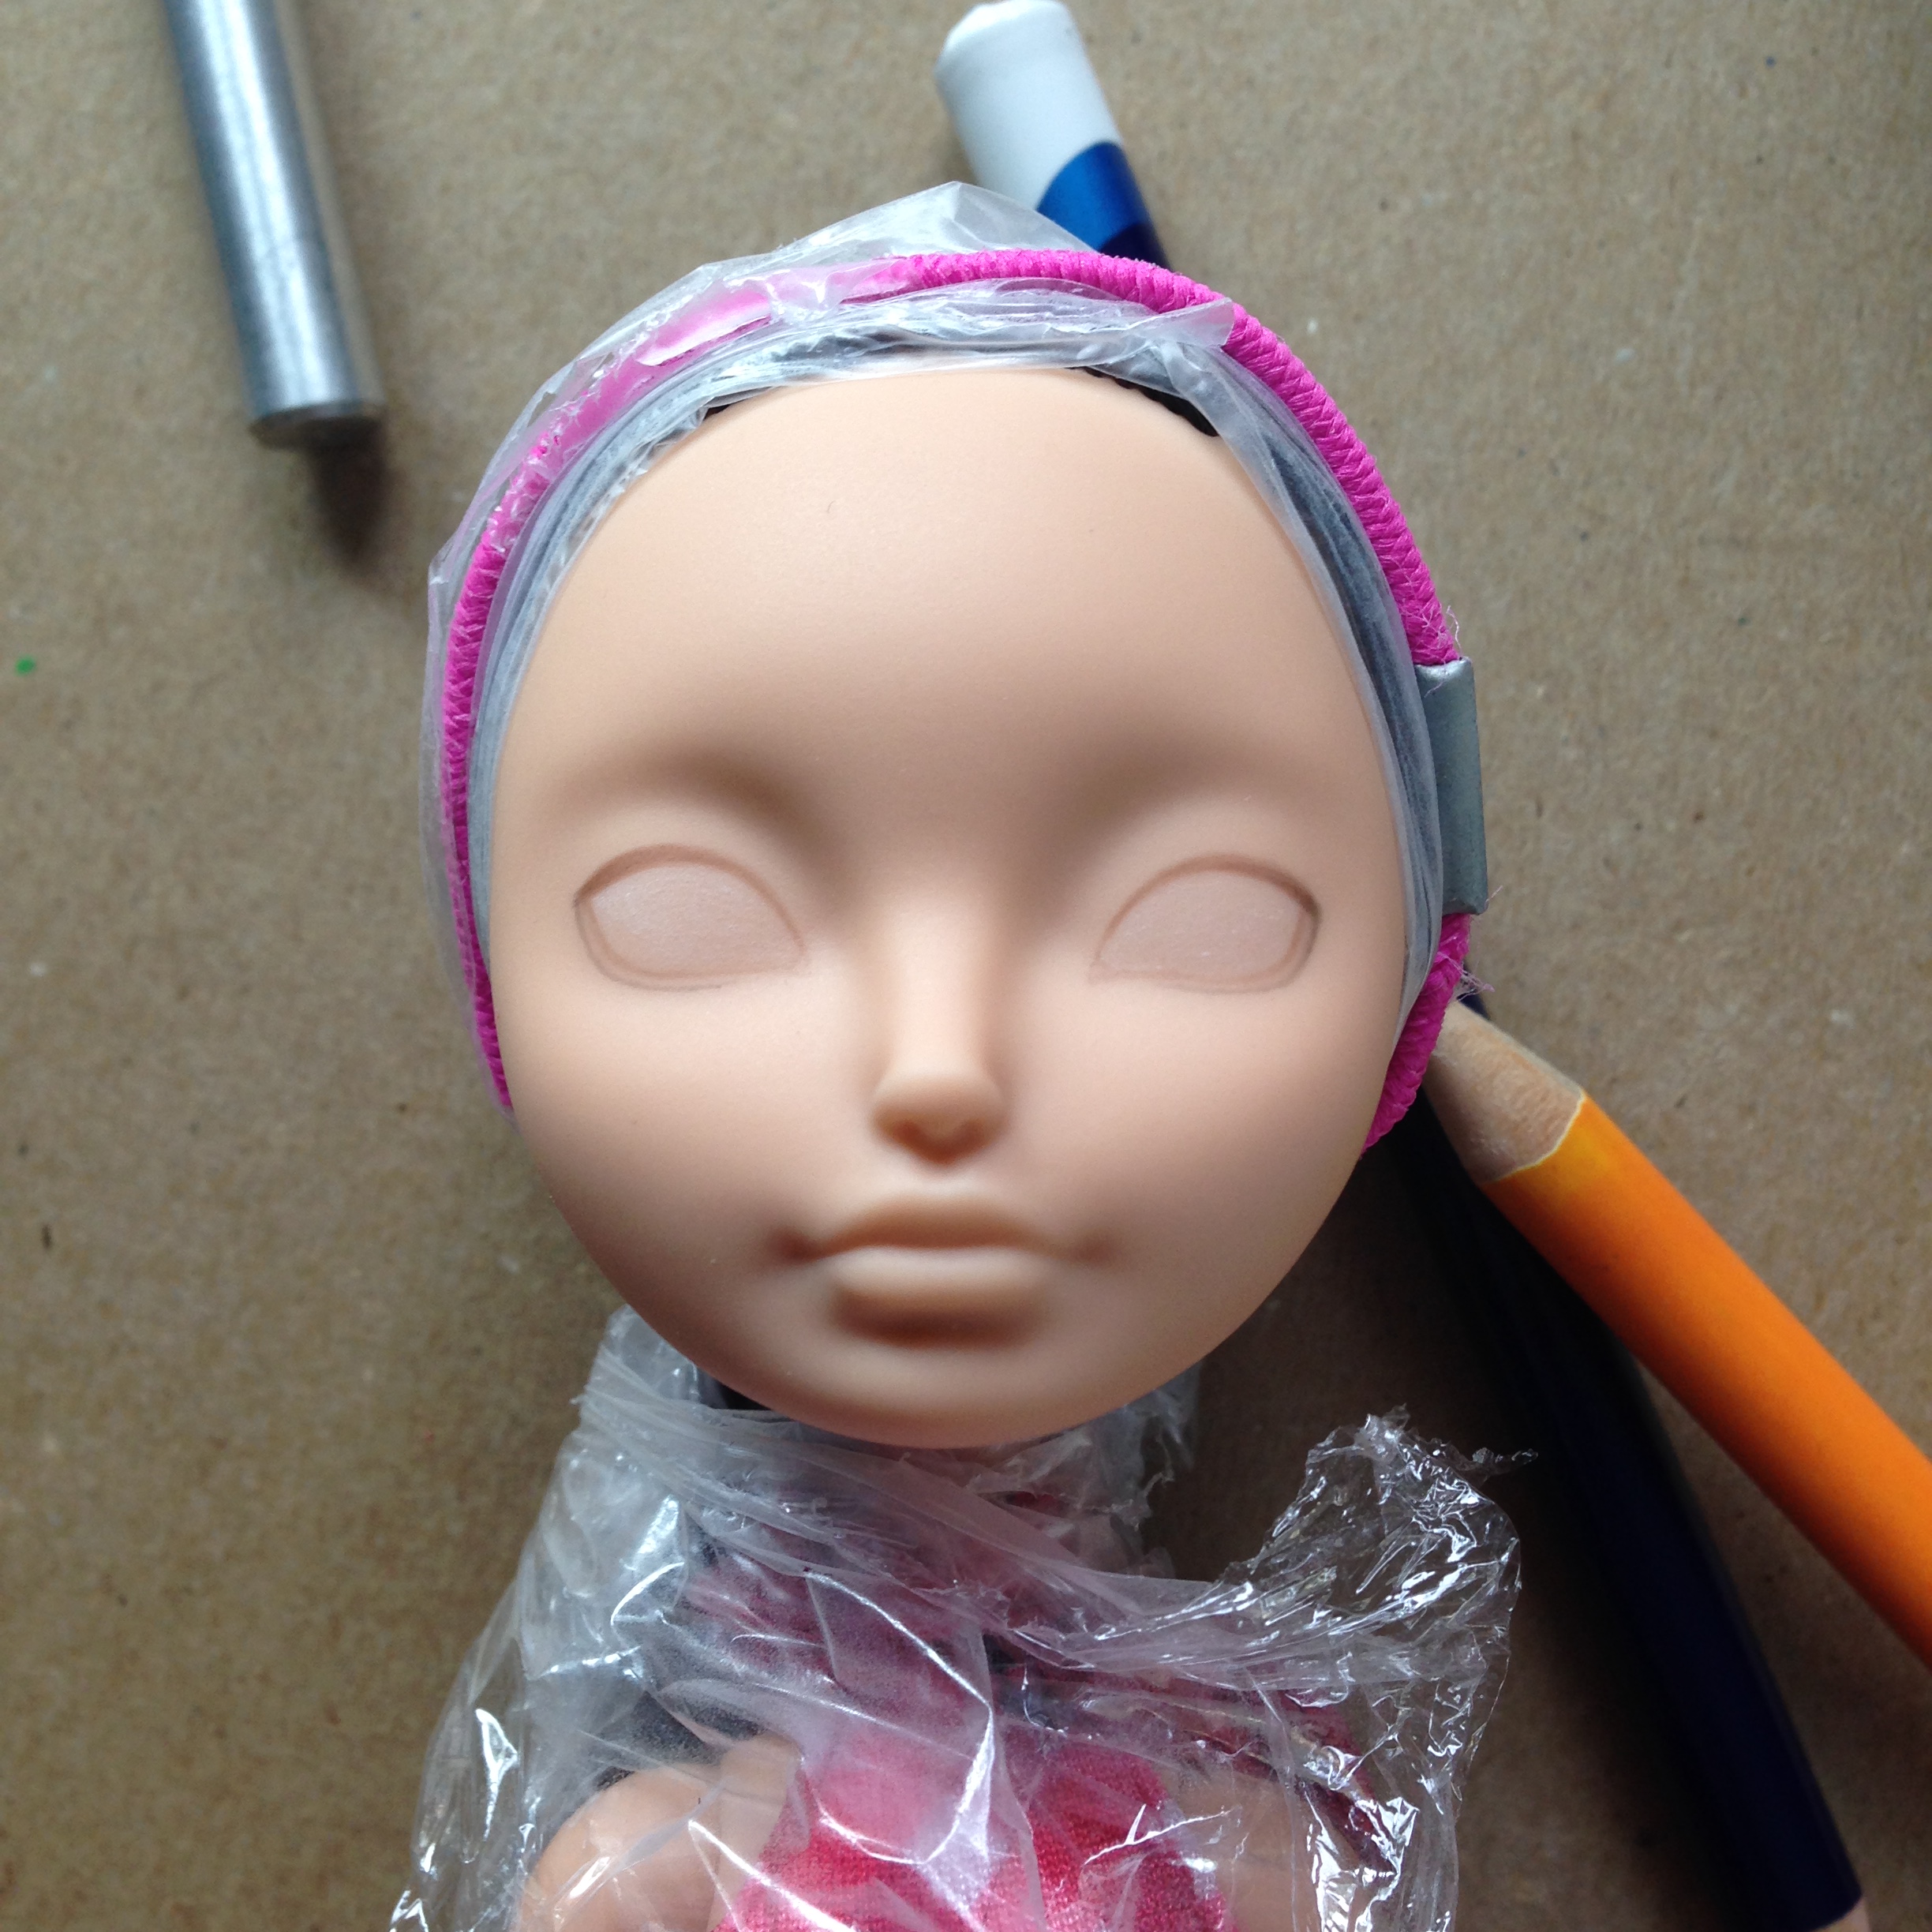
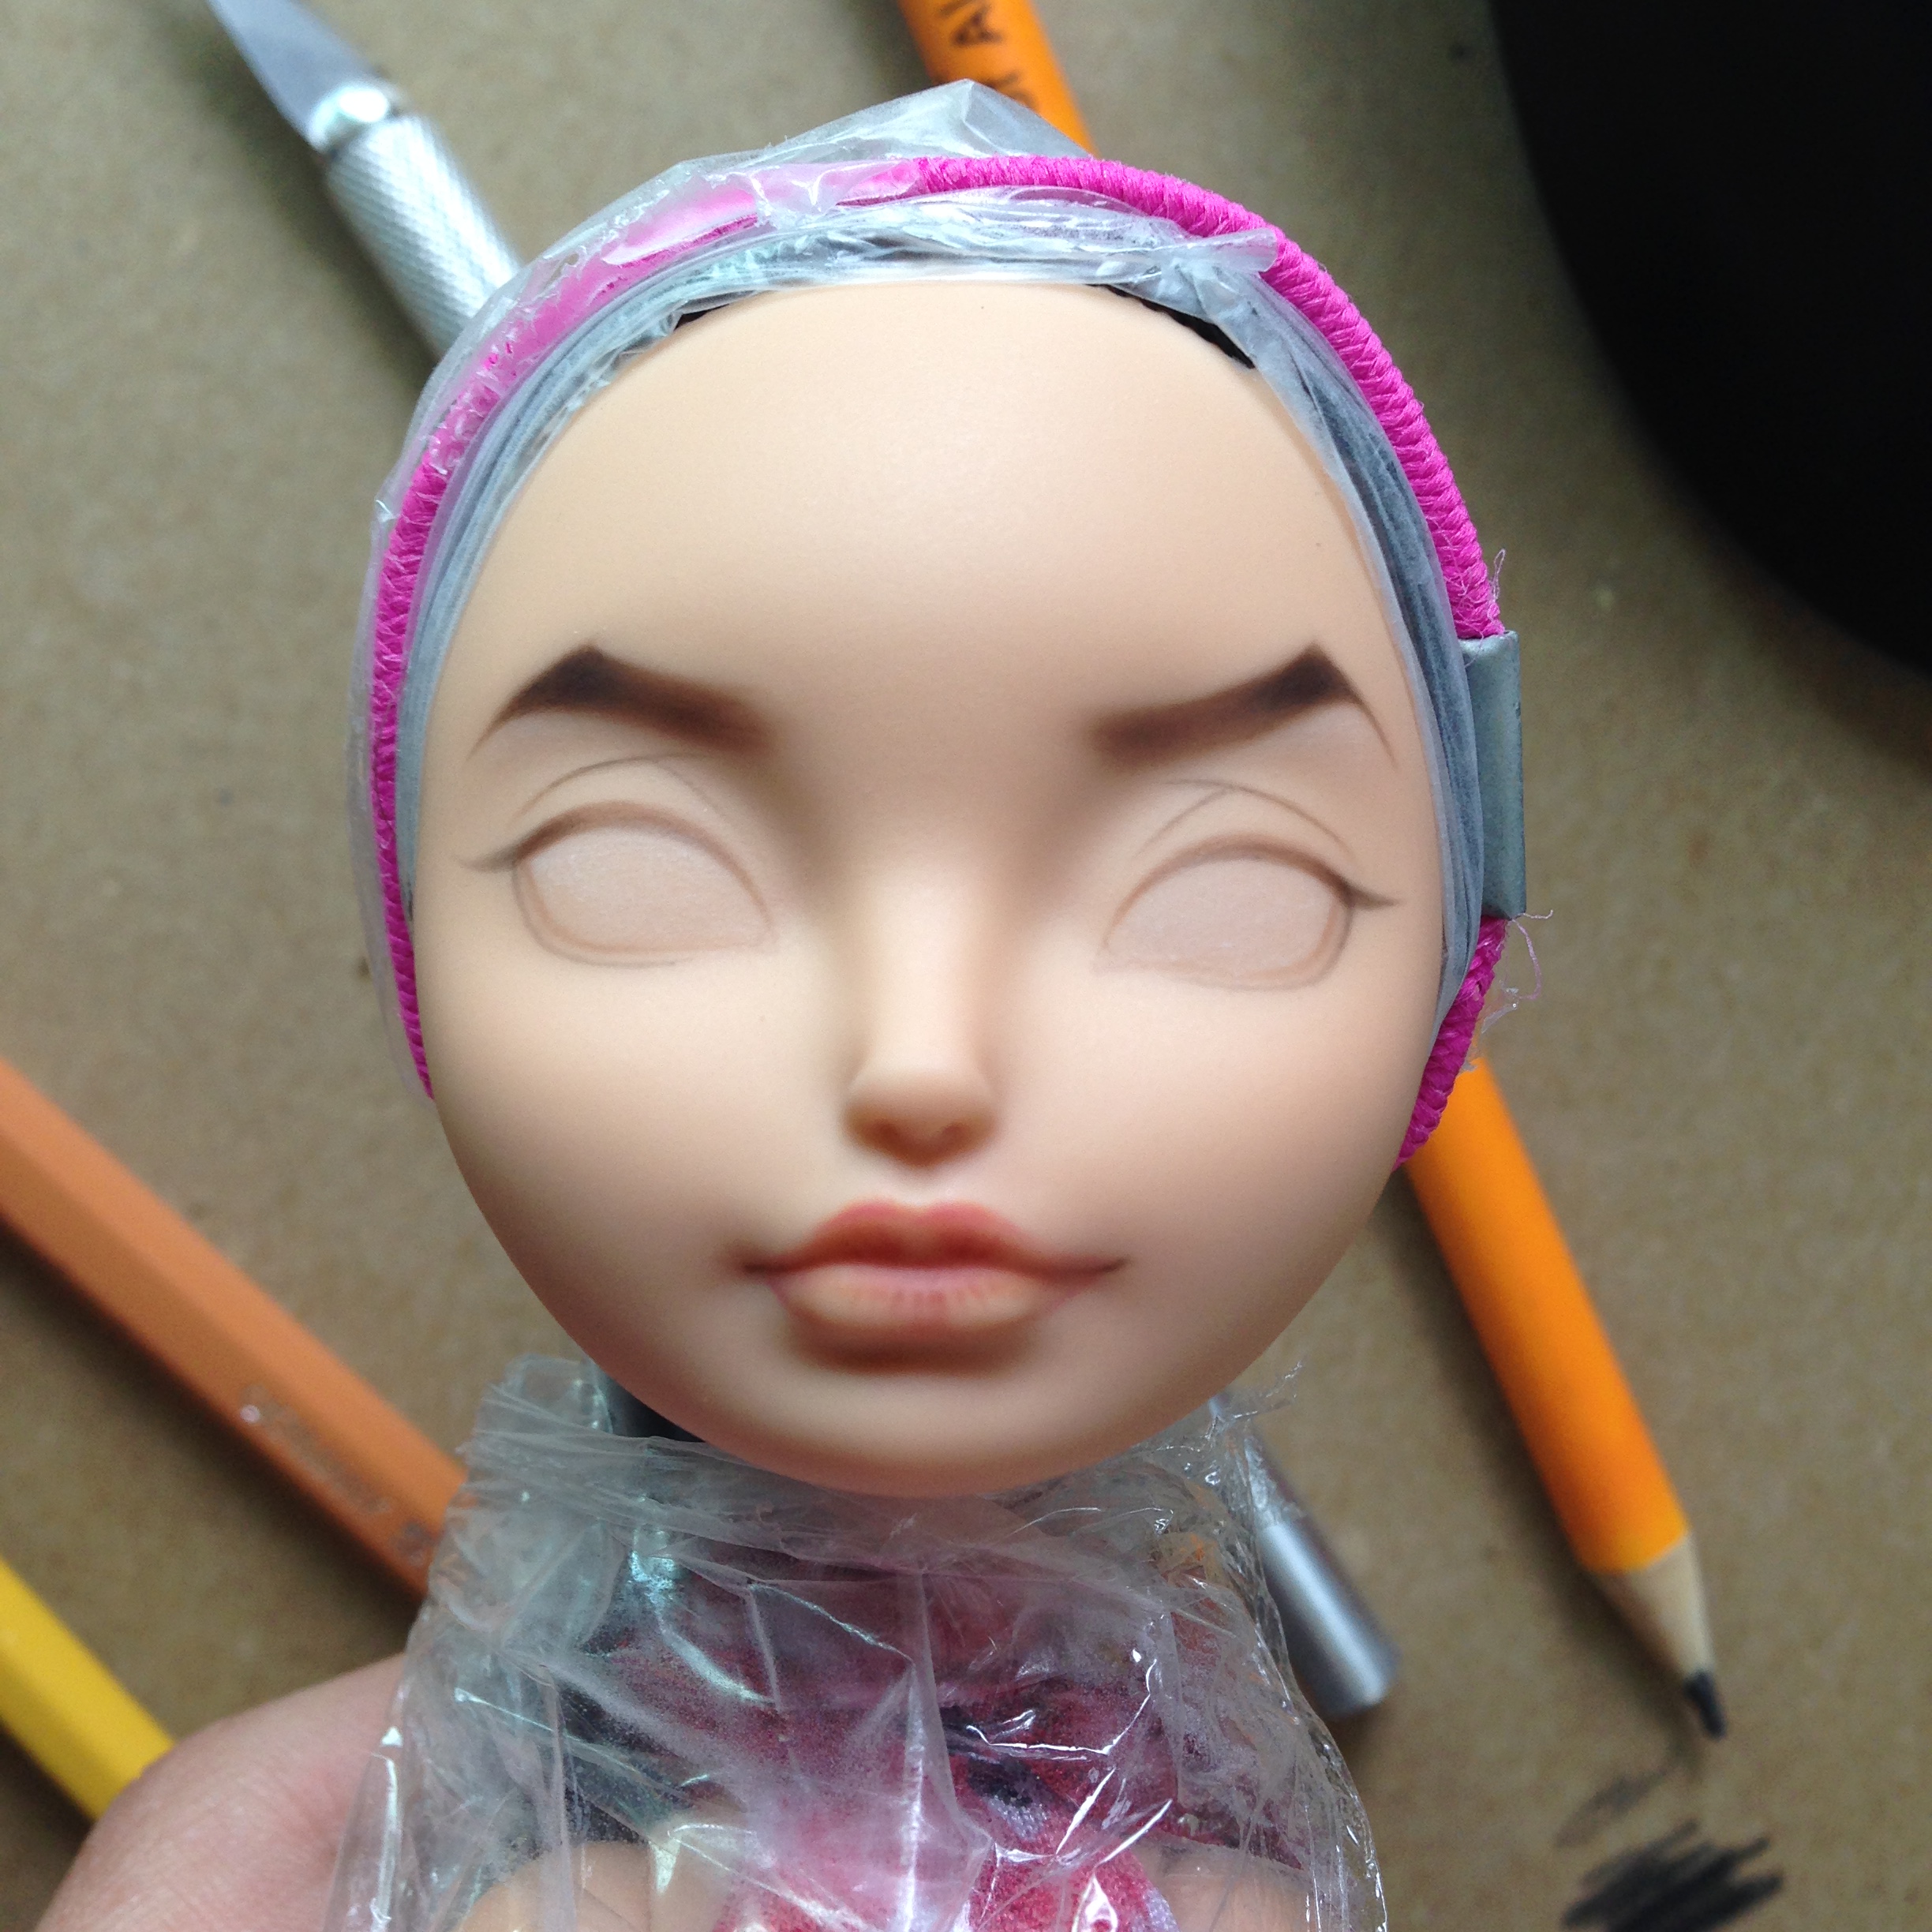
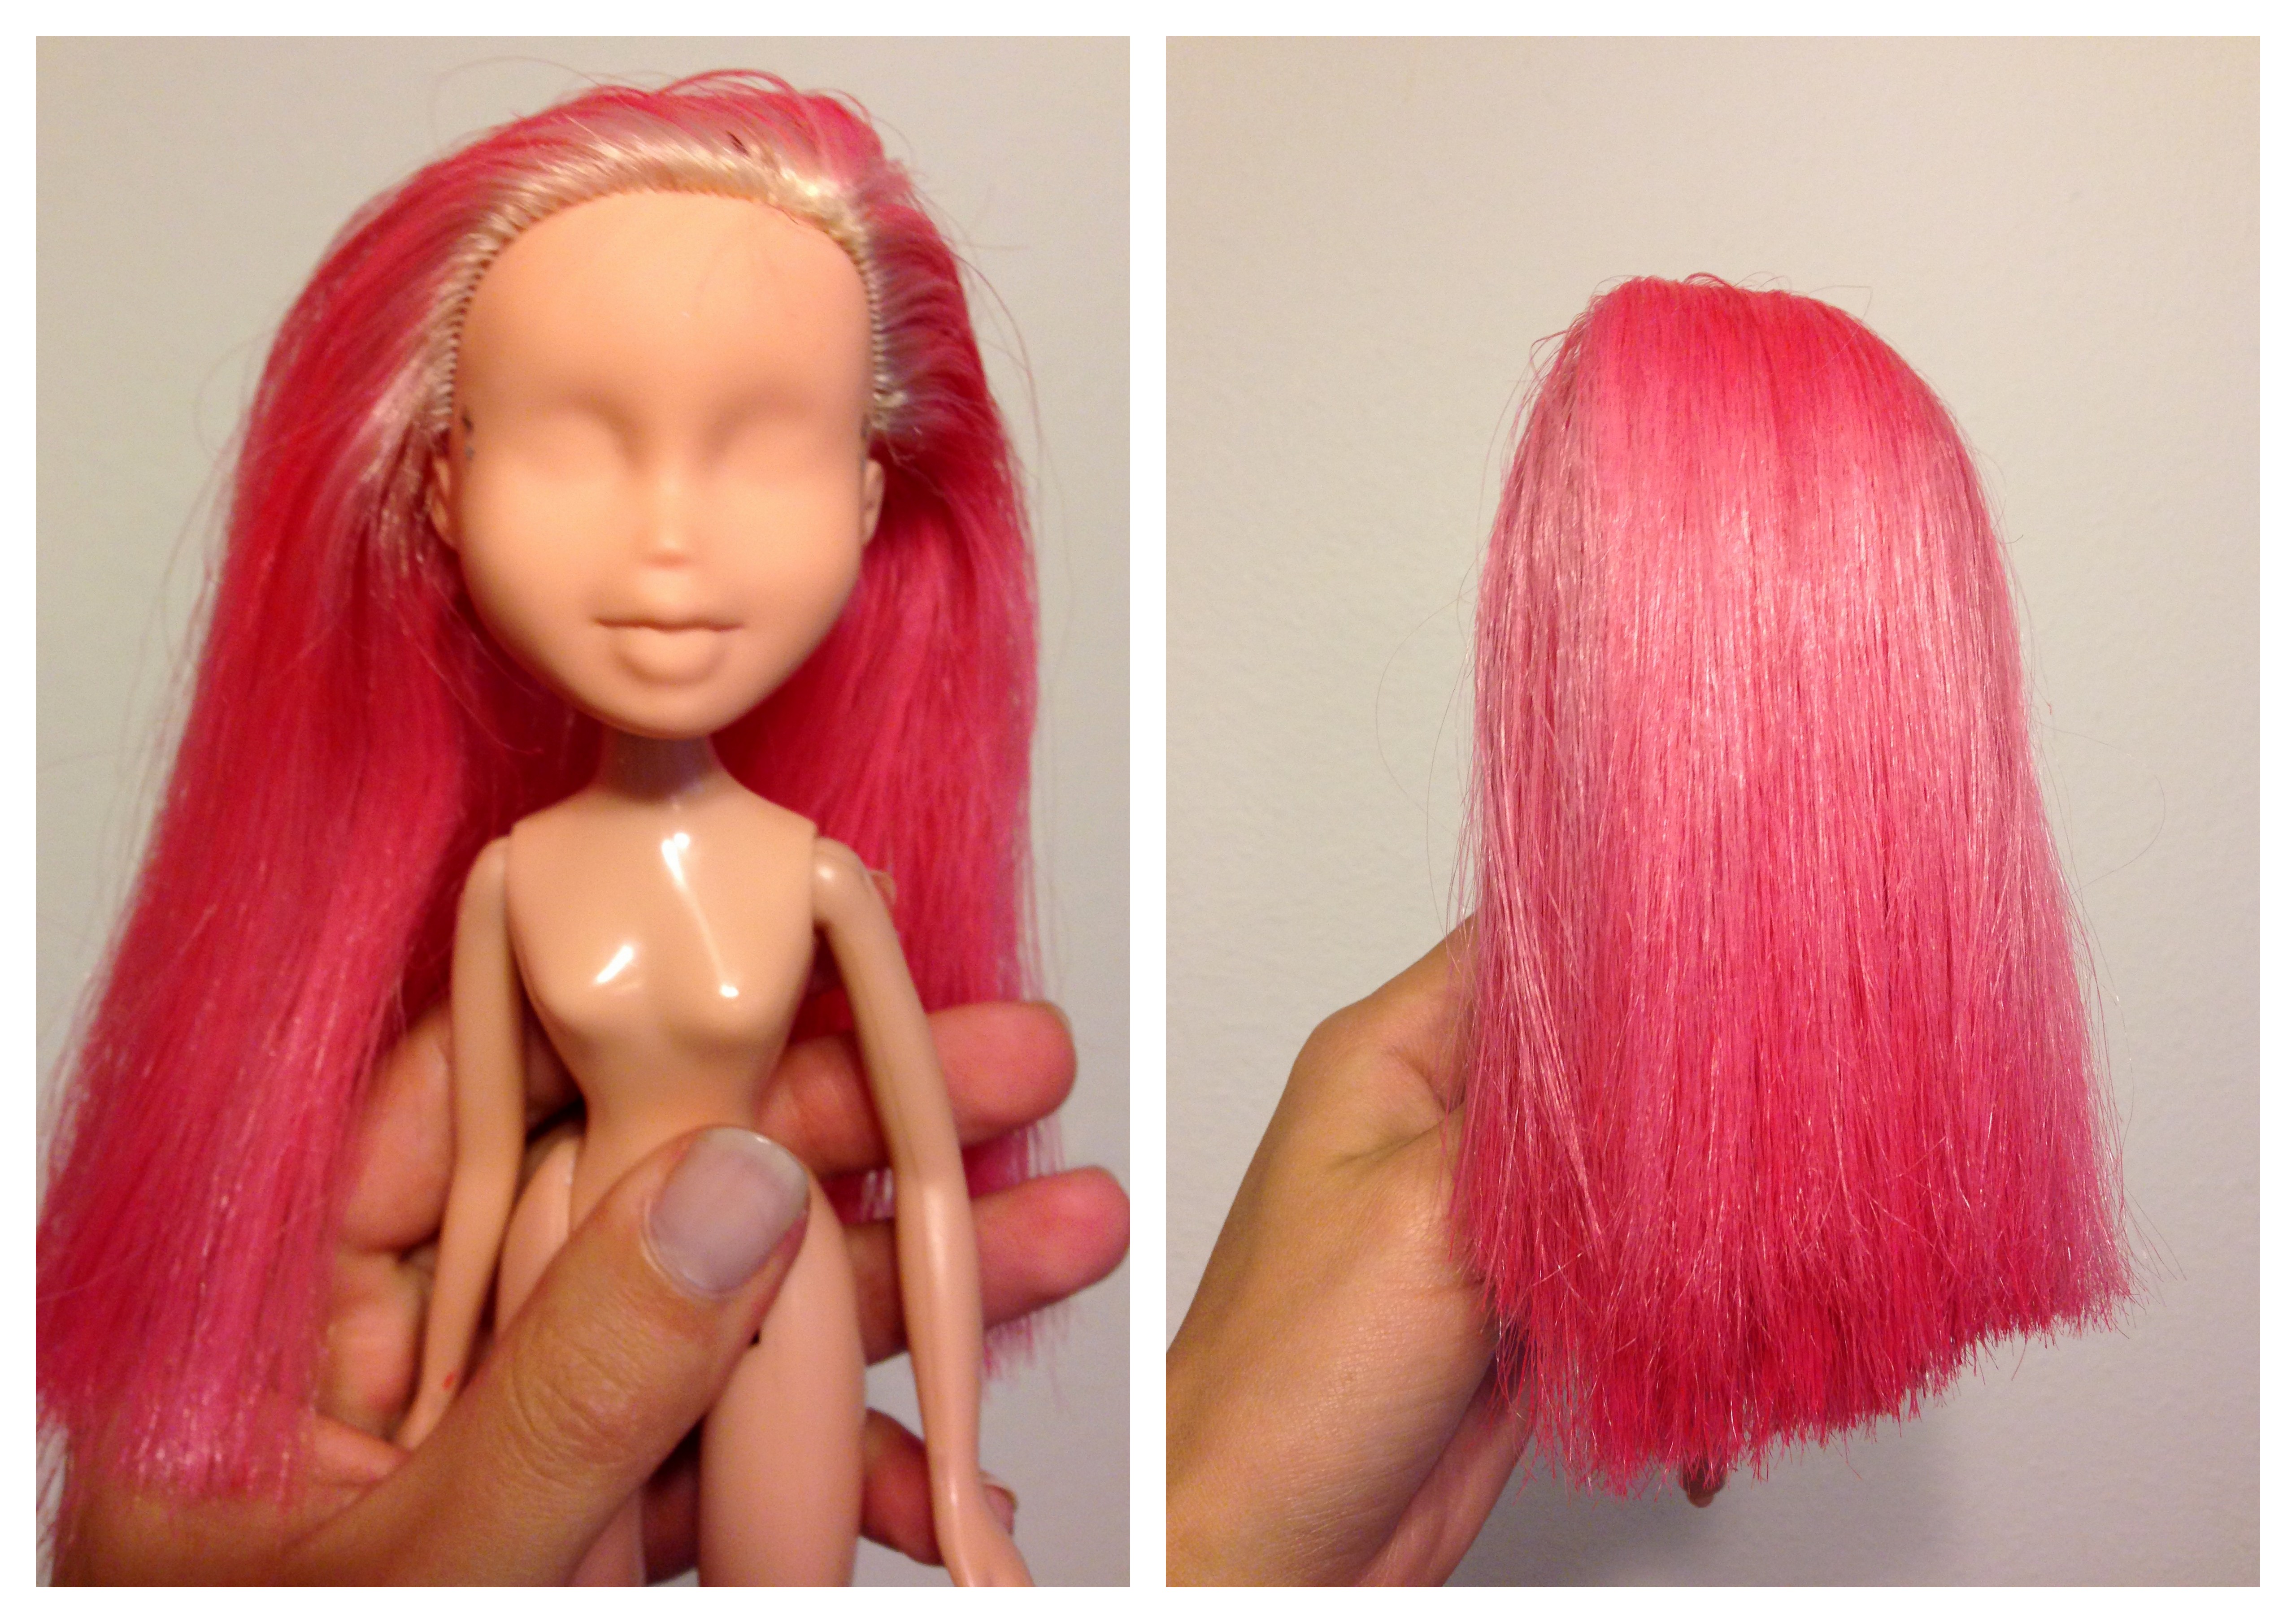
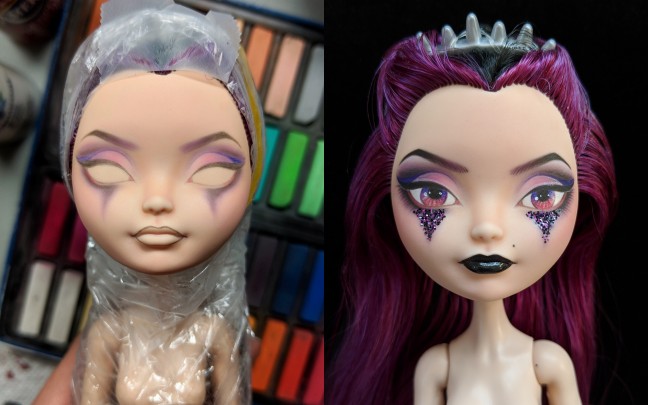
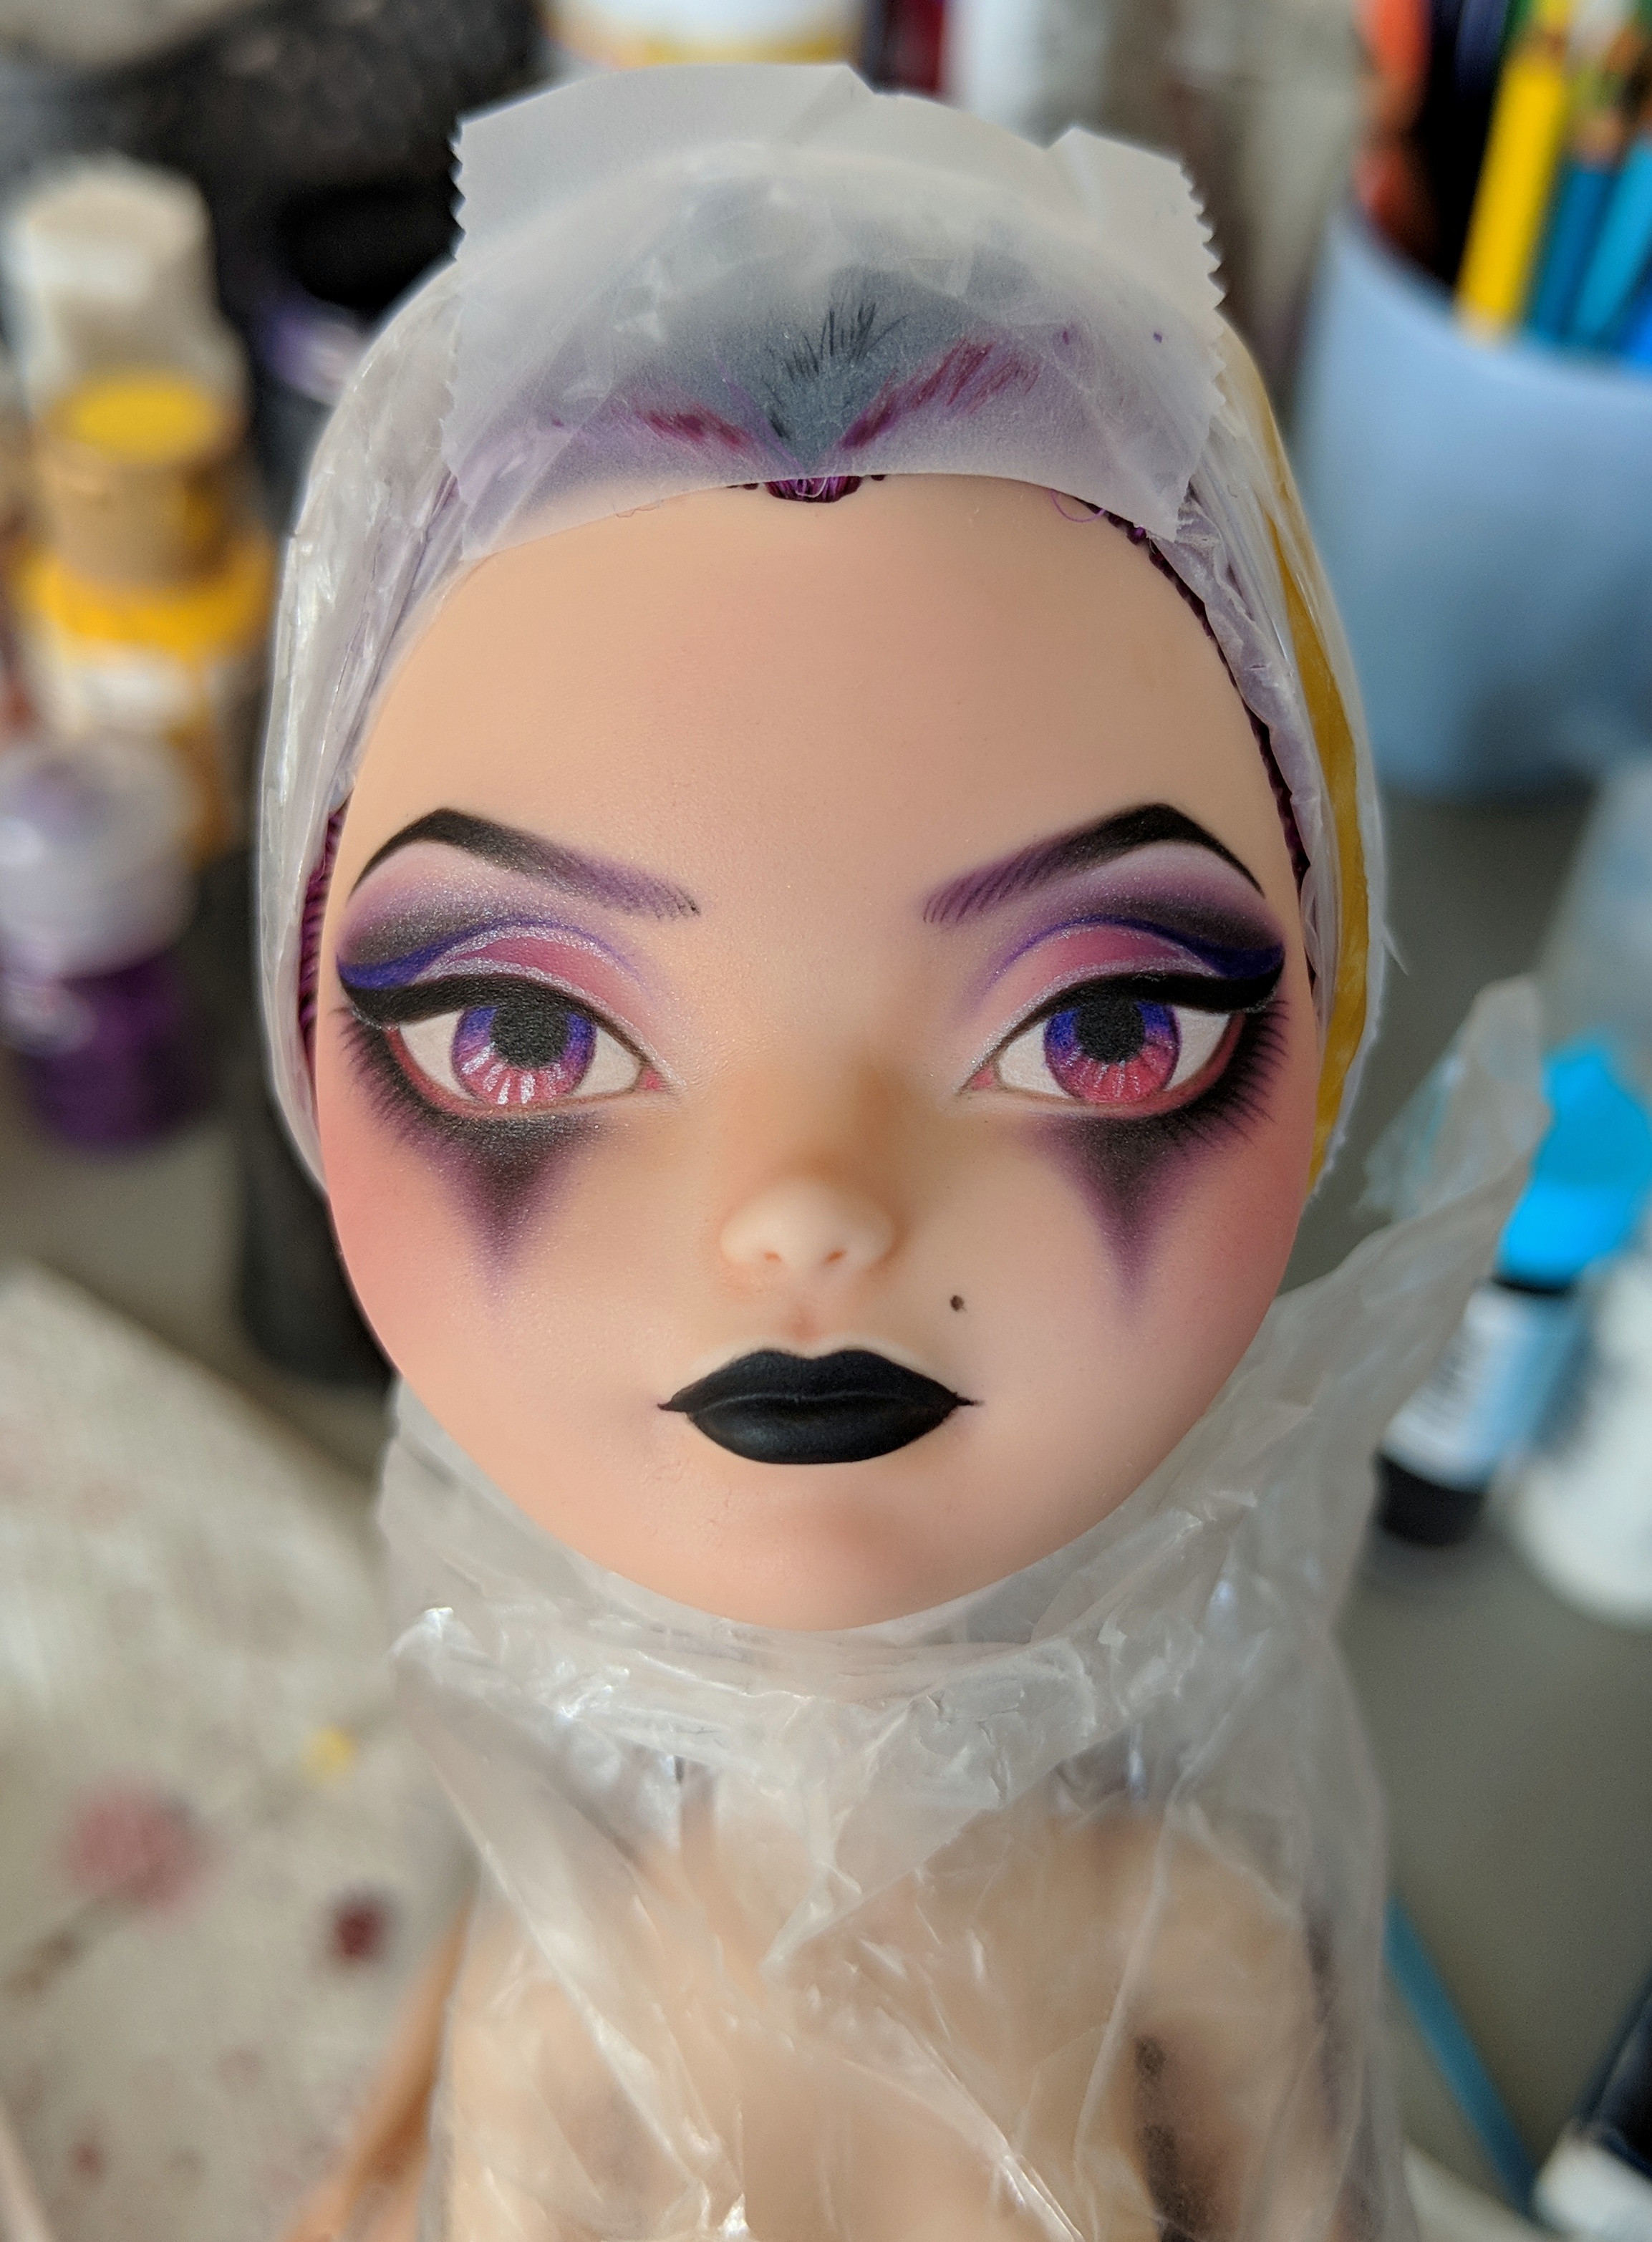
Disclaimer: this is a list of materials for the type of repainting or faceup that I most commonly do. I use watercolor pencils and chalk pastels for most of the colors/lines on the doll. I don’t use acrylic paint very often, although it is possible to repaint a doll using only acrylic paints and a bit of pastel for blush. If that’s your style, though, this materials list won’t be as helpful. Here’s a couple pictures of repaints using the watercolor pencil/chalk pastel method:

Some dolls I completed in late 2020.

Ok. Below is the list itself if you need something for easy reference. I would recommend reading past “The List” to read about some of my notes on brands/type of materials to purchase (and some photo examples of what I’m talking about in the list).

The complete set of basic repainting supplies you need to get started.

The List – 22 Essentials of Doll Repainting

  1. Watercolor Pencils
    1. Black
    2. White
    3. Medium Brown
    4. Dark Brown
    5. Red
    6. Light (green/purple/blue – whatever eye color you want to draw, unless you want to stick w/ brown eyes, in which case you already have that color)
    7. Dark (green/purple/blue – the dark version of whatever eye color you want to draw)
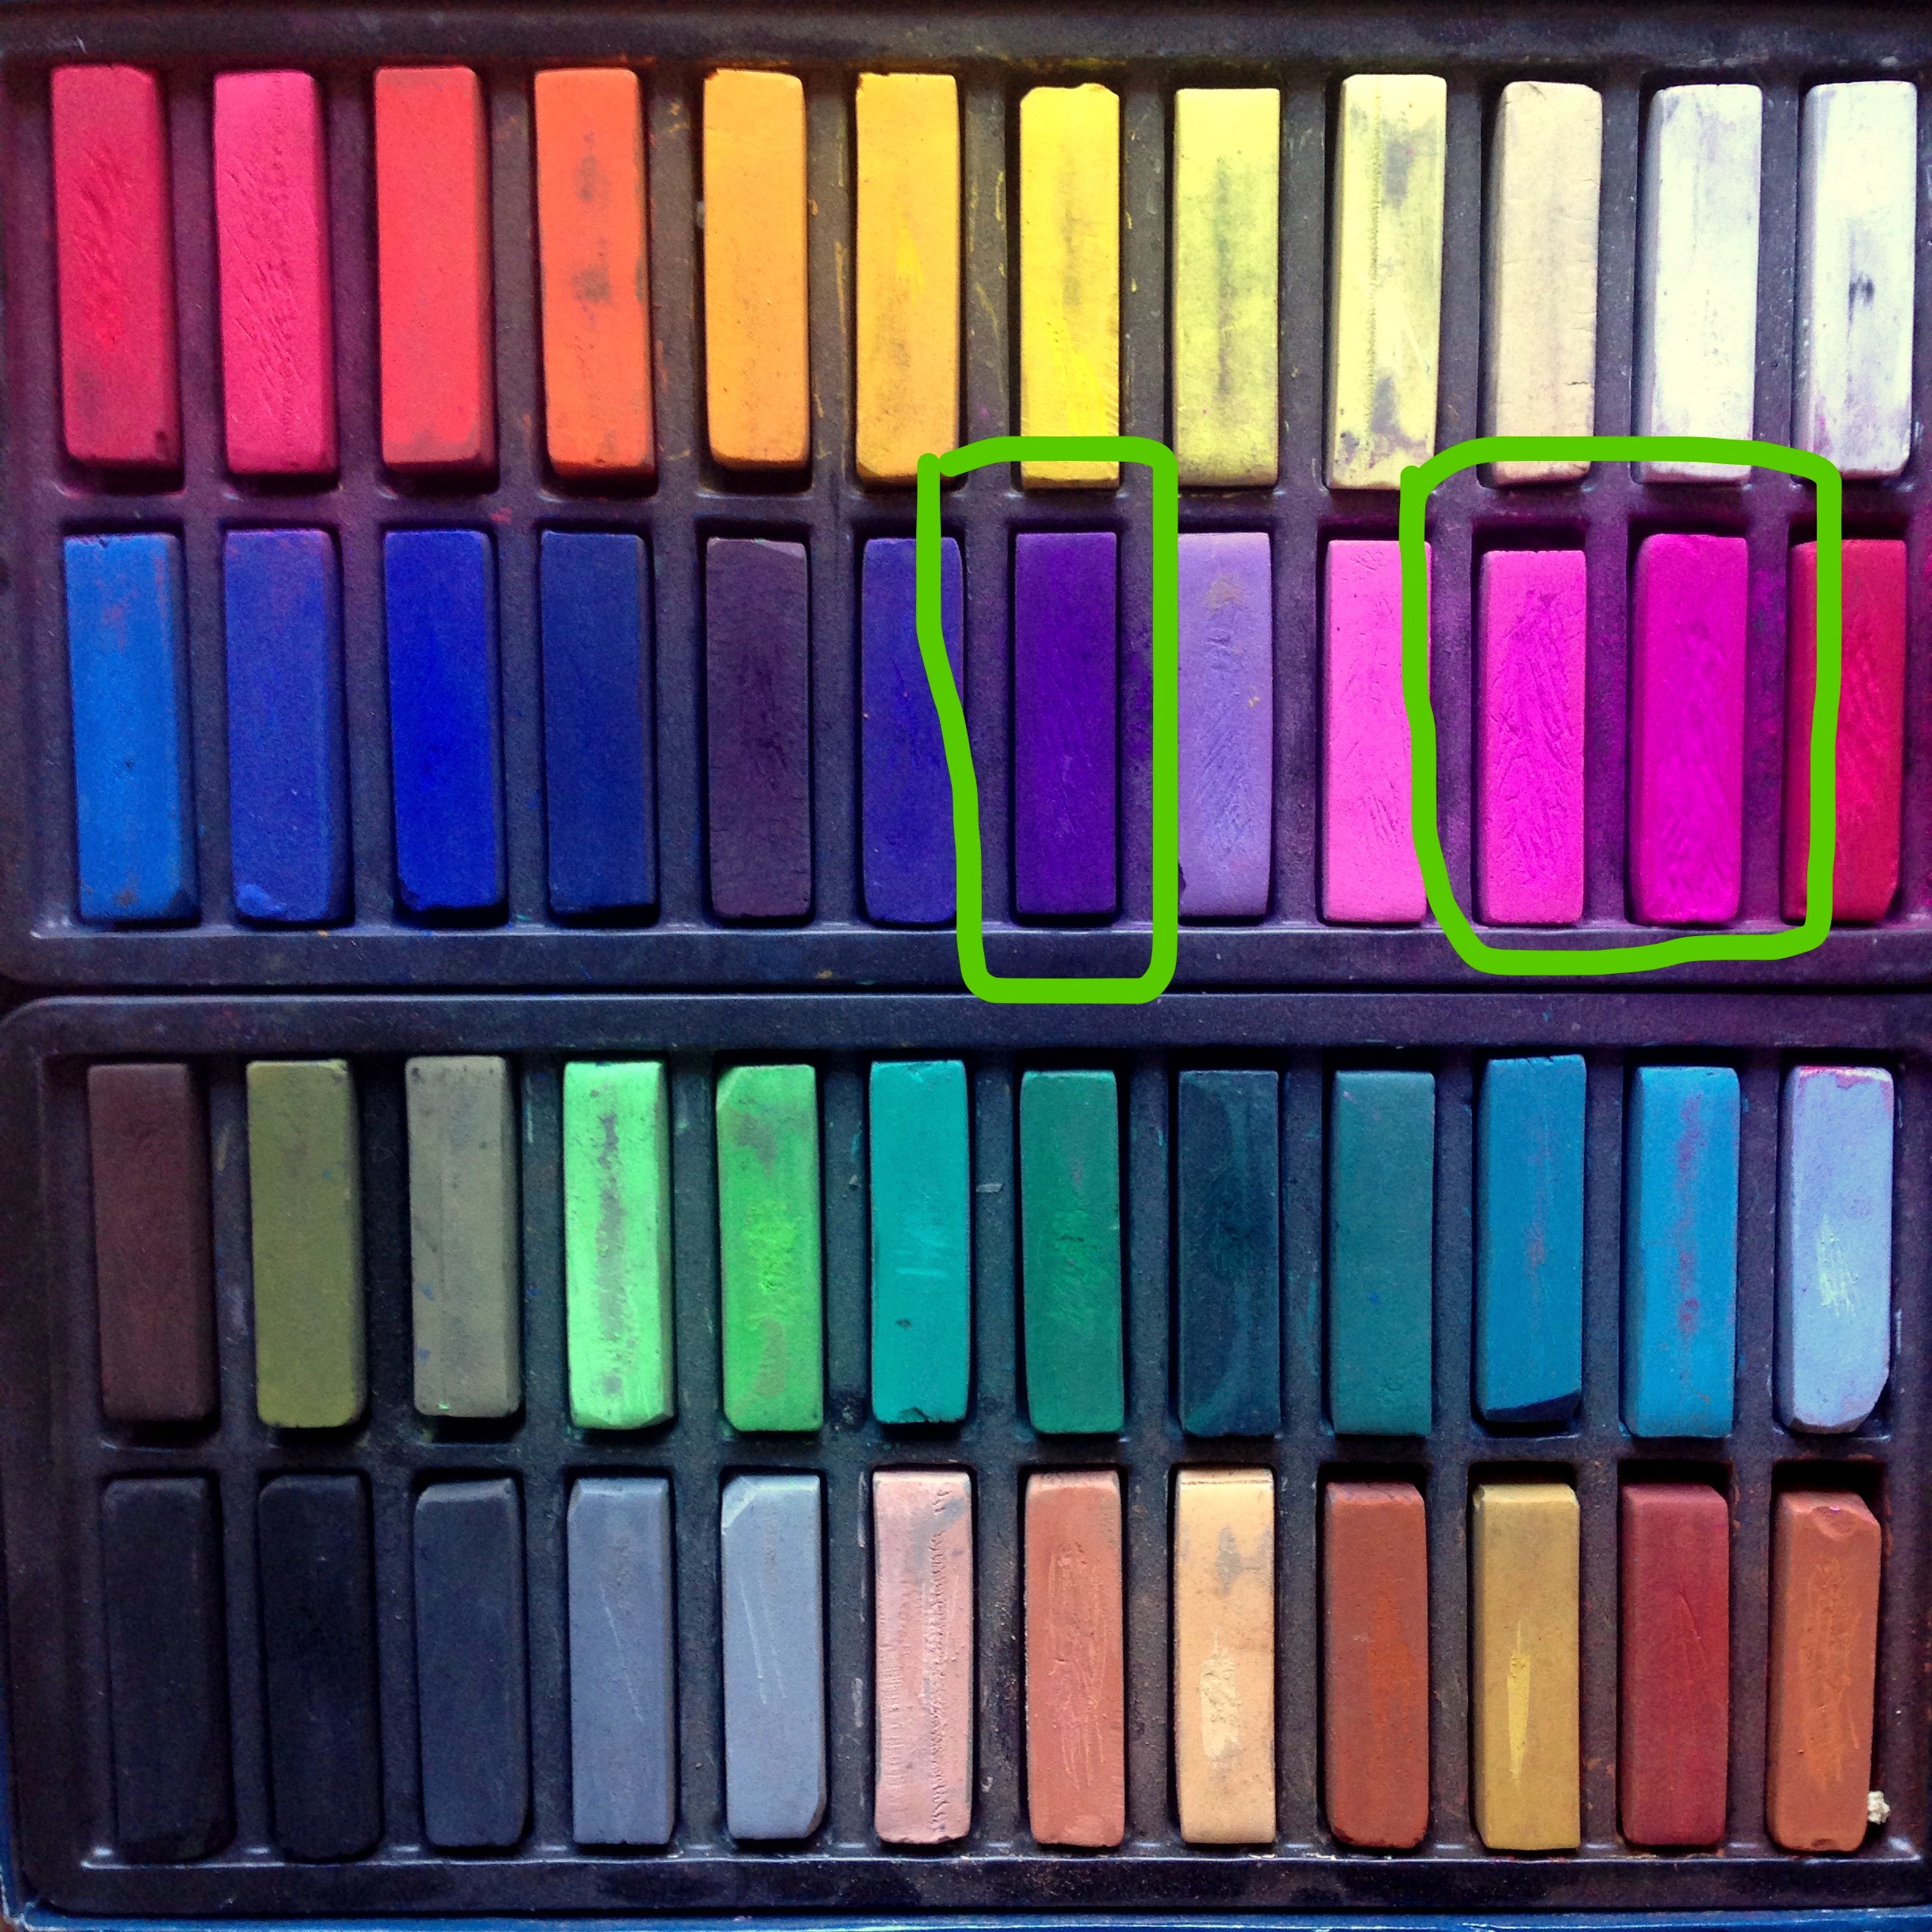
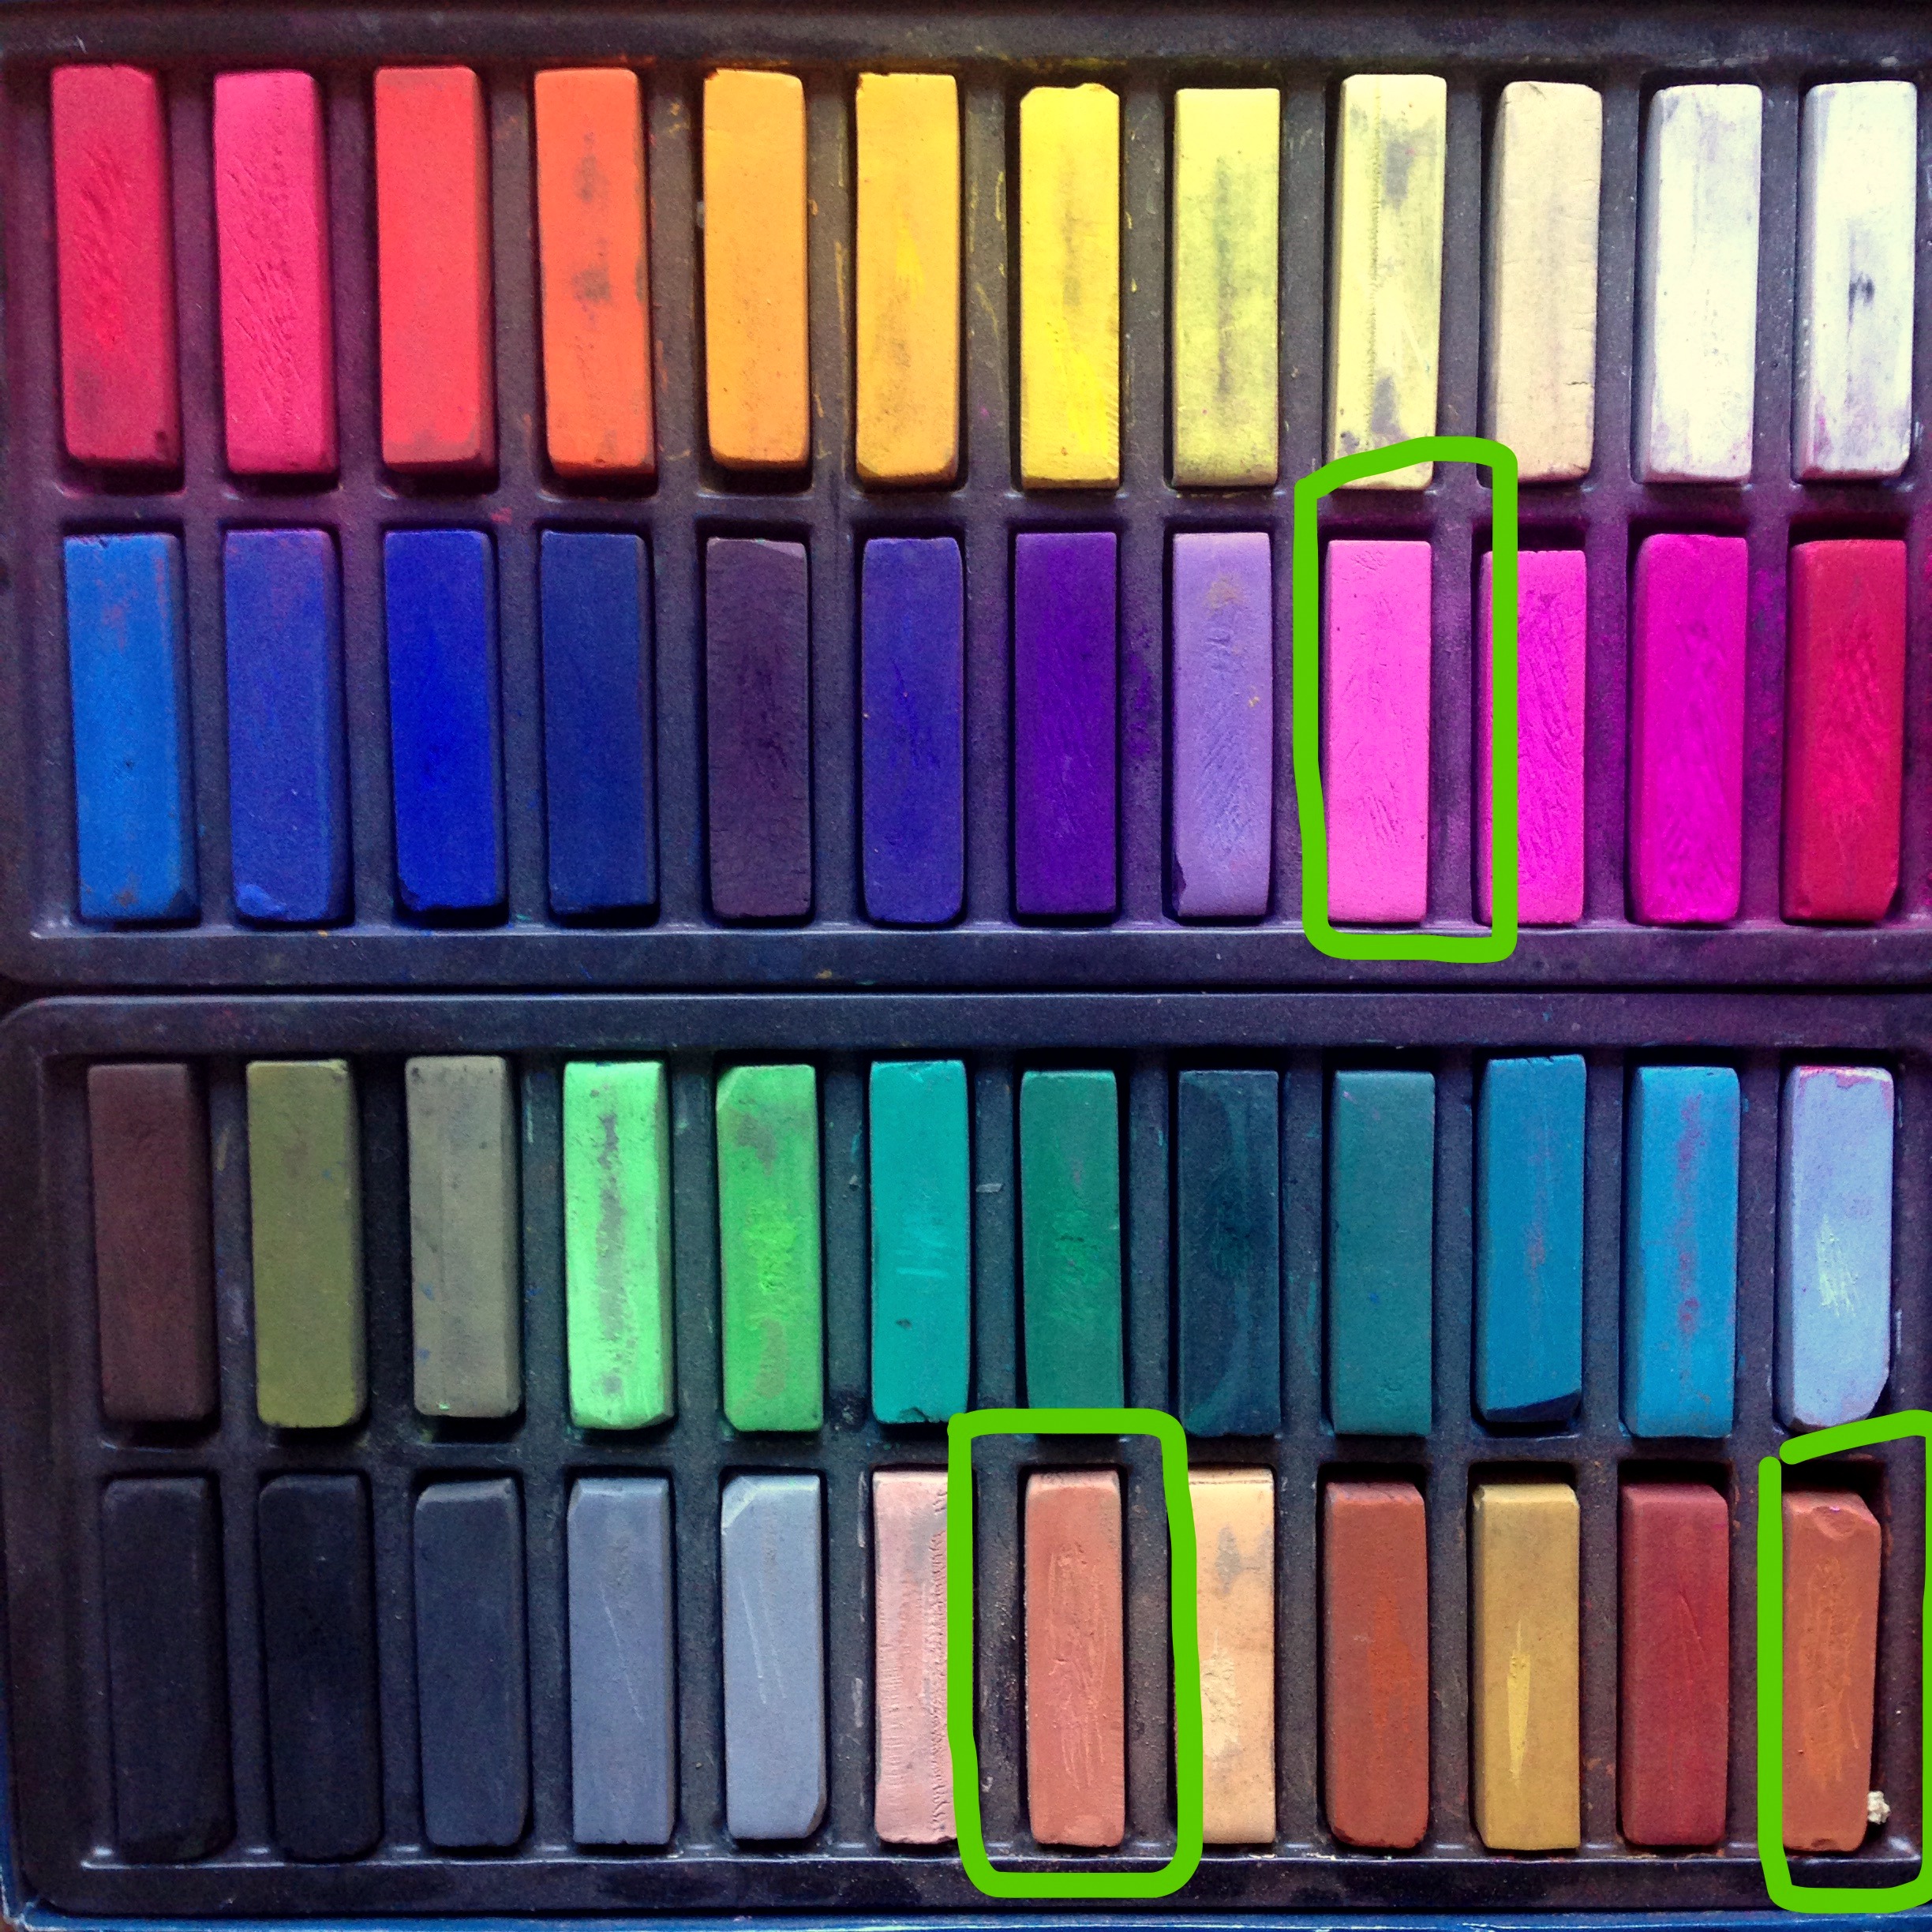
  2. Chalk Pastels (you might as well just buy a set of 24, see below in chalk pastel section for notes, but these are your bare-minimum colors that should be included in any set you buy:)
    1. Pink (go for a warm pink that has a bit of orange in it – this is for blush and you want something natural)
    2. Black
    3. Dark Brown
    4. Light Brown
    5. A color for lips (this will depend on the skin color of your doll. A reddish-pink is fine for lighter-skinned dolls, and a reddish-orange or reddish-brown is fine for darker-skinned dolls. You could also just use the pink from above that was meant for blushing the cheeks).
  3. Mr. Super Clear – Matt/Flat by Mr. Hobby (Mr. Hobby is the brand, Mr. Super Clear Matt is the name of the product)
  4. Gloss Varnish
  5. White Acrylic Paint
  6. Tools
    1. Small, stiff flat brush (I mean really small)
    2. Medium fluffy brush (this is for blushing cheeks, mine is an eyeshadow brush)
    3. Small round brush (cheap, used to apply the varnish/gloss to eyes and lips)
    4. Good pencil sharpener
    5. Toothpick
    6. Eraser

Ok, that’s the list! That’s all you need.

It seems like a lot.

Won’t lie – this isn’t really the hobby that’s easy to “just try out and see if you like it” because it requires some specialty art materials. I think it’s reasonable to expect to put $50 – $60 into an initial set of supplies for repainting a doll, depending on how expensive your brushes are. For more details on the brands and where to find each of the above items, read on.

Watercolor Pencils

The bad news: you have to buy the nice fancy artist ones from the art store. The good news: you don’t use very many and it takes a looong time to use up a pencil.

Using “The List” from above, below is a photo of the pencils (from my collection) that are the foundation for ALL of my repaints (except for the green, which is just an example of the light/dark colors you want for eyes – they can be replaced with any color you like).

The basic colors for repainting dolls (with green pencils as an example of light/dark eye colors)

What to get: look for watercolors pencils sold individually in the fine art section of your local art store. Watercolor pencils are NOT the same thing as colored pencils, and both are often sold individually near each other, so make sure you’re selecting from watercolor pencils and not color pencils.

The reason watercolor pencils, and high-quality ones, are so necessary is that it can be hard to build up vibrant colors on doll heads made from soft vinyl plastic (like a Barbie head). Watercolor pencils have a higher concentration of pigment in their “lead,” and they do not contain wax, unlike colored pencils. Lower quality watercolor pencils do not have the intensity of pigment you will want for repainting dolls. Don’t bother settling for a cheap set, even if it seems like a good price. I recommend buying them individually, too, and not buying a set. I have exactly 27 watercolor pencils and only about ten are common colors that I would expect to be in a set of 24. The others are more unique colors suited to my personal palette preferences. I bought all of mine individually. I have been repainting for 6+ years now and I’ve gone through two white pencils and two black pencils, but all the others are the original ones I bought six years ago and most are not even 3/4 used up. The black/dark brown/medium brown/red in the above photo are the only ones more than halfway gone – the white was recently replaced.

Brands: look for Faber-Castell and Derwent brands. Both of these are pretty commonly at my local art store (based out of Denver, US). If you get Faber-Castell, you want to look for Albrecht Durer watercolor pencils. I think Faber-Castell has a slightly cheaper type of watercolor pencil called Goldfaber, and I’ve never tried this type.

If you get Derwent, I use their Inktense pencils which are basically watercolor pencils, and can be used like watercolor pencils but are technically a little bit firmer and brighter, according to Derwent. Honestly, I only have a few of the Inktense pencils because my art store was often out of the colors I wanted, but the select few I do have seem more pigmented and better for repainting than the Faber-Castell ones. So I would recommend Derwent Inktense over Faber-Castell Albrecht Durer.

I think both of these pencils sell individually for $2-3 each.

Where to buy them: when I say “go to your local art store” I mean an art store that sells these pencils individually and not in a set. If you have a Michaels or Hobby Lobby large enough to sell these individually, that’ll work. I prefer the local-local art store that is not a massive chain whenever I can, so I go to the fine art art store for my pencils (or I did, ages ago when I first got them).

Chalk Pastels

Faber-Castell Goldfaber Studio Soft Pastels, Set of 48

That’s the set I use.

Chalk pastels are often sold individually at fine art stores, BUT unlike watercolor pencils, it will likely be more economical to just buy a set of 24. The pastel colors in “The List” are the bare minimum colors you want to be included in your set. If you were to buy those colors individually it would probably run you about $2.50 per pastel stick (they’re 3-4 inches long), OR you could just buy a set of 24 half sticks for about $10-15 dollars.

What to buy: Buy THESE or something similar. That’s a link to Dick Blick (common art store in the US), specifically the Faber-Castell Goldfaber Studio Soft Pastel set of 24 half sticks. I use the same set with 48 colors (picture to the left), but the 24 color set has the colors that you need (and I don’t use most of the 48 set for repainting dolls). The 24 color set is about $10 right now on Dick Blick, but I’ve seen it for around $15 in art stores.

I’ve had this set of pastels for even longer than I’ve been customizing, because I used them in an art class back in middle school (that was a LONG time ago). I haven’t gone through any of the half sticks yet; they should last you years and years.

There are probably cheaper sets of these chalk pastels, or soft pastels, out there. I haven’t used those, so I can’t say whether or not they work. Faber-Castell is a pretty high-quality brand in general, so I would expect them to be more pigmented than cheaper brands. And more pigment is what you want.

If you’re at the art store, and/or reading about doll customization online, you might hear of something called Pan Pastels. These are soft pastels that come in a shallow disc and cost the approximate value of your first-born child, and I don’t know why anyone would pay that much for pastels for doll faces. No offense to all the great artists who do, I just don’t think it’s a necessity for a beginner at this. Or for me.

Mr. Super Clear

Here is a picture of what you’re looking for:

Mr. Super Clear Matt by Mr. Hobby.

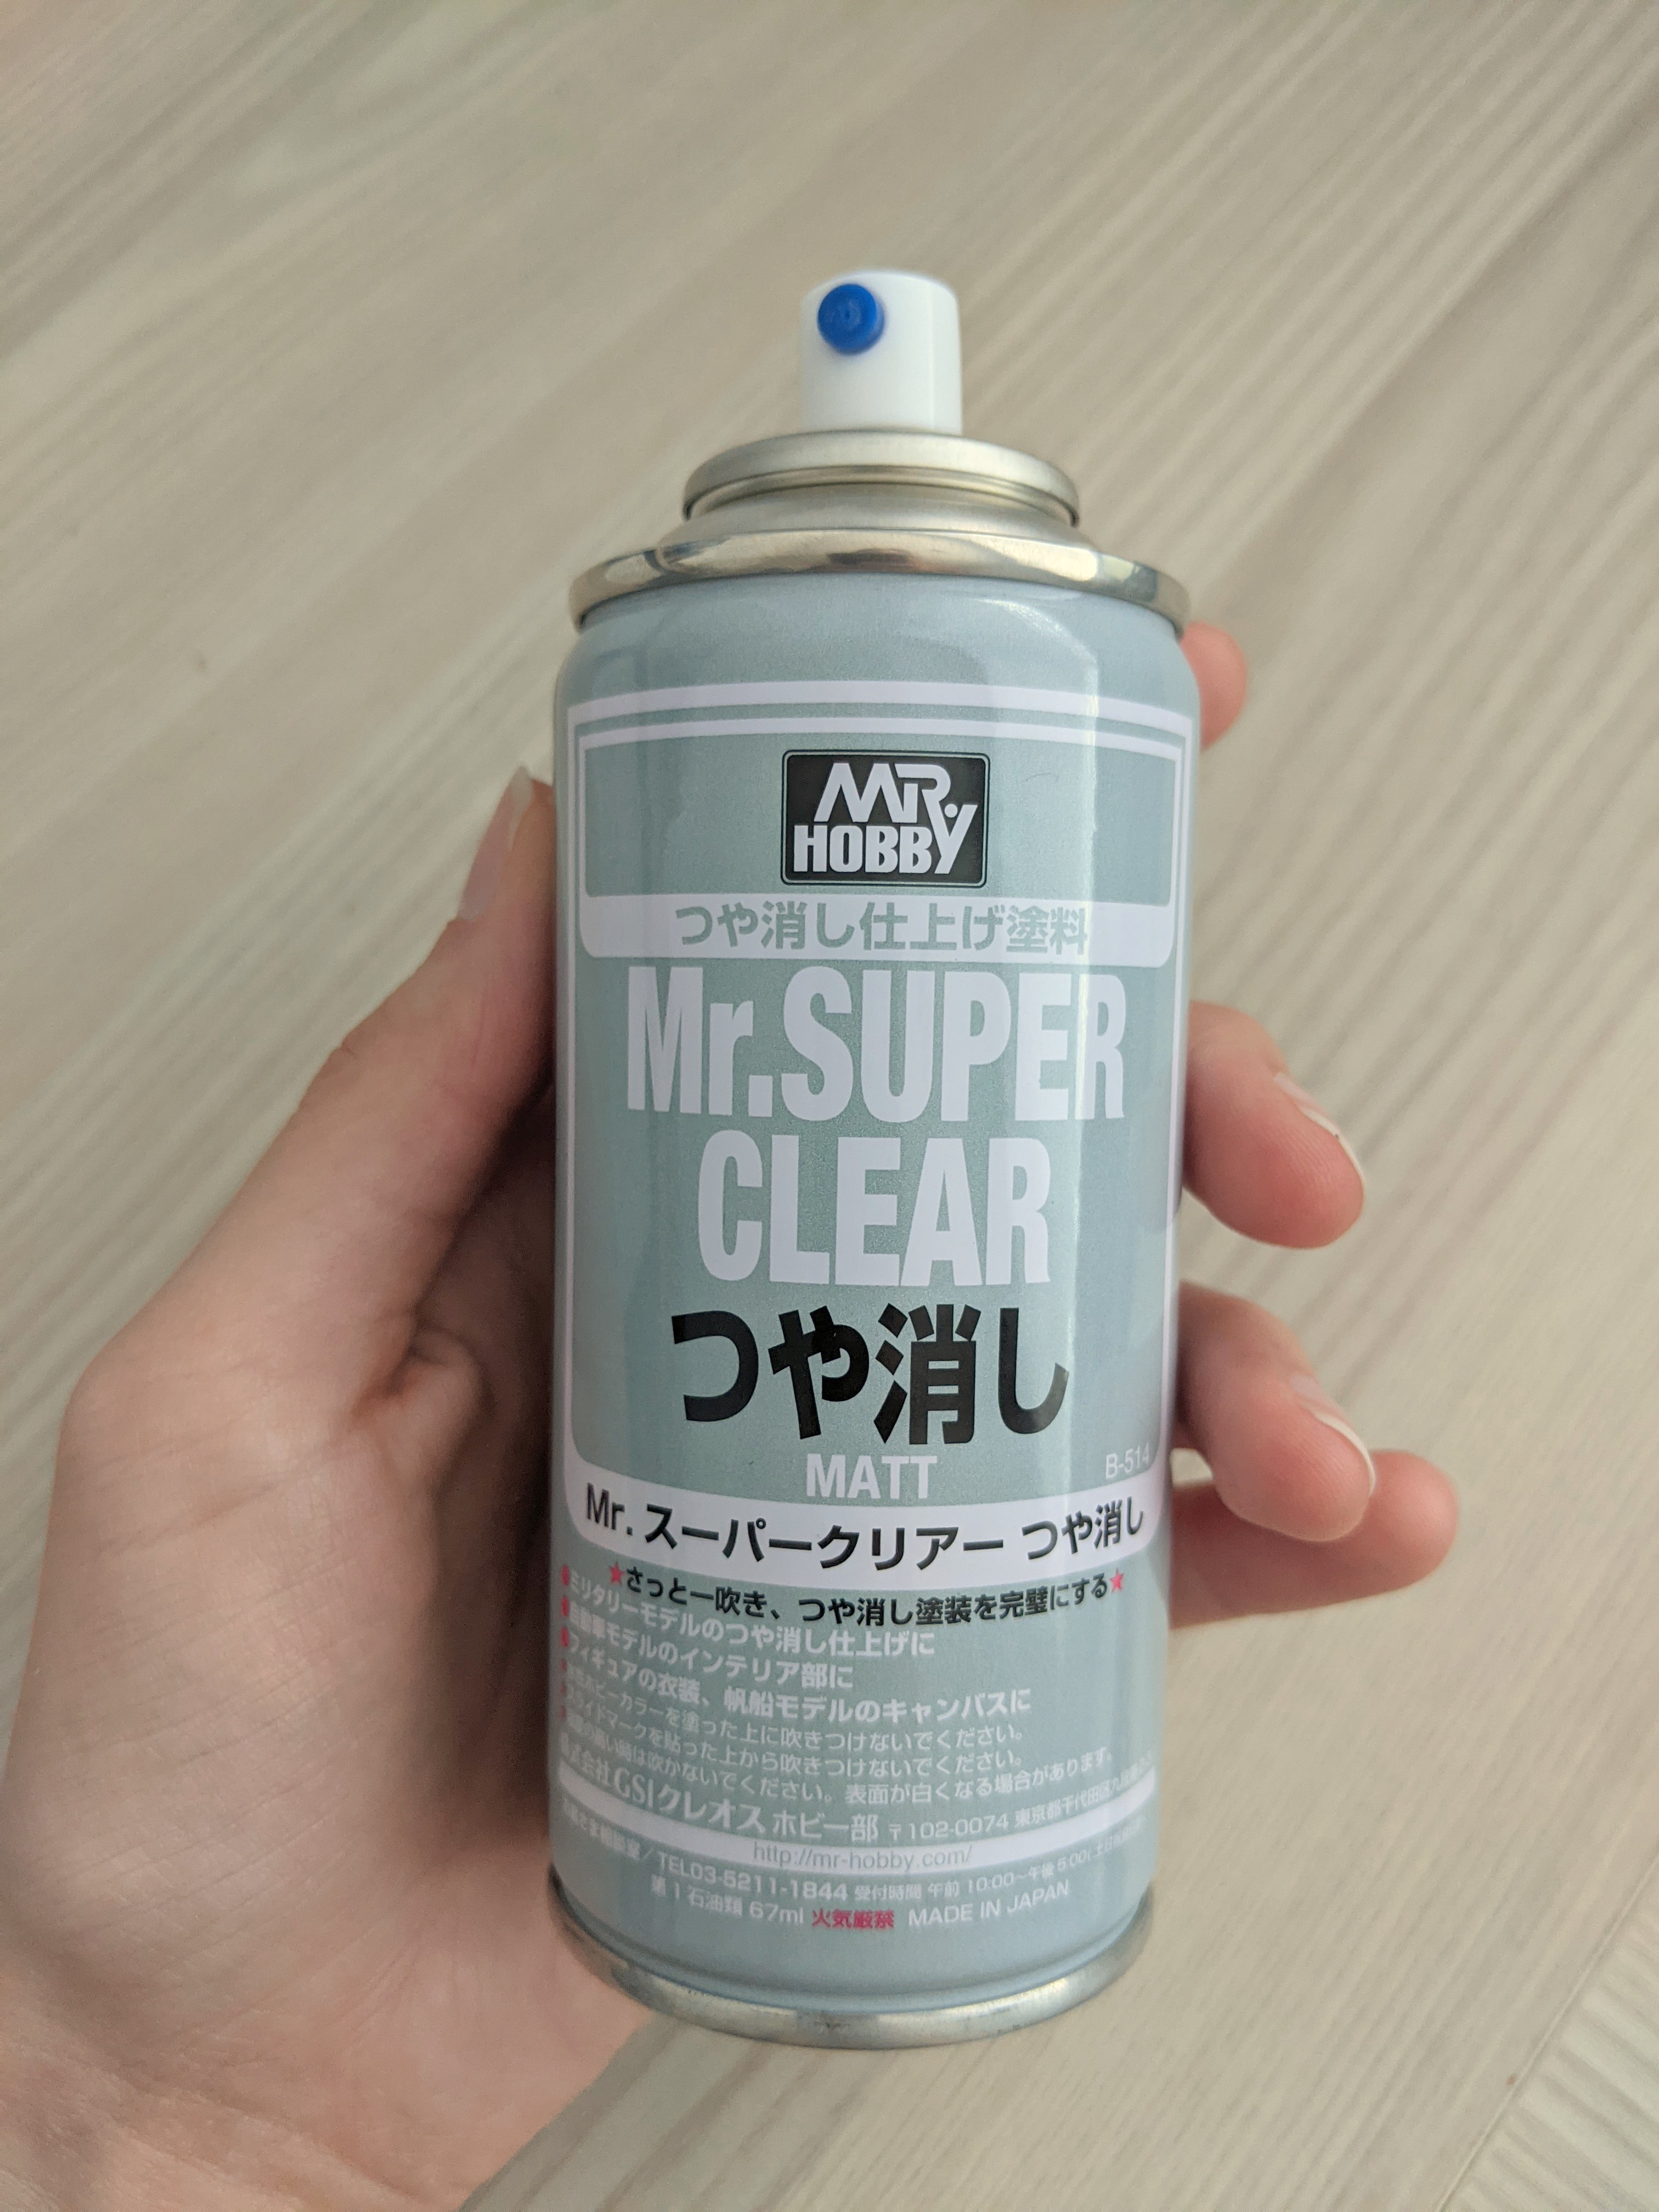
This is used to prime the surface of the doll’s head for repainting, to help build up pigment, and to seal the pigment in once it’s on the doll’s face.

MSC is different from many other sealant options out there: it has a tooth to it, or a slightly rough texture similar to paper. Other sealants are normally smooth and without texture, which means there is nothing for the watercolor pencil pigment to stick to. So yes, you really do need MSC and not other sealants.

What to buy: Mr. Super Clear is normally referred to as MSC in the doll repainting world. It comes in “Flat” OR “Matt” depending on how old the can is. Most cans I find now are “Matt.” To be clear, Flat and Matt are the same product, “Flat” was just an older label that was phased out several years ago and replaced with Matt (WHY is it not “matte?!”).

MSC Matt also comes in two forms – UV Cut and the normal one (like the can above). The UV Cut MSC is normally a dollar or so more expensive, and has a little red “UV-Cut!” text on the front of the can. It makes the pigment under the sealant more UV-resistant, which is good, but I don’t think UV Cut is necessary for a beginner if you want to save a dollar or two and just get the normal stuff.

Just DON’T get MSC “Gloss.” It’s, well…a gloss. And it will make your dolls look creepy and shiny all over.

Where to buy: I use to buy MSC on Ebay, mostly. It would be about $15 per can (sometimes $10 with $5 shipping) and was always available.

Currently I buy MSC at my local hobby store, which is, in fact, different from my local art store and my local craft store. A lot of hobby stores will carry Mr. Hobby products, MSC Matt included, because they’re used a lot in the miniature modeling world. A hobby store is the kind of store that might sell gaming miniatures, tabletop games, RC cars, model planes, stuff for miniature trains/railroad terrain….you know, nerdy stuff that like.

What about other, cheaper options: MSC Matt is kind of the gold standard for doll repaints. Just get it. It’s an aerosol and has to be sprayed outside and all that, but from the research I’ve done nothing else out there really seems to get equal results. The can should last you a while – I get a LOT of repaints out of each can. It’s worth getting it in the beginning, because if you don’t, you’ll probably get frustrated 2-3 repaints in and end up buying the MSC anyway.

Gloss Varnish

There’s mine. It’s a very old bottle from my mom, actually.

This is used to brush over the eyes and lips of the doll to make them a bit glossy and more realistic.

What to buy: look for a small (1-2 oz) bottle of Gloss Varnish for crafts. There are different types of gloss. You’ll often see a high gloss, gloss, semi-gloss, satin, and matte finish options in the varnish section of the craft/art store. Personally, I prefer semi-gloss and satin finishes, which are less glossy than high gloss/gloss finishes. My bottle is a satin gloss, and if I put a few layers on I can get a high-gloss, but I often don’t want to.

The varnish is only used to make the eyes and lips glossy, and if you don’t want that, then you can skip this material entirely.

Where to buy: a craft store like Joanns, Michaels, or even the craft section of a Walmart should carry these little 2oz bottles. Some fine art stores carry them too, but it’s a little more rare (at least they’re not sold at mine. You can buy a gallon of gloss varnish, but not 2 oz). If you don’t live in the US or have no idea what Michaels or Joanns is, just go to you local craft store and you should be able to find some.

White Acrylic Paint

This is used to make the little eye reflection dots, or catch lights, in the doll’s eyes.

That’s mine.

What to buy: any 2 ounce bottle of white acrylic paint. It should be less than $3.50. You’ll need to water this down before applying it, so the fact that it’s the thin runny acrylic paint is fine.

Where to buy: craft store like Joanns and Michaels have tons of these, Walmart has them too, even Dollar Stores. You don’t need anything fancy.

Tools

These are the tools you use to apply pastels, gloss varnish, and catch lights to the doll’s face.

From “The List” here are my three most-necessary brushes (and a toothpick).

Note that none of these brushes need to be/should be expensive. You could get them at the dollar store if you wanted. This isn’t where you need to invest your money.

Small stiff flat brush: To the left, you can see the “small stiff flat brush” on the very left. It’s black, size 10/0 flat in a random brand from a random art store (keep in mind that brush sizes are not standardized so the size examples in this article might not be helpful). The brand really isn’t important, and you should go with a cheaper brush over an expensive one. What’s important is that it be a flat brush, small enough that you could imagine applying eyeshadow to a Barbie with it, and have short fibers (this is what will make it a bit stiffer). This brush is use to apply pastels to the eyes (eyelids, really), brows, and lips.

Medium fluffy brush: Above, you can see this brush in the middle. It’s actually an eyeshadow brush from the grocery store (brand is EcoTools, not sure of the size). This brush is used to apply pastels to the cheeks, so get a size that you think would be good for that. The brush I use is very soft, which is great at getting very even blends of blush and shading – you want a soft fluffy one for sure.

Small round brush: Above, you can see this brush on the right (it’s the one that is not a toothpick). Honestly, I just grabbed a random brush from my collection of tiny brushes to use as an example. This brush is used to apply the varnish to the doll’s eyes and lips. It shouldn’t be expensive, because the varnish will likely mess up the fibers on the brush anyway, and you might have to replace it more often. The one I use right now is size 2/0 from Artists Loft, the cheap Michaels brand.

Toothpick: You want a toothpick with a pointed end. This is for applying the little white dot for a catch light inside the doll’s eyes. It could help to even file down the end of the toothpick using a nail file or emery board to make it smaller. Depends on how small/large you want your eye dots. Keep in mind that you can always make them larger, but you can’t go smaller than the end of your toothpick.

Pencil sharpener: You want a pretty good sharpener to keep your watercolor pencils sharp (they need to be REALLY sharp to get the thin lines for eyelashes and such). I use this one: LINK

It’s a little more expensive (around $7-9 depending on where you buy it) but the blade is very sharp and I don’t have to replace it often. Look around at the art store, or the craft store, for a sharpener that isn’t the “bottom shelf” super cheap kind. Those blade are not as high-quality and they will get duller faster, which could end in you breaking the tips of your pencils while sharpening. A sign that your sharpener may not be sharp enough is if it’s breaking off the lead of your pencils.

So you don’t have to get the fancy one I use, just don’t get the super super cheap one either.

Eraser: I actually almost forgot this one! A nice eraser will make your life as a beginner repainter MUCH easier. I use a very very small one meant for a .03 mechanical pencil. It’s the replaceable type, I just keep it out of the pencil and in my little area for tiny doll things.

I like this size because it’s very, very precise. You can use any type of firm eraser (for bigger areas I often use a normal pencil eraser) but you need to be able to get into the small areas of a face mold, so look for a pretty small one or one with a fine tip on it.

You can find these super tiny erasers for mechanical pencils in the art store, either in the pencil section or the architect/drafting section (if that exists in your store). They normally come in a tube of 5 or so.1

And that’s a wrap! Do you disagree with my list, or think it’s missing something? Let me know in a comment!

Raven Queen Repaint Layer by Layer

Well, two years in between posting isn’t….that bad, right?

Hello again! And to those just joining, welcome to a very irreverent and self-deprecating blog about repainting dolls. Grammar-people beware, I did not proof-read this post.

In this post I’m walking everyone through a layer-by-layer (not step-by-step) process of repainting.

What’s a layer and why do I care?

When I talk about a layer, I mean the amount of pigment that can go on a doll without having to re-seal it to start with a fresh base of sealant.

If you’re a bit newer to repainting, the sealant that most people use is Mr. Super Clear, a weird (super toxic, horrible smelling) aerosol that can actually adhere to soft vinyl plastic and provides a bit of a tooth for watercolor pencils, pastels, and acrylic paint to cling to – anything smoother and it’s like trying to draw on glass. When you’re drawing on the doll’s face, or adding pastel shading, you’ll notice that the colored part of the face gets smoother and smoother until you can’t add more color without it scraping off color underneath. This is the point when you need to stop trying and just add another thin layer of sealant. The sealant will seal in all the work that you’ve done, while also providing you with another layer of ‘tooth’ which you can layer more pigment on.

If you use watercolor pencils, you should expect to use at least three, and up to 10+ layers on your doll. Three is not recommended. Five is probably a good number, depending on the skin tone of the doll.

Onto the repainting:

LAYER ONE!


IMG_20181008_182618
This is Photo 1, Layer 1.


So first, I prep the doll for repainting. I have a blog written about materials and prep somewhere around here (here, specifically), so if you want to back up a few steps, go check that post out.

The short version is: spray at least two to three base layers of MSC on the doll before applying any pigment. Some artists use up to five base layers. THIS IS SUPER IMPORTANT. That ‘tooth’ I mentioned earlier can take a couple layers to build up enough to allow a pencil to stick very well. You can technically start drawing on the doll right after one layer of MSC (I used to do this), but it’s such a miserable first layer and frustrating process because the pencil won’t stick very well.

So please apply three layers of MSC on dolls before you start working! You will thank yourself later.

So above, in Photo 1, you see that I’ve prepped the doll (three layers of MSC) and added in the outline of her eyes. The thick lash line looks sort of blotchy and not very dark because we haven’t layered any more color/sealant on top of it.

IMG_20181008_203216
Photo 2, Layer 1.

Photo 2 is still layer one. Because MSC is stupid expensive, I like to get as much done per layer as possible. This conserves the number of layers you need in the end.

So in Photo 2 I’ve built onto the outline of the eyes. She now has a lower and upper eyelids, tear ducts, a lower waterline, eyebrows, an outline of her lips, and some contouring.

Starting with the eyes: I’m going for a super dramatic, glam look with this doll so her makeup is going to get really dark. But even going in with black and dark purple chalk pastels I’m not getting a dark application. This is because pastels, just like pencils, need to be applied in layers.

I have not applied any white pencil to the whites of her eyes in this layer. That is intentional, and more on that below.

The lips: will eventually be painted black, so I just draw in the outline so I know where to paint. More on this in a couple layers.

The eyebrows: are outlined in pencil first, then filled in with pastels for a smoother look, because I blended two colors together.

QUICK TIP: watercolor pencils can also grip to the chalk pastel dust applied to the doll (over a layer of MSC, of course), which means that sometimes after you apply a layer of pastel dust, you can go over it with pencil and get darker/more vibrant colors. An example of this would be the solid line on this doll’s upper lid: I drew it in, then applied pastels, then drew over that line again and got a deeper color.

Contouring: Photo 2 (and most of photos) were taken at night in artificial light, so it’s a bit tough to see the contouring. The sides of her nose have been shaded with tan and pink, and pink has been added to her cheeks, forehead, and chin.

LAYER 2!

IMG_20181009_211417
Photo 3, Layer 2

Okie dokie, we’re on layer two. There should be a pretty big different between Photo 2 and Photo 3, above. Photo 3 depicts the doll with every line drawn over and every pastel shaded more intensely. Basically, on layer two I did everything I did on layer one all over again,  going over the same areas with the same colors to build up more intensity.

The only thing I’ve left alone from layer one is the contouring. I tend to go in on layer one, contour and blush, and then leave that alone for a couple layers. If you add blush and contouring every layer your doll is going to look super weird. So on my last layer I take a look at the face and if the contouring seems too faint compared to the eyes or lips or whatever, I add a touch more.

Whites of the eyes: if you repaint dolls with watercolor pencils, you probably know that the whites of the eyes are the BIGGEST PAIN IN THE ASS ever. When I colored in the whites using a white watercolor pencil I found that even when the rest of the colors on the doll were sufficiently dark and vibrant, the whites of the eyes were barely visible. Then I was just layering MSC and white pencil for another five layers before the eye whites looked normal. It’s frustrating. I get you.

I switched a couple years ago and started painting in the whites of the eyes. The process is somewhat easy: I just water down white acrylic paint and apply it with a tiny brush. The trick is to apply the super thin paint in LAYERS (of course. More layers). Do one coat (it will be pretty transparent), let dry, add another.  Because it’s paint, you don’t have to add a sealant layer in between each coat of white. The thin paint is necessary for a smooth eye – if the paint is too thick you get bumps.

I painted her lips the same way, just with black paint. Layer by layer, until I had a smooth, even, coat.

Not shown but very important: It looks like a skipped a photo (sorry!). After I let the paint in her eye whites dry completely, I go in with the first layer of pigment in the irises. The pencil will stick to the paint, and you can get a pretty solid first layer on without too much more. This saves an extra sealant spray, too.

LAYER THREE!

IMG_20181011_221846
Photo 4, Layer 3.

So again, I’ve gone over everything again with a third layer of pigment. The eyes (which I first filled in on Layer 2 after painting the eye whites) have also been given a second ‘coat’ of watercolor pencil to fill in any gaps or uneven spots. I’ve also added in a few hair lines in her brows with a thin black pencil.

Because her eye makeup is finally getting pretty dark, I added another coat of blush to her cheeks (using pastels, not actual blush).

TIPS ON WHITE HIGHLIGHTS: If you look closely you’ll notice a lighter line going around her inner eyes and extending up onto her lid, just above the thick line of ‘eyeliner.’ You can also see a lighter line just above her upper lip, and another just below the arch of her brows. These are all areas that I do use a white pencil to highlight. You can’t see it in all the earlier photos, but I am adding these white highlights in each layer. It’s just that it takes until about layer three on this doll before it’s noticeable at all.

Pearl Ex Powder: I’ve added some shimmer in the form of Pearl Ex powder, which is some sort of powdered pigment that I think you’re supposed to add to paint? I don’t really know. But it’s great for this sort of stuff. Pearl Ex is somewhat similar to white pencil in that the MSC sealant applied over it will make the shimmer less noticeable, so it requires a couple layers.

LAYER FOUR!

IMG_20181012_132505
Photo 5, Layer 4

In Photo 5, above, I added another layer of blush, more shimmer, darkened her beauty mark (but really, it’s a mole. Those are just moles and I don’t know why we call it something different if it’s on a woman’s face? Thoughts.), and added some silver highlights. I also added the white pencil highlights to her inner-eyes, upper lip, and brow arch. Annnnnd finally I gave her some lower lashes. I tend to do the lashes fairly late in the process, which can add an extra layer if they need to be built up more. Here, the makeup underneath the doll’s eyes was so dark that I knew darkening the black eyelashes wouldn’t make them stand out much anyway, so I didn’t worry about it.

The silver highlights were applied to her eyes and her lids. Just a single layer of thinned-out silver acrylic paint. Just for…extra drama. You know.

In this layer I actually didn’t go over any of her eye makeup to make the colors darker. They seemed dark enough to me and I was finally happy with everything.

DONE!

IMG_20181103_105229
Photo 6, Finished Doll.


You could consider this layer five, if you wanted. But I don’t think it counts because you won’t seal this with MSC.

After Photo 5 (layer four) I sealed the doll a final time with MSC. Adding in the three base layers, that’s a combined total of seven coats of MSC (I think).

Over the top of my final layer of MSC I added the eye reflections and a gloss varnish to the doll’s lips and eyes. I also added some glitter because why not.

And she’s done! This doll is for sale in my Etsy shop at the moment, and you can find her HERE.

Makeunder Doll Tutorial Pt 3: Making Shoes

Whoa…when I started this series I clearly forgot how much time tutorials take! Goodness.

But finally (FINALLY), the final installment on making makeunder/rescued dolls. This tutorial covers my very simple shoe-making process.

For the first part, a tutorial on repainting makeunder faces, go HERE!

For the second part, a tutorial on making simple dresses, go HERE!

And for the third part, a tutorial on making shoes, stay here.

Materials:

  • Polymer clay in whatever color you want your shoes to be
    • Preferably use Fimo clay or Sculpey Primo (the good stuff)
  • An exacto knife (or any sharp knife)
  • A marker or pen for rolling clay
  • A pen or pencil or paintbrush
  • Rubbing alcohol
  • Q-Tips
  • Hot glue gun (preferably high-temp gun but a low-temp gun should work fine)
  • Cooking oil of some sort, or vaseline.
  • A doll (duh)

FORMING THE SHOES

IMG_6167
Humble beginnings.

Here is the clay I’m working with. The clay on the left is Fimo, and the clay on the right is lower-quality Sculpey III. I wouldn’t recommend the cheaper Sculpey III – use Fimo or Sculpey Primo or something. The higher-quality clay doesn’t pick up fingerprints as well, and it’s stronger so small children won’t break the shoes getting them on and off.

IMG_0144.JPG

Not many people know this, but I used to run an Etsy shop making tiny clay cupcakes and cakes. I ended up featured on Anderson Live! I had a shop in Etsy for a little over a year before I grew bored with the venture and stopped. But, working with clay so often gave me a head start on making shoes and other doll props with clay, so now I can pass on a bit of my clay knowledge!

Some Polymer Clay Background

If you don’t know what polymer clay is, it’s a plastic clay that hardens when baked. The higher-quality clay (Fimo and Sculpey Primo…anything that’s not the cheapest kind) is pretty sturdy stuff, but it becomes fragile and brittle if it’s too thin or if it’s baked improperly (not enough baking time or too much). It has to be baked on glassware, nothing else!

A note on choosing a color: this clay LOVES to pick up dust, and unless you want to spend half an hour sanding your shoes down after you bake them, I wouldn’t recommend using white or any other light color of clay for the shoes. It’s for your mental health, really.

Conditioning the Clay

IMG_6169
Pen for size reference.

Before you start working with clay, you should condition it first. ‘Condition’ is just a fancy way of saying you need to warm it up. Work it around with your fingers, smoosh it, roll it out and crumple it up…just get it nice and kneaded. Working with clay that is warm (literally warm, cold clay is rock hard) makes everything so much easier!

Once your clay is conditioned, roll it in a ball between your palms and then form it into a sort of log shape, shown above.

A note on surfaces: clay likes to stick to things, especially rough surfaces. For this project glass or tile is the best surface to work on, but you can make do with wax paper, aluminum foil, or just being really careful on whatever surface you have available.

Cut the log in half with an exacto knife or something sharp, then roll the two halves into balls.

Form the Shape

Now you’re ready to start forming the foot shape!

Here you can sort of tell the shape I was going for. I went with little booties with a rounded toe, although you can see in the left photo that there is a right and a left shoe, which I made by rounding the toe box out more on one side of the shoe.

The right photo shows the ankle. You can make yours shorter or taller depending on how you want your boots to look – but you can’t go too tall without making the boots fragile.

Making the Hole

…That sounds weirdly dirty. No. Just doll shoes! That’s all!

Take a pen, pencil, or the end of a paintbrush and smoosh it into the ankle part on the boot you just formed. This is the hole for the doll’s leg pegs to go into.

Work the pen around, making sure to stabilize the boot with your fingers as you work so the ankle doesn’t get too misshapen. If it does, just mold it back into place.

You want the hole to be a bit larger than the doll’s legs. The legs should fit in there with room to slip around.

IMG_6179

Now take a new ball of clay, get it nice and warmed up, then form it into a ball.

Roll the ball out into a long, thin rope. My clay rope (on the left) is about half the width of an exacto knife or pen.

Making even ropes out of clay is actually harder than you would think. Try to make it as even as possible by using your fingers to roll instead of your palm. Use both hands and roll slowly to prevent the rope from flopping around.

Now take whatever you want to use to roll the clay out and gently roll over the rope, working to make the new width of the rope even. I rolled this out with an exacto knife.

This flat rope is going to be the ankles on the booties! If you want taller booties, make the rope taller or wider, just remember it can’t be too thin – polymer clay (even Fimo and Sculpey Primo) isn’t the sturdiest of stuff when thinned out.

Cut two length of the flat rope, and gently wrap each one around the ankle part of the boot bottom you formed earlier. Then take your pen or something that fits into the hole of the boot and use that to help press the two boot parts together (with the pen on the inside and your finger on the outside of the boot).

Almost there!

Smoothing it Out

If you’re like me, your boots are a mess of fingerprints by now. If this was a crime scene we’d be screwed. CSI would love us. There are a couple ways to smooth everything out.

IMG_6185
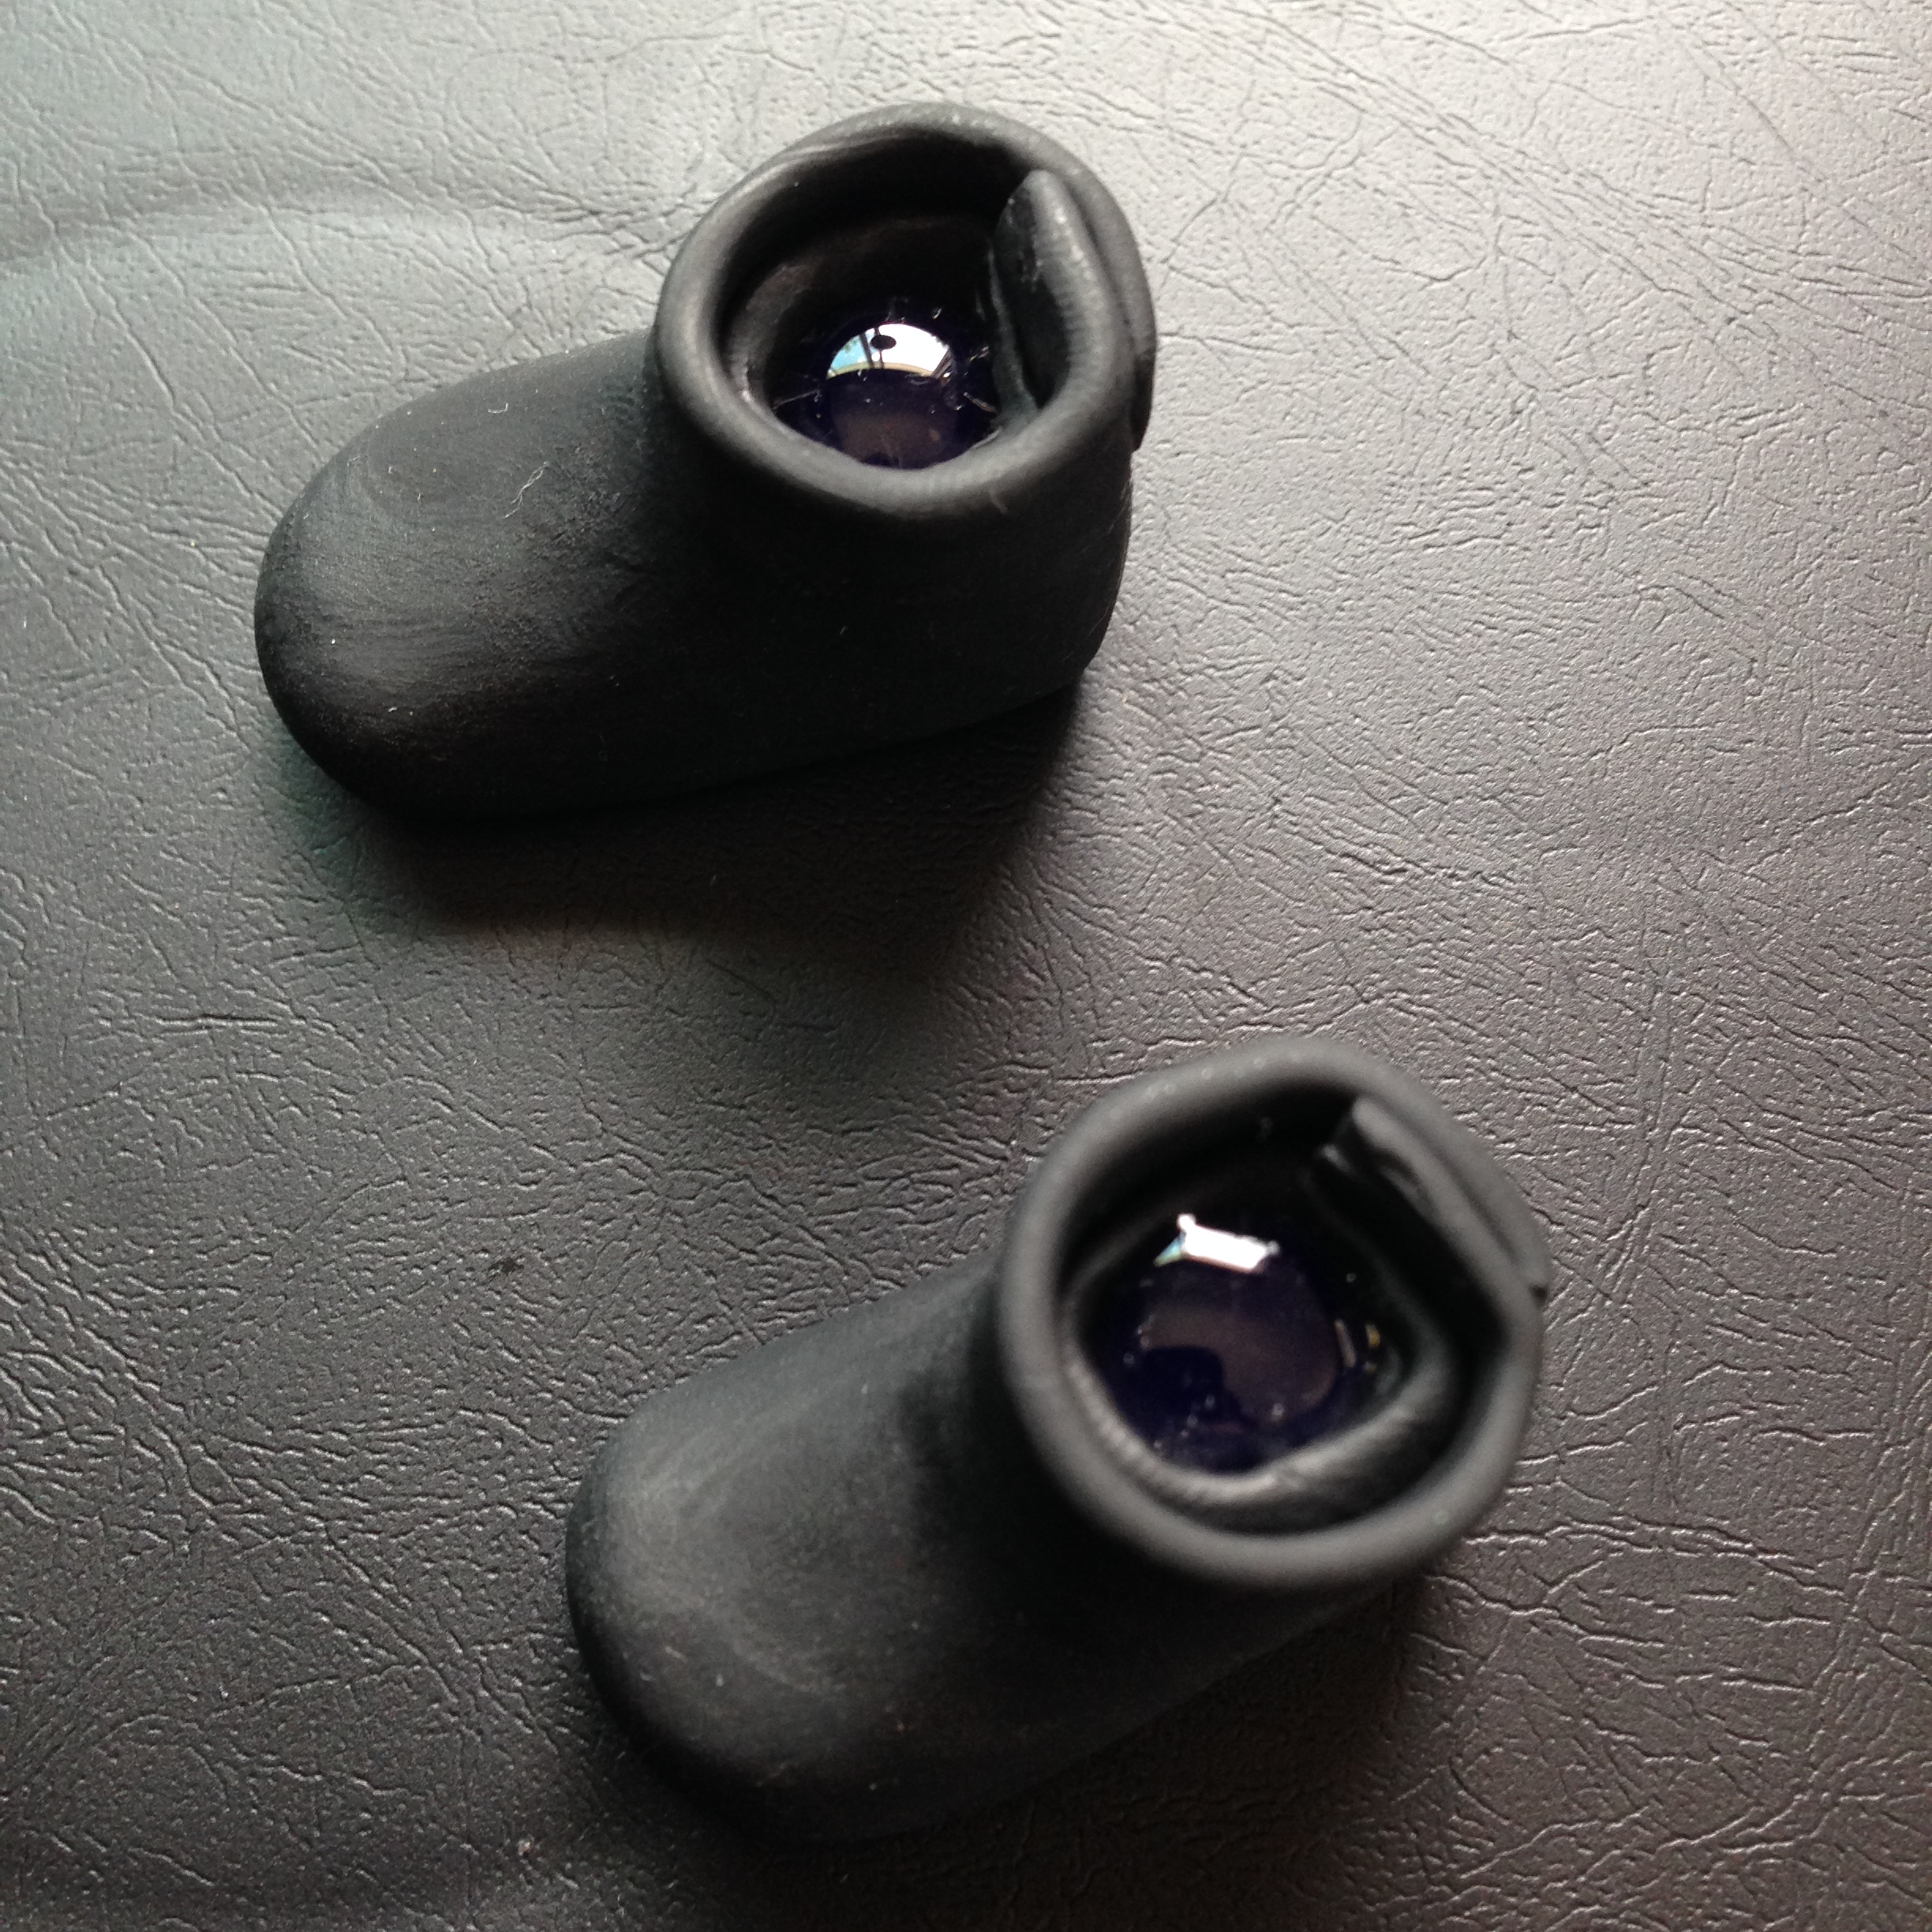
First, you can just lick your finger and use that to smooth out the clay. I normally don’t do this. You can also dab your finger in baby powder and rub it on the clay, using the baby powder as a film between the clay and your fingers to prevent more prints from showing up as you smooth the old ones away. I don’t do this with boots because it’s a bit messy, and because it doesn’t work very well with dark colors (baby powder is white, after all).

So…get some rubbing alcohol and a Q-tip.

IMG_6187

Dip the Q-Tip in a healthy amount of rubbing alcohol and start rubbing the fingerprints out.

Bake!

Bake according to the directions on your clay package. I bake mine for 15 minutes for every quarter inch of clay there is. So I bake my shoes for 30 minutes. It’s better to err on the side of overbaking, underbaking will only make the shoes brittle.

Make sure you bake on glass, nothing else!

After it’s done baking, let the shoes cool before you pop them off the glass bakeware.

Making the Leg Peg Hole….Things

Get out that glue gun and get it warmed up. While you’re waiting, put a bit of cooking oil or Vaseline onto a paper towel and rub the doll’s leg pegs with it. They should be coated in a thin layer of grease (not so much that it’s just dripping off, though, so don’t just dip the doll’s legs into oil).

IMG_6193

Fill the holes in the boots part way with hot glue. I normally fill the boots up to the line where the flat rope is wrapped around. Be careful not to over-fill, you don’t want the glue to spill out everywhere.

IMPORTANT! Before you stick the doll’s legs into the glue, WAIT for 10 seconds or so for the glue to cool a bit. You may not have to wait at all if you’re using a low-temp glue gun, though.

IMG_6195

Now, after you’ve waited for a few seconds (if you have a high-temp gun), carefully insert the doll’s legs into the center of the glue, pushing down until the pegs are fully covered.

If the doll’s legs aren’t perfectly straight, you may want to insert one leg at a time, instead of doing both at once.

Now let the glue dry. I normally let it dry COMPLETELY before removing the doll, so I let them sit for at least ten minutes or so. To get the doll out, start by twisting the shoe around the leg to loosen it up, then pop the leg out.

DECORATING!

Decorating is always the best part, for everything.

IMG_6197

I painted these shoes with acrylic paint, but you can do lots of different things! You can wrap ribbons around the part that I painted, you can glue bows on, you can cover the whole damn thing with glitter if you want!

You can also use thin foam sheets to cut out a sole for the shoe, if you like.

After painting these shoes I coated them both in super thick varnish to make them super shiny. Then I put them on our makeunder model, Andy!

IMG_6206

Makeunder/Natural Doll Tutorial Pt. II: Dressmaking

Hello hello! Took a bit longer to get this up than I wanted, but that’s because I actually made THREE of these same tutorials. Every time I made the dress I realized a better or faster way to make it, so I re-did the tutorial.

If you want to learn about repainting makeunder/rescued dolls, or making shoes, check out these two tutorials: REPAINT TUTORIAL and SHOE MAKING TUTORIAL

Disclaimer: this isn’t the perfect way to make a dress. I don’t finish  my seams inside the garment as nicely as many people do (if you are one of those saintly people, hats off to you!) and even as I made this tutorial, I realized a better way to make the skirt (which I’ll mention in writing, but I’m not making the tutorial over again or else it’ll never get written up!).

What will you learn in this tutorial?

This tutorial covers how I make a simple dress for Bratz dolls. I’ve modified this pattern and approach for other types of dolls, too, like Monster High and Ever After High. It’s easy to do.

What WON’T you learn in this tutorial?

This isn’t a tutorial that will teach you basic sewing skills. There will be plenty of pictures of what each step looks like after I’ve sewn it, but I assume that you have at least a beginner’s knowledge of sewing to carry you through.

MATERIALS:

  • A small amount of fabric (really, you can do this with a 1/4 of a fat 1/4 if you wanted)
  • A sewing machine (or a needle and thread and a very good, long movie)
  • Pins
  • Fray check liquid
  • A seam ripper for the inevitable screw-up (I don’t even put my seam ripper away anymore. It just stays out on my desk)
  • A fastener of some sort. I use velcro, you can use whatever.
  • Other random sewing notions you probably need…like scissors, marker, etc.

Um….I have a life, here, how long is this going to take?

Not long! I can crank one of these dresses out in 30 minutes.

STEP ONE: GET A PATTERN

Waaaaiiiit…..you don’t have a pattern? No biggie. We can make one.

I did this part over a year ago now, so unfortunately I don’t have great photos of how I did it (okay, I have no photos). But it’s not hard.

I didn’t buy a pattern because I had a tank top made by Bratz that I knew fit the dolls. If you have a Bratz top lying around, pull out those seam rippers and separate all the seams. Lay the pieces out on some thin cardboard or cardstock, and add a seam allowance of about 1/4 inch (or whatever you want).

Or if that sounds like too much work, or you don’t have a Bratz top, buy a pattern from some wonderful patient person who sells them on Etsy.

You don’t really need a skirt pattern. It’s just a rectangle, and even the most craft-challenged can manage that!

CUT OUT FABRIC PIECES

IMG_6148

Lay your top pattern over your fabric, making sure that any stripes/patterns are matching the way you want. Cut out the pieces! Make sure you have two layers of fabric cut for the top pieces, one for the right side, one for the lining. I sometimes use just a cheap white fabric for the lining, but I didn’t with this dress.

Cutting the skirt: The skirt I cut out here was about eight inches long. Notice the right side of the skirt has a little extra length cut out on top. This part will be to put the fastener on later (I use velcro, so I made the extra length the same width as my velco).

Keep in mind that this skirt will end up being rouched (or ruffled), so if you’re using a thinner fabric you can cut a longer strip because the skirt can be rouched more. If your fabric is thicker, like a normal cotton quilting fabric, you won’t be able to rouche the skirt as much because the rouched edge will be too thick for a tiny doll seam.

*Note to make this better* So remember I said I made this tutorial three times and found a better way to make this dress every time? Well, I could have made it a fourth time, but I’ll explain the difference now so I don’t have to do that. So instead of just cutting that extra little piece on the right side cut the little extra length thing on BOTH sides. One of the pieces will just be ironed flush with the skirt side so you can top stitch over it and keep the edge cleaner (this is explained better below). If you don’t cut out both sides of the skirt like that, the side without the extra length ends up being a visible raw edge, which is fine with some fray-check, but isn’t the most professional.

IMG_6149

Cut? Check.

MAKING THE TOP

IMG_6150

Pin together the top so the sides are lined up, right sides together of course. Stitch up the sides so you have the right side and the lining finished. If you’re using a pattern like mine, you’ll have three pieces of fabric stitched together, like in the photo below.

IMG_6152

Trim the seam allowances to about 1/4″. Don’t go much thinner than that or you may rip the stitching out later! (Bad).

IMG_6153

IRON! Get out the iron and press under a hem on the skirt. Be careful that you iron the shorter side of the skirt, not the side that has that little cut-out on it. If you want you can turn the hem over twice, I only do it once to cut down on bulk.

While you’re at it, press the seam allowances flat on the two pieces for the top, too. Helpful tip: press the allowances to the outside on the right side piece, and to the inside on the lining. This will help keep bulk down when you stitch them together.

ADDING STRAPS

IMG_6154

If you don’t want your dress to have straps, you can skip all this. I make a lot of my dresses strapless because it saves a lot of time.

But if you like the idea of straps, take the lining for the top and wrap it around the doll to check strap placement. Make sure the side seams are lined up with the doll’s sides, then mark where you want the straps to be.

IMG_6155

Cut out two strips of ribbon for the straps. I’ll be making halter straps for this tutorial, and the ribbons I cut were each about four inches long. I used the 1/4″ fabric for these straps because I’ll fasten them with velcro, and I’ve found velcro doesn’t really work on thinner ribbon.

In the photo on the left I’ve pinned the ribbon straps to the lining, over the markings. In the photo on the right I’ve pinned the right side of the top to the lining piece, right sides together, with the straps in between the two layers.

Caution: if your ribbons have a front and a back side (right and wrong side, whatever weird sewing terms you want), be sure you’ve pinned them the right way (I messed that up on the first tutorial draft).

IMG_6158

Go ahead and sew the sides and the top of both pieces together. Don’t stitch the bottom side, so you can turn the whole thing right-side-out and press.

Clearly, my stripes-matching was an epic fail.

THE SKIRT!

IMG_6160

Sew the hem on the skirt (the hem you pressed earlier. You did do that, right?). I hemmed and stitched a ribbon on at the same time.

Optional: if you want you can turn over the raw edge of the hem another time so you hide that raw edge completely. I don’t do this unless my fabric is thinner, because otherwise I find it too bulky. And really, this is like a three-inch-tall dress for a doll that probably had a really skanky face on before you got your hands on her, so she can’t really complain about a raw seam. Please, doll.


Time to rouche! Which means ruffle, if you don’t speak bourgeoisie sewing language. I’m probably not even spelling it right anyway (‘rouch,’ that is, I looked up ‘bourgeoisie’).

Sew two loooong running stitches along the top of the skirt. Set the stitch length to the longest possible. Then pull one thread from each line of stitching and pull everything together. I use my dress top to measure the dress as I’m rouching. You want the bottom of the bodice (BODICE! That’s the word I’ve been looking for) to be the same length as the top of the rouched skirt.

Bodice. Bodice bodice bodice. Got it.

IMG_6163

Pin the hell out of this bad boy adorable little dress. Remember to put the right side of the bodice and the right side of the skirt together. I sew two lines of stitching, one to reinforce.

IMG_6164

Now we’re going to sew up the back of the skirt. Line up the sides of the skirt as shown, with the little extra cutout thing sticking out.

*Making this better tip* In the beginning of all this I said you should cut the little extra length thing (my vocabulary is utterly failing me today, but I’m charging on without it, apparently) on BOTH sides of the skirt. If you did that (you did, didn’t you? jk I don’t judge if you didn’t), press one of the little extra lengths back so the folded edge lines up with the rest of the side. Press, and just top stitch that little fold so it’s a clean line. This will be the side of the dress that overlaps OVER the little cutout thing that wasn’t folded over.

IMG_6165

Okay stitch up the back of the skirt until you hit the bottom of the little extra cutout thing. Backstitch or otherwise reinforce the hell out of this seam, it will get tugged on when pulling the dress on and off those doll butts that are always weirdly big.

ADD A FASTENER! You’re almost done.

IMG_6166

I used stick-on velcro, which works pretty well if you heat-set it with an iron after (it’s not iron on, which would be awesome, but the iron gets the velcro sticky stuff all up in the fabric weave so it doesn’t come off).

Just make sure that you put the velcro (or other fastener of your choosing) on the correct sides of the fabric. The side of the skirt with that extra flap thing goes UNDER the side where the flap was folded over (or the side lacking a flap entirely). So figure that out before attaching the fastener (that was the mistake in tutorial draft number 2).

FRAY CHECK

Does your fray check smell toxic? Mine does. It’s concerning.

Anyway, take a bottle of that stuff and put it alll over any of the raw edges. Let dry thoroughly.

FINISHING THE STRAPS

Okay sorry for the switcheroo here, but I didn’t take pictures of this on the plaid dress I’ve been working with. So here’s the first dress I made for this tutorial (it’s very funky. Bad.)

Take your ribbon pieces and wrap them around the doll’s neck to measure the length you want for the halter. Trim to the appropriate length and stick some more velcro on there.

AND YOU’RE DONE! You can go enjoy a glass of, well, whatever you want, and a good movie. Or keep going and make some shoe!

Part three of the makeunder series, shoe making, is HERE!

Oh wait…if you want to add accessories like bows or bows or roses or buttons or bows…go for it. I did. 🙂

IMG_6213 (1)


Tutorial: Bratz Makeunder/Natural Repaint Pt. 1

Time for another makeunder tutorial! I did one a little under a year ago with  a Moxie Girlz doll, but my style has changed (and improved) so much I figured another tutorial would be helpful!

You can find the Moxie Girlz repaint tutorial HERE.

Update: now that I’ve finished all three parts of the Makeunder/Rescued Doll series, you can skip to my tutorials on DRESSMAKING and SHOEMAKING for dolls, if you like!

Also, because this is the part of the blog people seem to write random things totally unrelated to the post that no one cares about or reads, I JUST WENT TO THE MOTHER OF ALL JOANNS FABRICS STORES AND IT WAS HEAVEN. My quick trip (I literally needed two items) ended up taking two hours and about $40 more dollars than I planned on. I know all you crafty people know how that goes!

Back on track….

WHAT IS THIS TUTORIAL GOING TO TEACH ME?

This is part 1 of a three-part tutorial that goes through my process of rescuing or making-under dolls like Bratz or Moxie or whatever. Part one (you are here!) goes over the process of repainting the face. Part two will cover making a simple dress, and part three will show how I make simple shoes.

This isn’t a quick step-by-step photo tutorial. It’s really in depth, with lots of tips and tricks for repainting explained under each photo. But if you don’t want to read all that, you can go through the tutorial by looking at the photos. The captions to the photos explain what I did in what order.

What is this tutorial NOT going to teach me?

Lots of things, I suppose. Like how to cook chicken without over-cooking it (this is a problem I have 100% of the time). But as far as doll-related things goes….

  • First, this tutorial does not cover how to wash/tame/fix/style doll hair. If your doll needs a good salon day, head over to my tutorial HERE on how to fix doll hair.
  • Second, this tutorial won’t teach you much about the materials I use or how to prep the doll for a repaint (“what?! But that is so important!” I know. Don’t panic. It will be okay.).

GETTING STARTED (This is the part where you should start reading if you skipped all that stuff above).

Materials

  • Matt Spray Sealant like Mr. Super Clear
  • Chalk pastels
    • You’ll use pastel dust, which you make by scraping the surface of a chalk pastel bar.
  • High-quality watercolor pencils (Derwent or Faber Castell or Prismacolor)
    • You’ll use these dry…don’t get them wet!
  • White acrylic paint
  • Satin varnish (or glossy varnish, I don’t care, you don’t care).

If you have questions about any of these materials go check out my post on Materials and Doll Prep.

FIRST STEP: Preparing the Doll

What, you thought you could get away without reading my tutorial on Materials and Doll Prep? If you have any questions about how I remove factory makeup from the dolls, and protect and seal them, you should read that ‘Materials and Doll Prep’ link just above.

If you’re a veteran, get your doll all ready to start applying pencils and chalk dust.

How many layers of MSC do I spray before repainting?

It used to be that I only put one layer down. That’s not enough. I use 2-3 layers of spray sealant now, and it’s SO worth it. Trust me. Go spray another layer just to be sure.

Our Model

We’re going to call her Andy, because Andy is an adorable name for a girl.

Andy is a 2015 Bratz, so her head is bigger than the older Bratz, her body shape is quite different, and she has articulated knees (whoo!). This particular Andy is the ‘Hello My Name is…Meaghan’ doll I got in a five-pack of Bratz from ToysRUs (at a price that made it worth it, I promise).

In the photo on the right I’ve gone through all the prep necessary, including spraying two layers of MSC on her. We’re ready to go!

FIRST LAYER OF SEALANT


This doll was done using only three layers of MSC after I started repainting. So we’re going to go by layer, because I’ve found it’s the most efficient use of MSC (which is expensive; you definitely want to minimize your use).

* Note on how this tutorial is organized: each picture has  a caption with numbered subjects. Each subject is then elaborated on (in numerical order) underneath the photo.

IMG_6020
1. Eye outlines. 2. Eyelid creases. 3. Eyebrows

1. EYE OUTLINES

Very first thing I do is outline the eyes. I never move on until after I’ve gotten both eye outlines where I want them.

Eye placement and size

The bigger the eyes are, the younger the doll will look (until they’re so big it’s just creepy. Don’t go to that place). I find that the 2015 Bratz look better with eyes about the size I did here. Smaller eyes start to look out of place on the super large heads. I went with medium-large eyes. They could be a little bigger, but not much.

As far as placement goes, on a big-headed doll I make the eyes wider than normal. You can see the shadows in the picture above where her ‘eye sockets’ are. I’ve made my eyes a bit wider than the sockets, and they’re definitely wider than the original factory paint.

Um….How Do I Make My Eyes Symmetrical? 

Practice? But seriously, practice. Some tricks I used in the beginning:

  • Do the left eye first so you can copy it while drawing the right eye (or if you’re left handed, do the right eye first). This way your hand isn’t blocking the finished outline.
  • Don’t be afraid to modify both outlines to make them match. I set one down, then the other, then I go back to the first and change it, then so on.
  • If you have a hard time reaching one of the eyes, turn the doll upside-down to work on it.
  • Look at the eyes from different angles, especially from the top (bird’s eye view). This is SO HELPFUL!
  • Don’t be shy about taking a ruler out and measuring distances between the corners of the eyes and the bridge of the nose.
  • Hold a pencil (or anything straight) against the bridge of the doll’s nose and make sure your eyes line up along the pencil. I use this to make sure the corners of the right and left eyes are on the same plane.
  • Hold the doll up to a mirror for a different perspective.
  • Put thin outlines down, and make them more symmetrical by making them thicker in the same places.
  • Practice. Repeat.

2. EYELID CREASES

After the eye outlines are in place, you can pencil in the eyelid creases!

To achieve a more natural, child-like face, I keep the creases rounded and fairly close to the upper lash line of the doll’s eyes. For other dolls I might make the eyelid larger and the eyes less round (this achieves a more sultry look).

I also do a double-crease, just because….why not?

3. EYEBROW OUTLINE

Now for the brows.

I only pencil in an outline for the outer edges of the brows, because I’ll fill in the rest with chalk pastels. These brows are going to be pretty neutral brows, nothing crazy going on!


Caption: 1. Fill in brows. 2. Eye whites.

1. EYEBROWS

This is where the chalk pastels come in. Make some chalk pastel dust in the right color for your brows. Then use a small flat brush (I use my black 10/0 flat brush for this) to pick up some pastel dust and fill in the eyebrows.

You can go back and clean the brows up with a kneaded eraser (the weird grey kind that’s like gummy clay) or any eraser, really.

2. EYE WHITES

Using a white pencil, fill in the eyes. A lot of people have trouble getting the whites to show up well enough, and this is normally because they didn’t seal the doll enough before beginning. The picture shows just one layer of pencil, and it shows up so well only because I sprayed two layers of MSC on the doll before starting.

If your white watercolor pencil isn’t showing up like mine, don’t worry, you’ll just need some extra layers of MSC sprayed on to make the color show up more.

IMG_6034
1. Nostrils

1. NOSTRILS

Use a dark brown or medium brown pencil to mark two nostrils, about the shape of those in the photo. Make sure they’re centered as well as possible, and even. As far as placement goes, I put them right where the nose mold curves into the lip.

Warning: don’t make them too round or too tall! The doll will look pig-nosed (of course, if you adore pigs, go for it).

IMG_6037
1. Lip outline

1. LIP OUTLINE

Use a dark or medium-brown pencil to make two very small dots in the corners of the mouth. Then draw a thin dark line from the dots towards the center of the mouth. My line is only about 4 millimeters long: they’re very short.

Then use a pink or red or whatever-lip-color-you-want pencil to outline the corners of the lips, and the upper lip curve. If you don’t want the lines to be too noticeable, use a lighter pink or nude pencil.

IMG_6040
1. Eye shading. 2. Nose shading.

1. EYE SHADING

Break out those chalk pastels again! Make pastel dust in nude colors. Here, I used  light tan, tan, and brown dust to shade the eyes.

Starting with the lightest shade, use a small flat brush (I’m using my black 10/0 that I used for the brows) to shade above the larger eyelid crease and the outer eyelids. I also used some of the tan dust under her lower lash line.


IMG_5962


Note on natural v. makeup looks: for a natural look, this shading should be fairly light. If you want the eyes to look more deep-set, you can use some darker shading, but you have to be very careful not to go overboard. If you want your doll to have a more smokey-eye look, just use darker/not-nude colors to shade!

2. NOSE SHADING

For the nose, use the light tan and tan dust to make the bottom of the nose (area around her nostrils) a bit darker. You can bring the dust up the sides of the nose if you want more realism.

Warning: I would advise against using a pencil to outline the bottom of the nose. I haven’t been able to do it where it looked natural, so I only shade with pastels. But if you are a braver soul than I…I can’t stop you.

IMG_6041
1. White highlights.

1. WHITE HIGHLIGHTS

This is more a personal style preference, so it’s up to you.

I use a white or off-white pencil to mark highlights around the doll’s tearducts and eyelid creases, and her upper lip curve.

Note: If you’re nervous about how white and bold these highlights are, don’t worry. They’ll fade a bit after they’re sprayed with sealant.

IMG_6042
1. Waterline.

1. WATERLINE

Use a dark brown (or whatever color you outlined your eyes with) pencil to add a waterline to the doll’s eyes just underneath the lower lash line you already drew. I keep them very narrow, and only extend this waterline to about the middle of the lower lash line. You can extend it all the way if you want; it’s just a personal preference.


IMG_6043
1. Color the waterline. 2. Fill in lips.

1. COLOR THE WATERLINE

Use a light pink pencil to color in the waterline until it ends and hits the white highlight pencil.

2. FILL IN THE LIPS

Using pink/red pastel dust, fill in the lips. I use a larger brush for this (my short clear makeup brush that I show in the Materials and Prep blog linked at the beginning of this tutorial).

I use darker pastel dust in the corners of the mouth and the center of the upper and lower lips.

IMG_6044
1. Blush

1. BLUSH

Using pink/light pink pastel dust, use a fluffier larger brush to blush the doll’s cheeks. I use a fluffy eyeshadow brush for this.

I use a lighter pink dust to blush the doll’s chin and center of forehead.

Why blush now and not earlier?

Because we’re trying to minimize sprays of sealant, I do blush right before I’m about to seal the doll. If it’s done earlier in the process it’s super easy to smear the blush dust all over the place, which sucks.

SEAL WITH A THIN LAYER OF MSC (OR WHATEVER)

SECOND LAYER


First, let the layer of MSC dry for ten-fifteen minutes.

IMG_6046
1. Iris outline. 2. Eyebrow lines.

Tiny note: see how much the white highlights faded? It’s more natural-looking now.

1. IRIS OUTLINE

Using a color that is a shade or two darker than the shade you want your iris to be, make two round outlines for the iris. For example, I’m going for light blue eyes, so I used a dark blue pencil to outline here. You can go as dark as black, though, if you want.

I made Andy’s eyes looking to her left, but it’s easier to make eyes that are looking straight forward, if you’re just starting out.

Placement

Your outline shouldn’t be perfectly round. The iris should always be partly obscured by the upper eyelash (if it isn’t the doll will look crazy or terrified or some horrifying combination of both). For a rounder, more Caucasian eye, the bottom of the iris should just touch the lower lash line. For a more almond-shaped eye, or an Asian eye, the bottom of the iris can be partly obscured by the lower lash line, but generally not as much as it is obscured by the top lash line.

2. EYEBROW LINES

Using a pencil with a darker color than the pastels used to fill in the brows, use fast, short strokes to create individual ‘hairs’ inside the eyebrows.

I also colored in the outer edges of the eyebrows with a dark brown pencil to make them more solid. I often make the outer edges of the brows darker than the inner edges.

IMG_6053
1. Iris color. 2. Iris shading. 3. Pupils.

Oops, I forgot to take more pics of this process (sorry, I was watching Jurassic World and got REALLY caught up. Ahhh the raptors!).

1. IRIS COLOR

After penciling in the outline, color in the whole iris with the lightest shade you want in your eye. I chose a very light blue for this.

2. IRIS SHADING

Then take a darker pencil and lightly shade in the top 1/3 of the iris, trying to blend it into the lighter color as well as possible.

3. PUPILS.

Using a black or dark brown pencil, pencil in the pupils using circular strokes. Start small, then build them outward so they don’t get too big too fast (if they get really big, your doll is going to look really stoned, which would be funny, but probably is not the intent).

IMG_6055
1. Small eye line things.

1. SMALL EYE LINE THINGS

Using a dark brown or black or dark blue/green/purple/I-don’t-care pencil, make tiny lines in the irises, radiating out from the pupils.

IMG_6058
1. Make upper lash line darker. 2. Eye whites.

1. DARKEN UPPER LASH LINE

Sorry about the lighting that keeps changing in these photos. I was chasing the good natural light around my tiny studio, which is definitely easier said than done!

Use a black pencil to make the upper lash line a bit darker and thicker. This is less ‘natural,’ so I suppose it’s my own personal style preference. You don’t have to do this if you don’t want to, but I’d recommend it.

If you want a more natural look, use dark brown instead of black.

2. EYE WHITES

Using a light grey pencil, very lightly shade the part of the whites that is just beneath the upper lash line.

Then, go over the entire whites with white pencil (including the grey, unless you want your shadow more pronounced).

IMG_6059
1. White highlights. 2. Lip lines.

1. WHITE HIGHLIGHTS

If you want the white highlights to be more pronounced, go over the white highlights again with your white or off-white pencil. Remember, after we seal the final time they’ll fade a bit more.

2. LIP LINES

Using a light red/dark pink pencil, draw tiny lines inside the lips. These are the lip creases that most people have!

SEAL WITH A THIN COAT OF MSC!

THIRD LAYER


Remember to wait for the MSC to dry!

IMG_6062
1. Eyelashes. 2. Eye whites. 3. Darken Pupils. 4. Highlights


1. EYELASHES

Technically you could do these on the previous layer. I sometimes do that. But I normally try and do them after sealing because I often have to erase them once or twice to get them perfect, and I don’t want to ruin anything underneath.

For the upper lashes I do thicker more doll-like lashes using a black pencil. For the lower lashes I use a dark brown pencil and do tiny, thin, straight lashes until the waterline ends. For a more natural look on the upper lashes, you can use a dark brown pencil instead of black, or you can just make the lashes thinner and shorter!

2. EYE WHITES

Go over the whites of the eyes with white pencil again. If you want more shadow, add more light grey underneath the upper lash line.

3. DARKEN PUPILS

Go over the pupils once more with a black pencil, or dark brown, or whatever color you chose for the pupils (they don’t always have to be black!). If you want you can also darken the shading in the irises.

4. HIGHLIGHTS

If you want, go over all the highlighted areas from earlier again with a white or off-white pencil. If you like where they’re at already, you don’t have to go over them again.

However, ALSO add some thin white lines to the lower 1/3 of the irises, and to the lips.

IMG_6063
1. Freckles.

Sorry about the weird green lighting. Dunno what was going on there.

1. FRECKLES

Optional, of course, but Andy’s a redhead so I decided to give her some freckles with a tan pencil. So adorable. Love freckles.

SEAL WITH A LAYER OF MSC

FINAL LAYER


Let that stuff dry.

IMG_6064
1. Unwrap doll. 2. Catch-lights.

1. UNWRAP DOLL

She’s looked like a serial killer victim for long enough. And she’s SO CUTE!

2. CATCH-LIGHTS IN EYES

Or eye reflections, whatever you want to call them.

Mix up one drop white acrylic paint with two drops of water to thin the paint down. Then, using a toothpick, make a small white dot in the same place in each eye. Then make a couple other small white dots (or not, the number of white dots is up to you. I use two-three, normally).

Just make sure the white dots are in the same place in each eye (for the most part).

IMG_6069
1. Varnish

1. VARNISH


Using a gloss or satin brush-on varnish, brush a coat over the eyes and lips (or eyes only if you don’t want the lips to be a bit glossy).

I have a satin varnish, and I used one coat on the eyes, and two coats on the lips, so the lips are shinier.

And she’s done! I don’t have Part 2 written up yet, but I’ll try to do that this week. Stay tuned!

Furthermore, if you like Andy, you can adopt her on my Etsy page, here! She comes with a cute pair of glasses, a pink dress, and booties.

IMG_6070


Step-By-Step Ever After High Repaint (Photo Blog)

Goodness it’s been far too long! I’m sorry to all my wonderful followers who put up with my ramblings! Grad school and blogging just don’t go hand-in-hand (okay, nothing really goes hand-in-hand with grad school except maybe reading and stress).

I have a few posts in the works, and those should be out within the next month or so. One is a tutorial to make a ballet outfit for Bratz, and the other is a tutorial for mermaid outfits for Bratz (although the tutorials can be modified for any doll).

But for now, I thought I’d get back into the swing of things with a photo blog that shows you how I repaint my dolls, step by step.

Our lovely model is Cerise Hood, an Ever After High Doll. Unfortunately I didn’t take a before picture, but if you really want to see that just google ‘Cerise Hood Enchanted Picnic’ and photos will pop up.

Let’s get started!

IMG_5944

Layer one: just the outlines of the eyes and a layer of white pencil over the whites. (Not shown: spray seal before starting with MSC!)

IMG_5948

Layer one: Added dark brown to the corners of her lips (gave her a bit of a smirk because she sassy), and outlined her upper lip with a light red. Drew in a simple upper-lash line, added eyelids, and outlined eyebrows.

IMG_5949

STILL layer one! Filled in eyebrows with dark brown chalk pastels, filled in lips with red and peach chalk pastel, but erased parts of it on her lower lip to get a more natural/nude lip color. Then I used a dark red watercolor pencil to make small lip lines on her lower lip.

IMG_5950

STIIIIILL layer one! Shaded in her smokey makeup with chalk pastels (from tan to black). Added a second eye crease with a black watercolor pencil. Blushed cheeks, chin, forehead, and nose with chalk pastel dust (skin tones and blush tones).

IMG_5951

Layer two! (Finally). Used dark red and white watercolor pencils to make her lip lines more pronounced, highlited the upper lip line with a white pencil. Added a beauty mark with dark brown pencil. Made her upper-lash line darker with black pencil. Shaded more eyeshadow with chalk pastels to make the color deeper. Colored in her waterline. Darkened her lower-lash line a bit. Highlighted her brow with off-white pencil. Made eyebrow hairs with dark brown pencil. Highlighted eyelid crease with white pencil.

IMG_5953

Still layer two: Added the irises first with a light lime green. Made a dark green ring around the iris. Lightly penciled in the pupils first with a dark green, then with black.

IMG_5954

Layer THREE: Blended pupils into the irises with dark green, dark brown, and black pencils. Shaded the irises with those same pencils. Added another layer of white to the whites of  her eyes.

She’s so much less creepy now!

IMG_5956

Layer FOUR: Everything white on the doll got another layer of white pencil, including the upper lip highlight, lip lines, around her tear ducts, eyelid crease, brow bone, and eyes. Added all her lashes (I always do this on a layer separate from the pastel eyeshadow because I normally have to erase some of the eyelashes to make them match). Also added dark lines radiating from her pupils into her iris.

Seal for the last time!

IMG_5962

Finishing touches: last-minute I added some gold shimmer dust (PearlEx powder) to her eyelids. I did this before I sealed for the last time.

After the final seal I wait for the sealant to dry for about half an hour, then I unwrap the doll from her saran-wrap serial-killer-victim cocoon, fix her hair (I boil washed it), and add a layer of semi-gloss or gloss varnish to her eyes and lips.

All done!

Want her? She’s on Etsy!

IMG_5994

Tutorial: Blushing A Doll’s Body

Repainting a face is well and good, but what about the rest of the doll?

That’s what blushing is for. When I say ‘blushing,’ I’m actually talking about shading. Shading a doll’s body will make the doll appear more realistic and three dimensional, just like blushing/shading the face does.

I’m sorry that I don’t have many pictures here. I had a terrible time trying to get good pictures that actually showed the blushing; unfortunately blushing tends to happen where shadows would naturally fall, so it was tricky to get pictures that showed the blushing and not just the shadow.

Materials:

  • A doll (note: this tutorial, and blushing in general, will work best on dolls with hard plastic bodies. Disney Princess dolls, Barbies, and Bratz tend to have legs that are sort of rubbery: this plastic doesn’t take well to blushing at all! If you’re working with one of these dolls, only blush the torsos).
  • Chalk pastels
    • Super optional: pearl PearlEx powder for highlights.
  • Paintbrushes in assorted sizes (at least one big-ish, one small, one tiny).
  • A toothy spray sealant (Mr. Super Clear is my go-to, but if you have a different sealant go for it. As long as it has some tooth or grain to it!).

*WARNING*

Before we get started, you should know that blushing a doll’s body makes the doll less awesome for playing with. Playing with a blushed doll can easily scratch the sealant and rub off the chalk pastel. This is especially common around the doll’s joints, where the plastic will rub against itself when the limb is moved around.

When I post dolls on Etsy with their body’s blushed, I encourage the dolls to be used for display only.

Okay now we can start: The Prep

IMG_4666
Wrap the doll up to cover areas you don’t want to blush. This doll is a Disney doll, so her legs are rubbery and can’t be blushed.

If you’re planning on repainting the doll’s face, I recommend doing that first so you don’t accidentally rub off any of the body blushing while working on the face.

Wrap the doll’s head and hair in saran wrap so the spray sealant doesn’t get on it (wrap legs too if they’re the Mattel/Disney rubbery type). Then slightly spread the doll’s limbs apart, making sure to bend/place them so they are exposed to the sealant.

I spray the front and sides of the doll’s torso and arms first. Let dry. I then bend the arms so my next coat gets the inside of the arms (the outside and front of the arms is covered on the first spray). With the second spray I coat the doll’s back, inner arms, and the back of the arm. Let dry. Spray the front and outside of the doll’s legs (IF they’re the same hard plastic as the torso–if they’re that rubbery material, spraying them will work for a while but the sealant will normally start to fall off after a period of time. Most sealants aren’t designed to stick to that kind of material). Let dry. Manipulate the doll’s legs (if possible) so that the next spray gets the back of the legs and the inner legs. Spray. Let dry.

How much do you spray?

I dunno.

No, I kinda do. Only kind of, though. With MSC there is a very fine line between too much, where the chalk pastel won’t stick to it, and not enough, where the chalk pastel won’t stick to it. I spray from about ten to fifteen inches away from the doll, and do a fairly light coat. If you see the doll’s skin become shiny with wet sealant, that’s probably too much but it may not be the end of the world. Don’t panic. Panicking is not conducive to a relaxing evening of body blushing.

What brushes do you use to blush?

IMG_4672
My brushes! And a pen (for sizing, although it is a nice pen).

I use three brushes to blush. (1) The first is a big fluffy eyeshadow brush i bought at Fred Meyer for $3.00 or something. (2) The second in a small cream eyeliner brush that I got for free with a horribly expensive cream eyeliner I bought forever ago. I love it for blushing because it has short but firm bristles, so I can really smudge the chalk dust around. (3) The third is a super small 10/0 shader brush by miniMAJESTIC ™.

The fourth is a pen. No, I’m kidding. Don’t use a pen.

Picking the Right Colors

Choosing what colors to shade with probably comes naturally to most of you who are artsy enough to customize dolls. But there are a few rules of thumb.

  1. Do not shade with grey or black unless your doll has grey skin. There may be a few other exceptions to that rule, but otherwise you’ll just make your doll look like a sickly zombie, and that’s not great (unless you want a sickly zombie, of course).
  2. Choose a tone, warm or cool, for your shading. This will help you determine the darkest color for the shading. For example, my model in this tutorial has bright pink skin, and the customer who commissioned her wanted cooler tones. So my darkest color for shading was purple (a cool color), whereas it would have been red if the customer wanted a warm tone.
  3. Don’t shade with only one color group (i.e. green, including all shades of green). For example, my model in this tutorial was shaded with two shades of pink just deeper than her skin tone, as well as purple, which gives the shadows extra dimension.
  4. I would encourage you to shade with a bit of pink, even if the doll’s skin color is blue or grey or whatever. It’s up to you. I just think that adding a bit of pink makes the doll look a bit more alive.

Here are the three colors I picked to shade my doll (remember, she is bright pink, so that’s why my shading colors aren’t normal skin tones):

IMG_4674.JPG
The three colors I used to shade Goo. BTW, this is a Faber Castell palette of 48 soft pencils. Each pastel is about 1.5 inches long.

Ready, Set, Blush!

Once you’ve picked your colors, use an Exacto knife or coin or butter knife or nail or nail file or whatever to gently scrap the chalk pastels into a fine dust. Don’t scrape too much: you can scrap more later but once it’s scraped it gets really hard to store without smudging everywhere.

Some tips:

  • Start with your lightest shading color (it should be just a bit darker than the doll’s natural skin tone), and layer the darker colors over it as needed.
  • Keep in mind the doll’s anatomy when choose where to place shadows. If you stand the doll up in natural light, the areas where the shadows naturally fall, or would natural fall if the doll had actual bones and muscles, is where you should blush. The skin under the breasts, around the collar bones, around the belly button/abdominals, around joints, in between fingers…all those places should probably get blushed.
  • Blush the doll’s torso first, spray to seal, then blush the legs. If you do it all at once you’ll be smearing your earlier work around by the time you get to the later stages of the process. No good.

I start by blushing the big areas first, using my big-ish eyeshadow brush. On my model (meet commission Gooliope #2! We’ll call her Goo for short), I started by shading the area between and underneath her breasts, followed by her hip bones. I followed up with the darker shading colors under her breasts, but left the hipbones less shaded.


Then I take my small eyeliner brush (not the tiny one) and blush the smaller areas, including her belly button, collar bone, and in-between her fingers. Of course, Goo is a 17″ doll, so if you’re working with a smaller doll these areas may require the tiny brush (especially the fingers).

Goo is a sort of radioactive goo doll, so her skin is sort of…dripping.  I have a lot of questions about if the radioactive goo hinders her fashion choices, but that’s for another day. My customer asked that I blush her so the drips are more enhanced, so I took out my smallest brush and used the darkest pink and purple colors to shade each and every drip.

Some more pictures, finally!

IMG_4660

Highlighting

If we were working with almost any other medium, shading a drawing or painting doesn’t stop after adding the darker tones in. You would then add highlights to areas that will naturally pick up the light more. On a person, these are the tops of the shoulders, tops of the collar bones, tops of the breasts, etc. You get it.

Unfortunately, unless you have and are very good with an airbrush, options for highlighting a doll are limited. (If you’ve figured out a way to do this, PLEASE comment below!).

White chalk pastel, in my experience, doesn’t show up at all on the doll after applying it and then sealing it in place with MSC. Instead, I use Pearl EX powder to highlight.

IMG_2762
PearlEx powder was made by the craft gods for those who love making everything shimmer.

PearlEX powder was featured in one of my Transition Stories posts, but if you didn’t read that, PearlEx is a very very fine shimmery dust that is normally used mixed with acrylic paint to give the paint a metallic sheen. When applied as a dry powder, it looks nicely shimmery. Even better, it comes in a lot of different colors (I have purple-gold, pink-gold, and pearl).

If you want a really shimmery doll, you have to apply the powder in several layers, because spraying it with a sealant dampens the shimmer a bit.

IMG_4665
PearlEx powder was used on each drip and the pre-drip part of her leg. You can see one highlighted area that is randomly catching the light here. The other drip’s highlights don’t show up in the shadow.

On Goo, I put a touch of the pearl-colored powder on the tops of each drip. The effect is subtle enough that my camera can’t get a good picture of it, but when the light catches her drips they show up more!

PearlEx does NOT make a ‘glittery’ effect: the particles are too small for that. That said, it is shimmery, so if you don’t want your doll to have a slightly shimmery torso in some places, it may be better to skip the highlighting all together.

Here’s a few more pictures of the Disney Ariel I blushed alongside Goo. Her shading was super subtle (I think over-shaded dolls look scary), so I didn’t use her for my model. You can barely see the difference, but in person, she looks much better!

IMG_4675.JPG
The three colors I used to blush Ariel.


You haven’t seen the last of Ariel…she’ll be featured in my upcoming blog about tattooing dolls (the faint marks you see on her chest, arms, and hands are the beginnings of a heavy ink job).

And…..an upcoming giveaway!

IMG_4676.JPG
Here’s the first giveaway doll!

I promised that as soon as I reached 100 likes on Facebook I would do a giveaway! I reached 100 likes a couple weeks ago, just before leaving for a holiday trip. Now that I’m back at my work space, I’m working hard on getting two dolls (one made-under Bratz, one Monster High) ready for a giveaway. If you haven’t liked my Facebook page, do so now for updates on the giveaway as soon as it’s posted!

Making Ball Gowns for Bratz

So my newest sewing obsession is making tiny super-fancy dresses for my more detailed Bratz repaints. They can be quite a bit of work, but it’s worth it! If you like tiny super-fancy dresses, that is.

This is not a sewing tutorial, so if you’re not familiar with basic clothing construction or sewing principles, you might want to brush up before attempting this!

A few notes before we begin:

  • I don’t use a pattern. Or a ruler. I don’t do math. So if you don’t do any of those things either, you’re in good hands. *Later in the process I realized that I do use a pattern, but for the bodice only. And it’s a very loose pattern.
  • Choice of fabric will either make your life for the next hour or so very easy or very difficult.
    • For the skirt you’ll want something that’s very flowing and drape-y.
    • For the bodice you’ll at least want your lining to be a bit stiffer (like a cotton quilting fabric).
    • If you want an overlay over the skirt you can use anything from tulle to lace to … anything lightweight and fancy.
  • This doesn’t have to be perfect. It’s a doll. Not a night on the red carpet.

You’ll need:

  • Sewing stuff. Thread, fabric (see note above), pins, a sewing machine…
  • Fray check (seriously, you 100% need this)
  • A doll
  • The shoes the doll will be wearing (or an idea of how tall they are).
  • Some patience.
  • Some more patience.
  • And just in case … a seam ripper.

READY, SET, GO!

The Skirt

IMG_4150
Here is the skirt and the skirt overlay cut out. They’re both a bit over 12 inches in diameter. The hole in the center is for the waist.

Lay your fabric out on a flat surface and cut out a skirt. I eyeball this, but I base my measurement off of the doll’s legs, with her shoes attached. Because this skirt will be a circle skirt, I just put the doll’s waist in the ‘center’ of the circle, mark it, mark where her feet end plus a centimeter (seam allowance), then draw a sort-of symmetrical circle.

If you want the dress to have a slight train effect (be longer in the back than the front) add three or so inches to one side of the circle. It makes an egg-like shape.

To make the waist opening, fold the circle or egg-like shape in quarters, and cut a small hole in the top where the folds intersect.

Err on the small side here! You can always cut more away later if you need to make the opening larger, but it’s hard to make it smaller if you cut the opening too big early on.

IMG_4151
Cut a straight line from the edge of the skirt to the center of the waist opening. This will be the back of the skirt. I apologize for my messy carpet. It was a long day of crafting.

Then cut up the back of the skirt from the edge of the fabric to the waist opening. Yay. A skirt.

Overlay

If you want an overlay on top of your skirt, lay the overlay fabric out, put the cut-out skirt over it, and trace the pattern. Repeat all the cuts that you did with the skirt.

I find it easiest to cut the overlay and the skirt fabric out separately, because I tend to use fabrics that are slippery and I don’t like pinning them more than necessary. It is possible, of course, to cut them out at the same time, if you prefer.

Bodice

IMG_4152
This photo really made me realize how my Halloween tablecloth probably needed to go. It went.

Crap, I totally lied about the pattern. I use a pattern for all my bodices, but this one is one I created myself by taking apart a Bratz top and copying the shirt pieces onto a piece of paper, leaving room for a 1/4″ seam allowance (you might give yourself more allowance than that, 1/4″ is not enough, as it turns out).

Cut out your bodice according to whatever bodice pattern you have on hand, or whatever pattern you make yourself. There are plenty of patterns on Etsy for little Blythe dresses that fit Bratz and have simple bodices.

My bodice is going to be strapless.

IMG_4153
The bottom row of pieces are the outside or right side. I don’t use slippery satiny fabric for all three sections because I find it increases the likelihood that seams will split apart and it decreases the overall stability of the bodice. And I hate working with silky satiny fabrics, so the less of it I have to do, the better. The top row of fabric is just a cheap lining (cotton broadcloth).

Cut out one set of whatever fabric you cut your skirt from, and one from a lining fabric that’s cotton or anything easy to work with and sturdy. Mine is a cotton broadcloth.

Fray check


This is probably the most important step. If you used a fabric that frays easily (satins, organza, whatever) I would fray check EVERY raw edge of the fray-y fabric at this point. You will thank me later.

When fray-checking, make sure to go with the weave of the fabric. You can tell if you’re going with the weave because if you’re going against it, you’ll actually start pulling the fabric apart. Because the skirt is a circle, the weave will change ever few inches, just to keep you on your toes.


IMG_4156
Fray-check is pretty good about drying clear and not darkening the fabric too much, but some fabrics are more susceptible than others. The right side shows dry fray-check, the left is wet.

Sew the skirt

IMG_4159
I’ve pressed the sides in for the slit in the back and the hem-edge of the skirt.

This part is a pain. First you want to ‘hem’ the slit you cut up the back of the skirt. I just press each edge to the side with my iron from Target that cost $10 (and is the worst iron you can imagine).

Then move on to the the circular edge. I have no tricks for this, except to say that it is hard and you might want to reserve time to drink a glass of wine or meditate after you’ve finished this.

IMG_4160
Sewing the hem. If you’ve fray-checked the edge, you won’t have to turn this edge over again and stitch a second time. You can if you like, but this is clothing for a doll and so I refuse.

I press the hem in about 1/4″ with my worst-iron-ever, then sew it and the slit up the back of the dress very carefully. Pintrest probably has better tips for you on this subject than I do.

Once you’re done with all that, drink wine/meditate/cheer, and then press the skirt. I always stretch the fabric a bit too much when hemming circle skirts so pressing it helps remind the skirt it’s supposed to be a circle, not a wavy mess.

IMG_4162
Basting the waist opening of the overlay (shiny silvery lacey stuff) with the skirt fabric.

Next, line up the waist opening of the skirt with the waist opening of the overlay and baste them together. This can sometimes stretch the waist opening too much, so basting by hand here is probably the better option. I won’t be basting this with a sewing machine anymore.

Sew the bodice

Sew all the bodice pieces together, trim the edges, turn right-side out, and press. Bam. Done.

Connect the dots (sew the bodice to the skirt)

This is another tricky part, mostly because I don’t have a pattern and so it’s always trial-and-error to get the size of the waist opening match the lower edge of the bodice.

I just start pinning the bodice to the skirt and adjust, cut, or gather as necessary to make it work. This is the part that is normally not perfect.

If your waist opening is too small: good! Easy fix. Just cut the waist opening a bit lower on the skirt until it fits. Or, you can just pin the bodice a little lower on the skirt. Because it’s a circle skirt, the waist opening will get larger if you cut away more fabric.

If your waist opening is too big: less good! But not horrible. You’ll just need to sew some basting stitches to the top of the waist opening and gather the opening until it’s small enough to fit the bodice.

Then sew all that together. When you trim all the seams and all that, you should have the bodice connected to the overlay and the skirt.

IMG_4164
After sewing the bodice to the skirt. I fray-check this seam too, because why not?


I usually sew a couple reinforced stitches just in case this dress is going to get into the hands of a five-year-old. Also make sure to look at the seam you just sewed from the front of the dress to check that you caught all the edges of fabric in the seam. Otherwise you’ll end up with a big hole in the front of the dress (definitely speaking from experience).

Sew up the back of the skirt


I always screw this up. You need one side of the bodice and skirt to overlay over the other for your snaps or velcro or whatever you use. I normally play around with the skirt (get the overlay out of the way for a sec) opening by folding the edges right sides together until I figure it out.

I think this is actually a lot simpler in real life than it is in my mind. So that’s good for you, I suppose.

I ended up messing mine up, but it’s hardly noticeable so whatever. Like I said, it doesn’t have to be perfect.

IMG_4169
Stitch up the back of the skirt overlay, too! I don’t like to stitch the skirt and the overlay together at the back, but you’re welcome to.

Stitch up the back of the overlay, too!

Add a fastener

IMG_4170
Add your choice of fastener to the back. I add a strip of velcro to the bodice only. The skirt doesn’t require it.

I use adhesive velcro, and iron it in there to make sure the adhesive is really super stuck. You can use whatever you want.


Decorate

Well, the hard part is done. I have a huge box of beads and ribbon and buttons and glitter that gets pulled out at this point. I ended up sewing a strip of ribbon onto the bodice before sewing it onto the skirt, and then I sewed another strip of ribbon to the bottom of the overlay fabric on the skirt.


Sky’s the limit.

Here’s the end result! To adopt this little doll and her silver dress, head over to I Am Loved Doll’s Etsy!

IMG_4186 - Copy


Dyeing Blonde Doll Hair (How To?)

So in typical Saturday-night fashion, I’m sitting at home watching movies and dyeing doll hair. And questioning my life choices, but that’s a whole other blog post.

This is just a quick blurb on today’s experiment: dyeing blonde hair with acrylic paint.

It’s totally not my idea, this is all over the internet. But I stumbled across it and decided to give it a shot today because I have FAR too many dolls with blonde hair (like, five, but that’s about four too many).

I first straightened and tamed my doll’s hair. I have a tutorial on this, HERE.

After I did that, I had this:

IMG_3766

She’s a Bratz, if you couldn’t tell, and that’s probably all you need to know.

Rumor has it the finer saran hair that Bratz are rooted with doesn’t take as well to acrylic paint dye as thicker hair, like Barbie or Moxie hair, but I figured I’d see how it worked.

I used craft acrylic paint, which is not the best for this sort of thing. Actually, it’s almost the worst for this sort of thing, but here we go…

IMG_3767

I mixed about a nickel’s worth of acrylic paint with about three ounces of water. That’s about a half ounce of paint with three ounces of water?

Then I took a paintbrush and painted the paint/water mixture onto the hair.

I didn’t paint all of the hair because I was going for an ombre effect, which totally didn’t work out in the end and I still can’t figure out why.

Then I let the hair dry. To prevent the paint from drying crusty and just flaking off, I brushed through the hair about once an hour. The brushing ended up transferring the paint from the ends of the hair to the roots, so by the end of the process her hair was almost totally pink.

After several hours of drying and brushing, drying and brushing, I was left with this:

The hair BEFORE the paint mixture had been washed out.

That photo shows the hair before the paint mixture was washed out.

THINGS I LEARNED NOT TO DO: Do not blow dry the hair at any point. Right at the end I blow-dried it and the paint just got really flaky and was a mess to wash out.

After I washed and conditioned the hair, it looked like this:

After washing the paint mixture out.

A lot of the pigment washed out, as you can probably see. That was expected, though, so I wasn’t too disappointed.

Because I was really hoping for an ombre effect, I did the whole process over again on the bottom two inches of hair, hoping it would soak up more pigment.

After repeating the process, I got this result:

After dying a second time.

Not much improvement.

As in, zero improvement. My best guess is that the porous saran plastic is done absorbing pigment at this point. I’m sure using proper acrylic paint (as in, not craft paint that cost .99 cents) would help.

THINGS I CHANGED FOR THE SECOND DYE: I added some white vinegar to the paint mixture the second time around and only applied it to the bottom two inches of the doll’s hair. Vinegar can often act as a binder between dyes and the surface they are being applied to: I always used a bit of vinegar when I was dying fabric, and you’ve probably added vinegar to egg-dyeing kits around Easter. Not sure how successful it was here. It may have been more effective if I had used it the first time around instead of only the second.

Even so, I got a nice pastel pink, so this girl will be transformed into some character than can pull off pale-pink hair. Halloween will definitely be an inspiration.

Blog_FB-008

SOME TIME-SAVING TIPS:

  • You may not have to wait for the paint mixture to dry fully. I didn’t experiment with this, but I have a feeling drying fully is unnecessary because…
  • The time the pigment is on the hair does not seem to make the color more intense. As you know, I was attempting an ombre effect. Although all the hair ended up with paint mixture on it, the top of the hair was coated in paint a couple hours after the bottom of the hair was, which means the ‘dye’ was on the roots of the hair for less time. However, the dye job on the roots of the hair is just as intense as the dye job on the bottom of the hair. No idea why. Plastic is weird, man.

On a random note, here’s the witchy girl I did today (she doesn’t have her outfit yet, but I figured a face is a decent start):

IMG_3786

I Am Loved Dolls on Etsy

I Am Loved Dolls on Facebook (when I get to 100 ‘likes’ I’ll do a doll giveaway!)

Tutorial: Anime and Manga Doll Repaint

Lately I’ve been (frantically doing homework, working part-time, attending classes, teaching high school civics, trying to keep my house clean) repainting a lot of Moxie dolls.

Basically, I first started doing makeunder dolls on Moxies, because that’s what I happened to buy off Ebay this one time five months ago.

But then I ended up with, like, twelve of them and I started getting bored. Maybe I’m totally ADD when it comes to dolls (is that not PC to say?), but I can’t paint the same face after same face. Especially because Moxie dolls have very, very, very flat faces.

It occurred to me that the Moxie’s flat-ness works very well for some things: very large eyes. And what art style involves girls with very large eyes?

Anime and manga.

I felt like a genius. Still feel like one, actually. But that’s a personal problem.

Okay you’re here for a tutorial. Not the ramblings of an exhausted student with too much creative energy.

So here you are:

PHASE 1: THE EYES

Every time I write a doll tutorial I end up saying something like “the eyes are the window to the soul.” So there it is again. It’s especially true with anime and manga eyes, because they are literally half the face (if not more-than-half). If you have the eyes down, you’re in good shape.

Phase 1, Step 1: Design the eyes

Some general characteristics of anime and manga eyes:

  • They are large. Like, really large. Weirdly large.
  • They are rounder than natural eyes.
  • There is generally not an outline surrounding the whole eye. The lashes frame the eye on the top and bottom, but not necessarily the sides of the eyes.
  • The lashes are much thicker on top than on bottom.
  • The pupils are larger than natural. Think somewhere between ‘really dark room’ and ‘really high.’
  • They are much more reflective than natural eyes. Very large shiny white spots, basically.
  • They are not as detailed as a realistic human eye.
  • They are framed by fairly thin eyebrows.

So now you know all that, grab a piece of paper. Or, if you’re familiar with anime/manga styles, go ahead and grab the doll you’ll be working on.

If you want to start work on your doll instead of planning out the eyes on paper, make sure the doll is properly prepared to be repainted. For information on how to prep a doll for repainting, see my post on Materials and Doll Prep. I’m going to proceed assuming that you’re practicing on paper first, but if you’re drawing directly on the doll, the same principals apply.

You can start designing your eye in any way you want. Sky’s the limit. If you haven’t seen a lot of anime or manga art, do a google search for ‘anime eyes’ or ‘manga eyes’, or click here for the google search I used: “Anime eyes” image search.

I start by drawing the outline of the eye, then the top and  bottom lashes. Thicker on top, thinner on the bottom lid.

Blog_FB-005

Then I sketch out the iris. Large, more oval than a real iris.

IMG_3695

Add in the pupil. There are different styles you can use for this part. Some anime or manga eyes are shaded to be very heavy on the black. There are black outlines everywhere, very much like a traditional comic book. See the picture below.

I know. She looks green. Oops.
I know. She looks green. I promise that she’s not in real life.

Alternatively, you could use a more gradient approach to fill in the iris and pupil, and leave out the black outlines.

Here's an example of eyes without the black outlines around the pupil and iris.
Here’s an example of eyes without the black outlines around the pupil and iris. Want to adopt this little lady? She’s on Etsy, here!

IMG_3696

Now that you have the idea of your pupil and iris laid out, add in the reflections. If you’re working with pencil or pen on paper, you’ll probably need to use a white gel pen to do this (or white paint).

Remember, anime and manga eyes are more reflective than realistic eyes. However, if you add too many reflective spots or too large of reflective spots, the doll will appear to have very watery eyes.

Play around with it!

IMG_3698

c
Another style

IMG_3700
Anooooother style. This one has softer, fluffier lashes.

PHASE 2: PAINT THE DOLL

Most of the materials used for this tutorial.

Phase 2, Step 1: Prep

Now that you know what you want the eyes to look like, you’re ready to begin repainting. If you want more information on what materials I recommend, and how to properly prepare a doll to be repainted, see THIS tutorial: Materials and Doll Prep.

What kind of doll to use? This is a tutorial using a Moxie doll as a model. Like I said earlier, Moxie’s flat faces make them ideal for this style. However, with some creative adjustments I know you can modify the eyes to work with almost any doll mold.

IMG_3708
The Moxie doll, wiped clean with acetone.

Phase 2, Step 2: Outline the eyes

First, did you prep your doll? Seal her face once? It’s important! You cannot pass GO until you’ve done that!

Now’s the fun part! Draw in the outline of your eyes. Don’t worry about the eyelashes: you’ll add those in next.

Outline the eyes. I used a light brown pencil to mark the placement, before I went over it with black.

Okay, now you can add the eyelashes.

Add in the eyelashes.

Phase 2, Step 3: Make the eyes less soul-less and creepy.

Draw in the iris, then the pupil. If you want a more cartoon-y look (I mean, all anime/manga eyes are cartoon-y), use black to outline the iris. If you want the more gradient look (discussed above in Phase 1), you’ll want to use a dark color of whatever your eye color will be. With this model, I’m using more black outlines than a gradient look.

Add in the iris, then the pupil.

Note: You can kind of see in the picture, but I use a light brown or light pink pencil to mark in where my irises/pupils/anything is going to be, then I layer black over that. I don’t commit to black pencil too soon.

Well…she’s kinda creepy. I promise, we’ll fix that. Now you can fill in the irises. Fill in the entire iris with the lightest shade of color you want to use for your eyes. You will layer on darker colors next.

Go ahead and use a white pencil to fill in the whites of the eyes, too.

The irises have been filled in, as well as the whites of the eyes.

Lip interlude! Take a quick break from the eyes to draw the outline of the lips and then fill them in. I honestly just did this as a color-check. I wanted to make sure the doll would look okay with bright red lips. You could easily do the lips after the eyes, but I like to get a lip color down in case I need to change the eye color to match.

Filling in the lips doesn’t have to be perfect: we’ll go over it with paint anyway.

The left image is the the outline of the lips, on the right is the outline loosely filled in.

Back to the eyes.

Now you can shade the iris. I used four colors to do this. The lightest pink was the base color, used to fill in the irises in the previous step. Next I used the red pencil to shade in the tops of the iris, going down to just below the pupil. Then I used the darkest red to shade the tops of the iris again, but I didn’t extend the dark red as far down. Last I used a black pencil to make sure the area just underneath the eyelid was very shaded, almost black.

The image on the right shows the irises shaded with pink, red, and dark red pencils. The image on the right shows the iris shaded with the pinks/reds, as well as black.

See? She’s less creepy, now.

Phase 2, Step 3: Seal

Now you’re ready to seal her. Make sure you like what you have, though, because after she’s sealed you can’t fix mistakes made on this layer!

Phase 2, Step 4: Do random things to the eyes

Add in the eyelids! Eyelids look good with this particular eye design, but keep in mind that if the upper lashes are thick enough, anime and manga eyes may look just fine without an eyelid.

Either way, if you decide to draw in an eyelid, it should be fairly thin. No big sultry eyelids here; those are more commonly seen in American comics. I’ve drawn mine with light pink.

Also, now that you’ve sealed the doll once, you have a fresh surface to work on again. I always go over all the black lines, and the whites of the eyes, with their respective colors to intensify the pigment. This will also fill in any areas that weren’t evenly drawn the first time.

Going back over the lines you made on the first layer will make the colors more bold.

Phase 2, Step 5: Eyebrows!

Add in the eyebrows. Anything goes here, depending on the expression you’re going for. Anime and manga eyebrows are typically very thin and simple, although you can do variations on that, of course.

Eyebrows!
Eyebrows!

Phase 2, Step 6: Blush

I’m sorry for the bad photo here: it makes it a bit hard to see what I did with the blush. For this doll, I used a combination of hot pink and red chalk pastel dust to apply blush to her cheeks just below her eyes. I used a lighter pink dust to blush her forehead and chin.

Blush the cheeks, chin, and forehead.

I love this step because the blush brings out so much character!

Phase 2, Step 7: Seal

Spray seal the doll for the final time. Make sure you like what you have, though, because after it’s sealed you can’t easily fix it. Also try and blow as much dust off the face as you can, and do a check for any stray chalk dust that may be lingering in a bad place (under the chin is where my chalk dust goes to evade detection, apparently).

Phase 2, Step 8: Paint the lips and eye reflections

I use a paint retardant to thin my acrylic paints out. It’s basically just expensive water, so if you don’t happen to have acrylic paint retardant, use water with confidence. It’s the same.

Red paint is for lips, white is for eye reflections.

Here's my super tiny brush. It's a 20/0 spotter, but it's in bad shape because I never wash it properly. Do as I say, not as I do.
Here’s my super tiny brush. It’s a 20/0 spotter, but it’s in bad shape because I never wash it properly. Do as I say, not as I do.

I do this lips first. Just thin out the red paint to the consistency of half in half or whole milk, and use a very very tiny brush (this one is an old 20/0 brush I had lying around) to go over the lines you already drew in on your lips.

Do a couple coats, until you’re happy with the color build-up.

Paint over the lip outline you drew in earlier.

Now do the reflections. I added a heart and what turned out to be a semi-colon to each eye. Anime and manga eyes can handle A LOT of reflection, so if you want more reflection than I used, go for it.

Too much reflection and the eyes will look watery, though (which can be great if you’re going for a teary look).

Add in the eye reflections.

Phase 2, Step 9: Varnish the eyes and lips

Use a small brush to apply several layers of glossy varnish to the eyes and lips. Wait for each layer to dry before applying the next. I used the same old brush I used to paint the lips, because I find that the varnish can ruin good brushes if they aren’t washed out properly. And apparently I don’t wash my brushes properly, because my ‘varnish brush’ is just a disaster by now.

You can see that I added a little heart on her cheek. I did that before I varnished, so I could seal it properly with MSC.

IMG_3742

Congrats! She’s all done. And I’m sure she looks great. 🙂

My models in this tutorial are for sale in my Etsy shop. You can find the dark-haired anime girl for sale HERE. You can find the light-haired girl HERE.

UPDATE 1/25/2016: I just added the little pink-eyed girl to my Etsy shop! You can adopt her HERE.

If you liked this tutorial, leave a comment below! And if you use it to repaint your own doll, I would LOVE to see your results! You can post your picture in the comments, or if you’re shy, you can send I Am Loved Dolls on Facebook a message.

And of course, if you have questions, ask away!